Bathroom Cleaning

Bathroom Cleaning

Hand painted image about Leslieville

Deep Cleaning Services in Leslieville, We Do It Right!

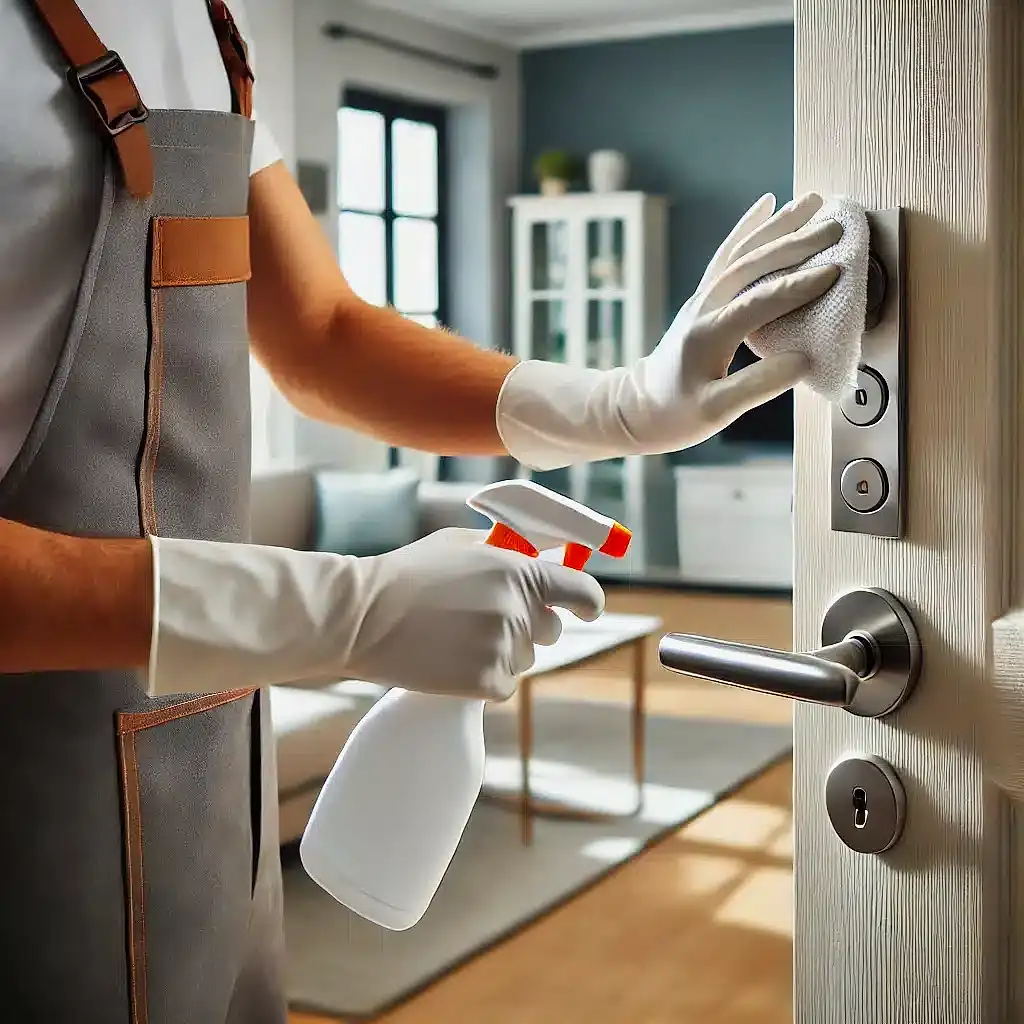
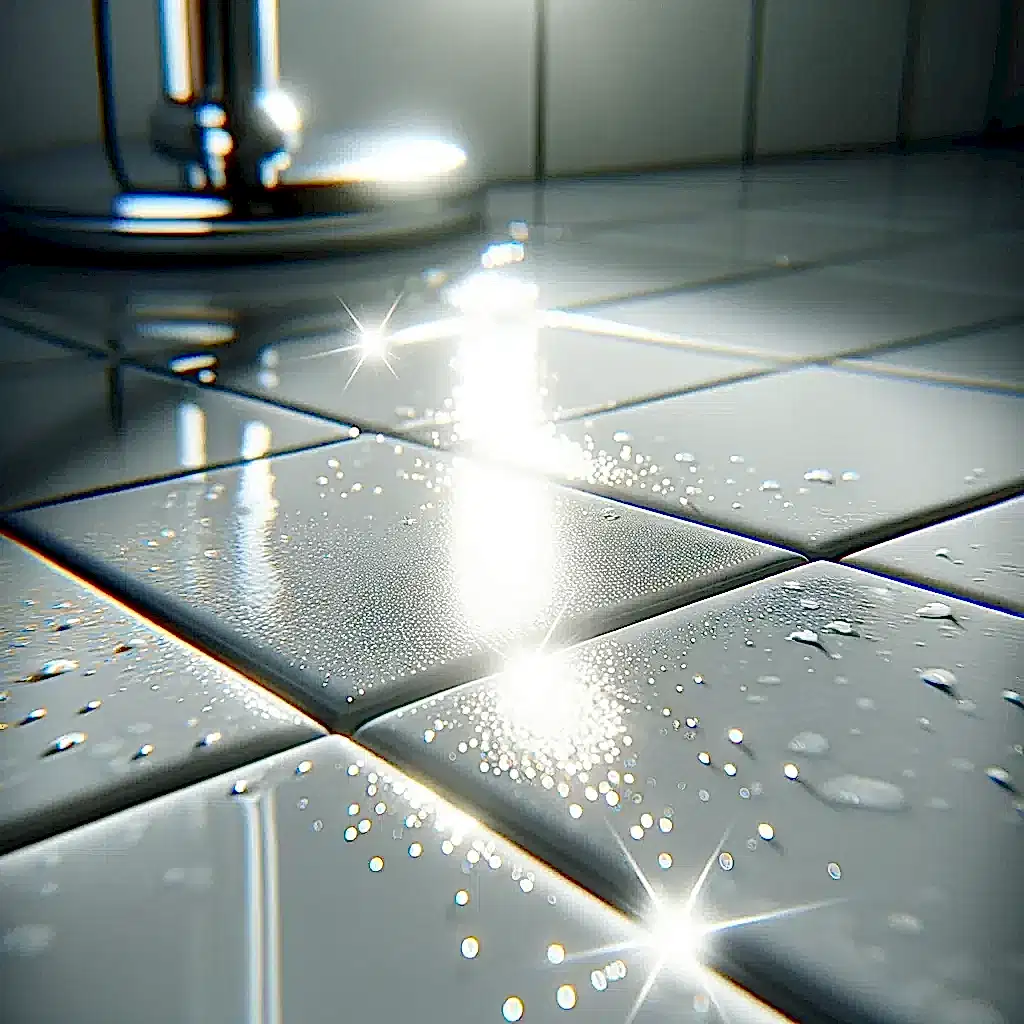
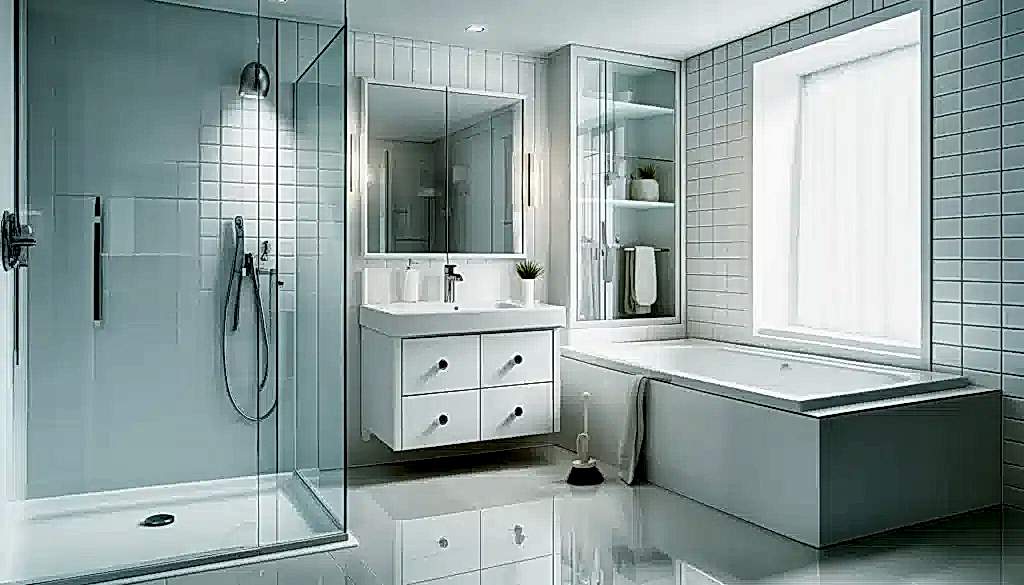
Leslieville is one of Toronto’s most vibrant and charming neighborhoods, known for its trendy cafes, historic homes, and lively community. But with busy city life, keeping your home spotless can feel overwhelming. That’s where our professional deep cleaning services in Leslieville come in! We specialize in giving your home the attention it deserves, tackling the dirt, dust, and grime that build up over time. Whether you need a one-time deep clean or regular maintenance, our team is here to help. Why Choose Our Deep Cleaning Services in Leslieville? Unlike standard cleaning, deep cleaning services in Leslieville goes beyond surface-level dusting and wiping. We focus on those hidden, hard-to-reach spots that accumulate grime over time. Our team is trained to tackle the toughest cleaning jobs, from scrubbing kitchen appliances to disinfecting bathrooms and polishing floors. Here’s why Leslieville residents trust us: Experienced Professionals – Our skilled cleaners know exactly how to handle even the most stubborn messes. Eco-Friendly Products – We use safe, non-toxic cleaning supplies that are effective and family-friendly. Customizable Services – Need extra attention on a specific area? We tailor our cleaning to meet your needs. Reliable & Punctual – We respect your time and ensure our team arrives on schedule, ready to clean. Satisfaction Guaranteed – Your happiness is our priority, and we won’t leave until the job is done right.     What’s Included in Our Deep Cleaning Service? Our deep cleaning service covers every inch of your home, focusing on areas that are often neglected in routine cleaning. Here’s what you can expect: Kitchen Deep Cleaning The kitchen is one of the busiest areas in any home, making it a hotspot for grease, stains, and bacteria. Our deep cleaning service includes: Scrubbing countertops and backsplashes to remove grease and food residue. Cleaning and disinfecting sinks and faucets to eliminate germs. Wiping down cabinets and drawers to remove dust and spills. Deep cleaning stovetops, ovens, and microwaves to break down stubborn grease. Washing refrigerator shelves and drawers to keep your food storage sanitary. Bathroom Sanitization Bathrooms require special attention to maintain hygiene and freshness. Our deep cleaning includes: Scrubbing and disinfecting toilets, tubs, and showers to remove soap scum and mildew. Cleaning sinks and mirrors for a streak-free shine. Wiping down tiles and grout to eliminate dirt buildup. Sanitizing high-touch surfaces like light switches and doorknobs. Living Room & Bedroom Cleaning Your living and sleeping areas should be cozy and clean. We focus on: Dusting and wiping down furniture to remove allergens. Vacuuming and mopping floors for a fresh and polished look. Cleaning under furniture to remove hidden dust and dirt. Washing windows and mirrors to enhance natural light. Vacuuming upholstery and mattresses for a fresher feel. Floor & Carpet Cleaning Floors can trap dust, dirt, and allergens. Our deep cleaning services in Leslieville include: Vacuuming carpets and rugs to remove embedded dirt and pet hair. Mopping hardwood, tile, and laminate floors for a spotless finish. Treating stains and high-traffic areas to keep your floors looking new. Dust & Cobweb Removal Over time, dust builds up in areas that are easy to overlook. Our team: Cleans baseboards, vents, and ceiling fans to reduce allergens. Removes cobwebs from ceilings and corners for a fresh look. Wipes down doors and window sills to remove dust buildup.     The Benefits of Professional Deep Cleaning Healthier Home Environment Deep cleaning removes allergens, bacteria, and dust mites, improving indoor air quality. This is especially beneficial for families with kids, seniors, or pets. Extends the Life of Your Home Regular deep cleaning preserves the condition of your floors, furniture, and appliances, saving you money on repairs and replacements in the long run. Stress-Free Living A clean home promotes relaxation and peace of mind. With our services, you can focus on what matters most while we handle the cleaning. Perfect for Special Occasions Hosting a party? Expecting guests? Adeep cleaning services in Leslieville ensures your home is in perfect condition for any event. Who Needs Deep Cleaning Services in Leslieville? Busy Professionals – No time to clean? We’ll handle it for you. Families with Kids & Pets – We remove pet hair, spills, and allergens to keep your home fresh. Homeowners Preparing to Sell – A spotless home makes a great impression on buyers. New Homeowners & Renters – Start fresh with a professionally cleaned space. Post-Renovation Cleanups – We get rid of dust and debris left behind by construction. How Often Should You Get a Deep Clean? For most homes, a deep clean every 3-6 months is ideal. However, if you have pets, allergies, or a busy household, you may benefit from more frequent deep cleaning services in Leslieville. We also offer regular maintenance cleaning to keep your home consistently fresh. Book Your Deep Cleaning in Leslieville Today! Don’t let dirt and dust pile up—let the cleaning experts in Leslieville handle the hard work for you! Whether you need a one-time refresh or ongoing deep cleaning, we’re here to help. Get a Free Quote Today! Contact us to schedule your deep cleaning appointment. We guarantee professional, reliable service that leaves your home sparkling clean.  

Deep Cleaning Services in Leslieville, We Do It Right! Read More »

High-traffic area on doorknob being cleaned

Hidden Germ Hotspots in Your Home & How to Clean Them

Keeping a clean home isn’t just about appearance—it’s also about maintaining a healthy environment. Many areas in your home are breeding grounds for bacteria and viruses. Regular cleaning and disinfecting of these hidden germ hotspots can prevent illness and keep your space truly clean. Here are the top places germ hotspots thrive and how to clean them effectively. 1. Kitchen Sponge & Sink The kitchen sponge is one of the dirtiest items in your home. It absorbs moisture, food particles, and bacteria, making it a perfect breeding ground for germ hotspots . The sink, especially around the drain, also harbors harmful bacteria like E. coli and salmonella. Without regular sanitization, these germ hotspots can transfer bacteria to your dishes, utensils, and food preparation surfaces, increasing the risk of contamination. To keep your kitchen hygienic, sponges should be replaced every one to two weeks to prevent excessive bacterial buildup. You can sanitize sponges daily by microwaving a damp sponge for one to two minutes, which effectively kills germs. Additionally, washing the sink with a disinfectant or hot, soapy water every day will help eliminate bacteria and maintain a germ-free environment in one of the most frequently used areas of the home. Neglecting to clean these areas properly can lead to the spread of harmful bacteria across kitchen surfaces. Using disposable or antibacterial sponges can further reduce contamination risks. Consider also using separate sponges for different cleaning tasks to prevent cross-contamination between surfaces like countertops, dishes, and cutting boards.     2. Doorknobs & Light Switches High-touch surfaces like doorknobs, light switches, and cabinet handles collect bacteria and germs from multiple hands throughout the day. These germ hotspots are often overlooked during regular cleaning routines, yet they play a major role in the spread of illnesses such as the flu and the common cold. With frequent contact, bacteria and viruses can survive on these surfaces for hours or even days. To keep these surfaces clean, it’s essential to disinfect them daily using antibacterial wipes or a disinfectant spray. Focus on areas that receive the most traffic, such as bathroom and kitchen switches, as well as frequently used doorknobs. A quick wipe may remove visible grime, but a deeper disinfecting routine ensures harmful germs are completely eliminated. In addition to disinfecting, using a microfiber cloth to first remove dust and dirt can improve the effectiveness of cleaning products. Encouraging household members to wash their hands frequently can also reduce the transfer of germs onto these high-contact surfaces. Regular maintenance can make a significant difference in maintaining a hygienic living space. 3. Remote Controls & Electronics TV remotes, game controllers, and smartphones are handled by multiple people, making them germ hotspots for bacteria and viruses. These electronic devices often harbor more germs than toilet seats due to frequent use and limited cleaning. Without regular disinfecting, germs from unwashed hands, food residue, and even sneezing can accumulate on their surfaces. To clean these devices effectively, use a disinfectant wipe to sanitize remotes and controllers daily. Pay close attention to crevices where dirt and bacteria can hide. For smartphones and tablets, use a microfiber cloth with a small amount of isopropyl alcohol to safely disinfect without damaging sensitive screens or components. Excessive moisture can damage electronics, so avoid using too much liquid when cleaning. If possible, consider using a protective case that can be easily wiped down. Establishing a habit of cleaning electronics frequently will help prevent the spread of germs and maintain a healthier home environment. 4. Toothbrush Holders & Bathroom Faucets Moist environments like the bathroom encourage bacterial growth. The toothbrush holder and faucet handles are among the most overlooked germ hotspots. Toothbrushes sit in holders that collect water residue and bacteria, while faucet handles accumulate germs from dirty hands before and after washing. To maintain hygiene, the toothbrush holder should be washed in hot, soapy water at least once a week to remove buildup. In addition, toothbrushes should be stored in an upright position to allow proper drying and to prevent bacterial growth. Replacing toothbrushes every few months is also essential for oral hygiene and reducing bacterial exposure. Bathroom faucets require regular disinfecting since they are touched before and after handwashing. Using a cleaning spray or antibacterial wipes to sanitize faucet handles daily can help minimize germ accumulation. Proper cleaning in the bathroom is crucial for preventing the spread of bacteria, especially in shared living spaces.     5. Pillows & Bedding Your bed can accumulate dust mites, sweat, and dead skin cells, which can trigger allergies and skin issues. Many people focus on washing sheets but forget that pillows and mattresses also harbor allergens and bacteria. Without regular cleaning, these hidden germ hotspots can impact respiratory health and sleep quality. To maintain cleanliness, pillowcases and sheets should be washed weekly in hot water to eliminate dust mites and bacteria. Using a mattress protector can help prevent dirt buildup, but vacuuming and airing out the mattress monthly is also recommended. Dust mites thrive in warm, humid environments, so keeping the bedroom well-ventilated can help reduce their presence. Pillows should be replaced every one to two years, as they can become a breeding ground for bacteria over time. If possible, washing pillows in hot water every few months can help maintain a fresh and hygienic sleeping environment. A clean bed contributes to better overall health and well-being. 6. Refrigerator Handles & Drawer Pulls The fridge handle is touched multiple times daily, often before or after handling raw food. Drawer pulls in the kitchen and bathroom also accumulate bacteria over time. These germ hotspots are frequently used but often neglected when it comes to cleaning, allowing germs to spread easily. To prevent contamination, refrigerator handles should be wiped down daily with a disinfectant spray or wipe. Kitchen drawers and cabinets also require regular attention, as food particles and grease can create an environment for bacteria to thrive. Cleaning the inside of drawers at least once a month can help prevent mold and bacteria buildup.

Hidden Germ Hotspots in Your Home & How to Clean Them Read More »

Blank paper and pen with apple at side

February Cleaning Checklist: Keep Your Home Fresh

As February rolls in, keeping your home clean and fresh is essential to combat winter dust and germs. A well-planned cleaning checklist will ensure your home stays cozy, healthy, and organized. Follow these steps to refresh your space and prepare for the upcoming spring season. 1. Deep Clean High-Traffic Areas Winter months bring in dirt and moisture from outside, making entryways, hallways, and living rooms prone to buildup. Vacuum carpets thoroughly to remove trapped dirt and allergens. Using a high-quality vacuum with a HEPA filter can help improve air quality while ensuring dust and pet dander are minimized. For hardwood or tile floors, mopping with a gentle but effective cleaner will remove grime without damaging surfaces. Baseboards and corners often collect dust and debris, making them important areas to clean regularly. Wipe down baseboards with a damp microfiber cloth to remove accumulated dirt. If scuff marks are visible, a magic eraser can work wonders in restoring the look of your baseboards. Don’t forget to clean under furniture, where dust can accumulate unnoticed. Entryways tend to get especially messy in winter, with salt, snow, and mud being tracked in from outside. Consider placing a heavy-duty doormat by the front door and asking family members to remove their shoes upon entering. A shoe rack or storage bench near the entry can help keep things organized and prevent unnecessary messes from spreading throughout the home. 2. Dust and Disinfect Frequently Used Surfaces Germs thrive during the colder months, making it crucial to disinfect countertops, doorknobs, and light switches regularly. Using a disinfectant spray or wipes ensures bacteria and viruses are eliminated, reducing the risk of illness spreading throughout the household. Pay special attention to kitchen surfaces where food is prepared, as these areas can harbor germs and contaminants. Dusting should be a part of your weekly cleaning checklist to prevent allergens from accumulating. Use a microfiber cloth or an electrostatic duster to trap dust rather than simply spreading it around. Ceiling fans, air vents, and window blinds often collect dust that can trigger allergies if left unattended. Regularly wiping down these surfaces will contribute to a healthier indoor environment. Electronics are another common source of dust and germs. Wipe down remote controls, computer keyboards, and smartphones with a disinfectant wipe. These high-touch items can accumulate bacteria quickly, so making this a habit will help maintain a cleaner and healthier home.     3. Refresh Upholstery and Bedding Soft surfaces like couches, curtains, and mattresses trap dust and odors. Over time, these fabrics can develop musty smells, especially during winter when windows remain closed. To combat this, vacuum upholstered furniture thoroughly using an upholstery attachment. Be sure to get into crevices and under cushions, where dirt and crumbs often collect. Bedding should be washed regularly to maintain freshness and hygiene. Pillowcases, sheets, and comforters should be laundered at least once a week using warm water to kill bacteria and dust mites. If possible, hang bedding outside on a dry, sunny day to naturally freshen and eliminate odors. Rotating and flipping your mattress every few months also helps maintain even wear and prolongs its lifespan. For an added freshness boost, consider using fabric sprays or placing baking soda on upholstery before vacuuming. This can help neutralize odors and leave your home smelling clean and inviting. If you have pets, using a pet-specific upholstery cleaner will help remove fur and dander while keeping fabrics in great condition. 4. Clean and Organize Kitchen Spaces Kitchens require regular maintenance to avoid grease and bacteria buildup. Begin by wiping down cabinets and countertops with a grease-cutting cleaner to remove any residue from cooking. Pay special attention to areas around the stove, where grease splatters are most common. A mixture of warm water and mild dish soap works well for general cleaning checklist without leaving harsh chemical residues. Your oven is another area that needs to be in the deep cleaning checklist. Use a baking soda paste or a commercial oven cleaner to remove baked-on grime and spills. Let the cleaner sit for a few hours before wiping it away with a damp cloth. Don’t forget to clean the stovetop, including burner grates and knobs, to keep your kitchen looking spotless. Pantry organization is key to maintaining an efficient kitchen. Go through your pantry and discard expired items. Group similar items together and use storage bins or labeled jars to keep everything neat. This will not only make meal prep easier but also prevent food waste by ensuring you use ingredients before they go bad.     5. Tackle Bathroom Grime and Mold The humidity from hot showers can lead to mold growth in bathrooms. To prevent this, always use an exhaust fan or open a window to improve ventilation. Mold and mildew thrive in damp environments, so keeping air circulation strong will help prevent buildup. Scrubbing tile grout is an essential part of any cleaning checklist. Use a grout brush and a baking soda paste to lift dirt and discoloration. For tougher stains, a hydrogen peroxide solution can work wonders in restoring grout to its original brightness. Regularly cleaning grout helps maintain a fresh and hygienic bathroom space. Mirrors and fixtures should also be cleaned frequently to prevent water spots and soap scum buildup. A streak-free glass cleaner works best for mirrors, while a vinegar-free cleaning solution is ideal for faucets and showerheads. Replacing old sponges, shower liners, and towels ensures a fresh and inviting bathroom environment. 6. Declutter and Prepare for Spring Take advantage of the last winter month to declutter closets, donate unused items, and prepare for a seasonal refresh. Start by sorting items into categories: keep, donate, and discard. This method makes decluttering more manageable and ensures that only essential items remain. Closets can easily become overstuffed during winter. Rotate seasonal clothing by storing bulky winter coats and sweaters in vacuum-sealed bags to free up space. Organizing clothes by type and color can also make it easier to find outfits and maintain order in your

February Cleaning Checklist: Keep Your Home Fresh Read More »

Cold Weather Cleaning

Cold Weather Cleaning: Easy Organize Your Space in 7 Days

When the cold weather arrives, it’s the perfect time to declutter and refresh your home. A well-organized space can create a warm and cozy environment during winter. Follow this simple 7-day cold weather cleaning plan to tackle your home and enjoy a cleaner, more comfortable space. Day 1: Declutter Your Entryway Start by organizing your entryway, as it’s the first place people see when they enter your home. Put away shoes, coats, and accessories. Use storage bins and hooks to keep everything tidy. Wipe down surfaces and sweep the floor to remove dirt and debris brought in from the cold. Cold weather cleaning starts at the front door, ensuring a tidy and inviting entrance. Next, evaluate what you really need in your entryway. If there are old or unused shoes, donate or store them elsewhere. Consider adding a small bench or shoe rack to make storage more accessible. Keeping this area organized will help you transition smoothly when coming and going. Finally, check the lighting in your entryway. Winter days can be darker, so ensure you have adequate lighting to create a welcoming atmosphere. A well-lit and clutter-free entryway makes a great first impression and sets the tone for the rest of your home.     Day 2: Tidy Up the Living Room A clean and organized living room makes relaxing in winter much more enjoyable. Fold blankets, fluff cushions, and clear clutter from coffee tables. Dust surfaces, vacuum the floor, and organize books or magazines. Consider adding a cozy rug or extra throw pillows to enhance the warm atmosphere. Cold weather cleaning in the living room ensures a comfortable and inviting space for family and guests. Take a moment to rearrange furniture for better flow and comfort. If you have a fireplace, clean it out and prepare logs for use. Organizing your entertainment center by hiding cables and tidying remote controls can also create a more streamlined look. Add seasonal decorations like warm-toned candles or fairy lights to make your living space feel extra inviting. Creating a cozy ambiance will make winter nights more enjoyable for you and your family. Day 3: Refresh the Kitchen Clear countertops by storing away small appliances and unnecessary items. Wipe down cabinets, deep clean the sink, and organize the pantry. Dispose of expired food items and rearrange shelves for easy access. A tidy kitchen will make cooking in winter more enjoyable. Cold weather cleaning in the kitchen helps maintain a hygienic and functional space. Take the time to deep clean your fridge and freezer. Remove old leftovers, wipe down shelves, and organize food into labeled containers. This will make meal prep easier and reduce unnecessary waste. Lastly, ensure your kitchen is stocked with winter essentials like hot drinks and hearty ingredients. Keeping everything well-organized will make cooking and dining more convenient and pleasant throughout the colder months.     Day 4: Organize Your Bedroom A clutter-free bedroom creates a peaceful space for better sleep. Declutter nightstands, fold clothes, and organize your closet by storing summer outfits away. Change your bedding to warmer sheets and vacuum the floors to eliminate dust and allergens. Cold weather cleaning in the bedroom promotes comfort and relaxation during winter nights. Assess your closet space and remove any items you no longer wear. Store out-of-season clothing in labeled bins to free up room for winter essentials. Organizing your closet will help you find what you need quickly and keep everything neat. Consider adding soft lighting, such as bedside lamps or dimmable bulbs, to create a relaxing atmosphere. A well-maintained bedroom promotes restful sleep, making winter more comfortable and cozy. Day 5: Clean and Disinfect the Bathroom Cold weather can increase germs in your home, so deep Cold Weather Cleaning the bathroom is essential. Scrub the sink, tub, and toilet thoroughly. Replace old towels with fresh, clean ones. Organize toiletries in storage bins to keep countertops clear and create a spa-like feel. Cold weather cleaning in the bathroom ensures a fresh and germ-free space. Don’t forget to clean the grout between tiles and replace any worn-out shower curtains or mats. A fresh, sanitary bathroom helps maintain a healthy living space during flu season. Stock up on winter-friendly self-care items like moisturizing lotions and bath salts. Keeping your bathroom well-maintained will make it a more enjoyable place to unwind after a long, cold day.     Day 6: Tidy Up the Home Office If you work from home, an organized office can improve productivity. Clear off your desk, sort through paperwork, and store away unused office supplies. Wipe down electronics and arrange cables neatly. A clean workspace can boost focus and motivation during colder months. Cold weather cleaning in the home office ensures a clutter-free and efficient work environment. Declutter digital files and organize important documents into labeled folders. Keeping a clutter-free digital and physical workspace will make your daily tasks easier to manage. Consider investing in a cozy chair or additional lighting to create a more comfortable work environment. A well-maintained home office ensures efficiency and helps you stay on top of your responsibilities during the winter. Day 7: Final Touches and Maintenance Now that each area is organized, spend the last day making final adjustments. Light scented candles, add seasonal decor, and do a quick sweep through each room to ensure everything is in place. Keep a routine to maintain cleanliness throughout winter and enjoy a stress-free home. Cold weather cleaning habits will help you maintain a warm and welcoming environment. Walk through your home and make any necessary touch-ups. If any spaces have accumulated clutter again, take a few minutes to tidy them up. Staying consistent with small daily Cold Weather Cleaning tasks will help maintain a warm and welcoming environment. If deep Cold Weather Cleaning feels overwhelming or you want professional help, consider hiring Toronto Shine Cleaning. Their expert team ensures a spotless and organized home, making winter cleaning effortless. With professional assistance, you can enjoy a fresh, cozy, and clutter-free space all season long! Cold

Cold Weather Cleaning: Easy Organize Your Space in 7 Days Read More »

Wet shower tiles in bathroom

How to Keep Your Bathroom Mold-Free: Top 5 Tips

Keeping your bathroom mold-free is essential for maintaining a healthy home environment. Mold can cause various health issues and damage your property, so preventing its growth should be a top priority. Here are five simple yet effective tips to keep your bathroom mold-free. 1. Ensure Proper Ventilation One of the most important steps to keep your bathroom mold-free is ensuring proper ventilation. Mold thrives in damp, humid environments, so reducing moisture is key. Proper ventilation helps to remove the excess humidity that mold needs to grow. Start by using an exhaust fan. Turn it on during and after showers to help reduce the humidity in the bathroom. The fan will pull the moist air out of the room and expel it outside, preventing it from settling on surfaces where mold could take root. If your bathroom doesn’t have an exhaust fan, it might be worth installing one, especially if you regularly deal with mold issues. In addition to using an exhaust fan, opening windows can be incredibly effective. If your bathroom has a window, open it up to allow fresh air to circulate. This not only helps to reduce humidity but also brings in fresh air, which can further help in keeping your bathroom mold-free. If your bathroom doesn’t have windows, consider leaving the bathroom door open after showers. This will let the moist air escape into the rest of the house, where it can disperse more evenly and not settle on bathroom surfaces. 2. Regular Cleaning Start by focusing on the tiles and grout. These areas are particularly susceptible to mold because they retain moisture. Scrub the tiles and grout regularly with a mixture of water and bleach, or use a specialized mold cleaner to ensure that mold spores are eliminated. Pay special attention to the corners and edges where mold tends to hide and grow unnoticed. Next, make it a habit to wipe down all wet surfaces after each shower. This includes the walls, shower doors, and any other areas that get wet during use. By removing excess moisture, you reduce the likelihood of mold spores settling and growing. A simple squeegee can be very effective for this purpose, making the task quick and easy. Don’t forget about the shower curtain, as mold can easily grow on it if it remains damp. Wash or replace your shower curtain regularly to keep it clean and mold-free. If you prefer fabric shower curtains, choose ones that are machine washable and make sure to dry them completely after each wash. Incorporating these regular cleaning practices into your routine can go a long way in keeping your bathroom mold-free. Consistent scrubbing of tiles and grout, wiping down wet surfaces, and maintaining a clean shower curtain are all crucial steps in preventing mold growth and ensuring a healthy, pleasant bathroom environment.     3. Fix Leaks Immediately Addressing leaks immediately is crucial for keeping your bathroom mold-free. Even small leaks can create an ideal environment for mold growth, as they provide a constant source of moisture. Regularly inspecting your bathroom for any signs of leaks and addressing them promptly can make a significant difference. Start by thoroughly inspecting faucets and pipes. Look for any drips or leaks, as even minor seepage can lead to moisture buildup and, subsequently, mold growth. Pay close attention to connections under the sink and behind the toilet, as these areas are often overlooked but can be common sources of leaks. Next, check around the base of the toilet. Leaks in this area can be particularly problematic because they can go unnoticed and cause significant damage over time. Ensure there are no signs of water pooling around the toilet base, and if you detect any moisture, take immediate action to fix the leak. Additionally, it’s essential to maintain the seals around your bathtub and sink. Over time, caulking can crack or peel, allowing water to seep into gaps and create a breeding ground for mold. Reapply caulking as needed to ensure that these areas are properly sealed and protected against moisture infiltration. By regularly inspecting faucets, pipes, and the toilet base, and by maintaining the seals around your bathtub and sink, you can effectively prevent leaks and keep your bathroom mold-free. Promptly fixing any issues as they arise will help maintain a dry and healthy bathroom environment.     4. Use Mold-Resistant Products Investing in mold-resistant products can make a big difference in keeping your bathroom mold-free. These specially designed items help prevent mold growth by creating environments that are less conducive to mold spores settling and thriving. One of the best ways to start is by using mold-resistant paint on your bathroom walls and ceiling. This type of paint contains antimicrobial agents that inhibit mold growth, offering an extra layer of protection in areas that are frequently exposed to moisture. Applying mold-resistant paint can significantly reduce the chances of mold developing on your bathroom surfaces, keeping them clean and healthy for longer. Shower curtains are another area where mold-resistant options can be incredibly beneficial. Traditional shower curtains can become breeding grounds for mold due to their constant exposure to water and humidity. By opting for mold-resistant shower curtains, you can minimize the risk of mold growth. These curtains are designed to repel water and dry quickly, reducing the moisture that mold needs to thrive. Floor mats are also important to consider when aiming to keep your bathroom mold-free. Choose bathroom mats that dry quickly and are specifically designed to resist mold. These mats typically have features that prevent water from soaking in and allow them to dry rapidly, preventing mold spores from taking hold. Ensuring that your bath mats dry out completely between uses is key to maintaining a mold-free bathroom environment. By incorporating mold-resistant paint, shower curtains, and floor mats into your bathroom, you create a hostile environment for mold, making it easier to maintain a clean and healthy space. These small investments can go a long way in preventing mold growth and keeping your bathroom

How to Keep Your Bathroom Mold-Free: Top 5 Tips Read More »

Spotless modern bathroom with white tiles and clear mirror in Mississauga.

How to Easily Clean Your Bathroom in Mississauga: 6 Essential Tips

Cleaning your bathroom can seem like a daunting task, but with the right approach, it can be quick and easy. Whether you’re in Mississauga or anywhere else, these six essential tips will help you keep your bathroom sparkling clean without spending hours scrubbing. Let’s dive in! 1. Gather Your Cleaning Supplies Before you dive into cleaning your bathroom in Mississauga, it’s crucial to gather all the necessary supplies. The key to an efficient and stress-free cleaning session is having everything you need within arm’s reach. This preparation ensures that you won’t have to pause mid-cleaning to hunt for a missing item, which can disrupt your flow and make the task feel more cumbersome. First on your list should be an all-purpose cleaner, which is versatile enough to handle a variety of surfaces and messes. For those stubborn stains that require a bit more muscle, a specialized bathroom cleaner will come in handy. Glass cleaner is essential for mirrors and any glass surfaces, helping to leave them streak-free and gleaming. Microfiber cloths are a must-have due to their superior ability to trap dust and dirt, and they can be used on almost any surface without causing scratches. Don’t forget a good scrub brush for tackling tougher grime, especially in areas like the shower or bathtub where soap scum and mildew can build up. Toilet cleaner and a sturdy brush are, of course, essential for keeping your toilet sparkling clean. Lastly, protect your hands from harsh chemicals and germs with a pair of rubber gloves. 2. Start with the Toilet When it comes to cleaning your bathroom in Mississauga, the toilet is often the most dreaded task. Tackling it first can make the rest of the cleaning process feel much easier. Begin by applying a generous amount of toilet cleaner inside the bowl. Allow the cleaner to sit and work its magic on the grime while you focus on cleaning the exterior parts of the toilet. This approach maximizes your efficiency and ensures a thorough clean. While the cleaner is soaking in the bowl, grab a disinfectant wipe or a cloth dampened with a suitable cleaner to address the rest of the toilet. Start at the top with the tank and handle, as these areas often harbor unseen bacteria and germs. Carefully work your way down to the seat and the exterior base. Pay special attention to crevices and hinges, as these spots can accumulate dirt and are often overlooked. Consistent and thorough wiping ensures that every part of your toilet is sanitized, creating a healthier environment in your bathroom in Mississauga. Finally, return to the toilet bowl. Using a sturdy toilet brush, scrub the interior, focusing on areas under the rim and at the water line where stains and buildup are most stubborn. Once you’ve given it a good scrub, flush the toilet to rinse away the cleaner and any dislodged grime. 3. Tackle the Sink and Counter When cleaning your bathroom in Mississauga, addressing the sink and counter area is crucial, as these surfaces often bear the brunt of daily use. Toothpaste splatters, soap scum, and other grime can accumulate quickly, making the sink look unsightly if not regularly cleaned. Start by spraying an all-purpose cleaner or a dedicated bathroom cleaner on the sink, faucet, and countertop. This initial step helps to loosen any dirt and grime, making it easier to wipe away. While the cleaner is working its magic, take a scrub brush and focus on the more stubborn spots. Areas around the faucet and drain can often harbor buildup that a simple wipe won’t remove. Gently scrubbing these areas ensures that all hidden grime is dislodged. Be sure to reach into the corners and edges where dirt tends to accumulate. This thorough scrubbing is essential for maintaining a sparkling clean bathroom in Mississauga. After scrubbing, use a microfiber cloth to wipe down all the surfaces. Microfiber is particularly effective because it traps dust and dirt rather than just pushing it around. Wipe in a circular motion to ensure you cover every inch, leaving the sink, faucet, and countertop looking shiny and spotless. This method not only enhances the appearance of your bathroom in Mississauga but also creates a more hygienic environment, free from the buildup of everyday grime.     4. Make the Mirror Sparkle A sparkling mirror can significantly enhance the overall appearance of your bathroom in Mississauga. The mirror often catches the eye first, and a clean, streak-free surface can make your entire bathroom look more polished and well-maintained. Start by spraying a quality glass cleaner evenly across the mirror’s surface. Let the cleaner sit for a moment to break down any spots of grime or fingerprints that have accumulated over time. Once the cleaner has had a chance to work, take a microfiber cloth or a paper towel to wipe the mirror. Microfiber cloths are particularly effective because they don’t leave lint behind and are excellent at removing streaks. Use a circular motion to ensure you cover every part of the mirror thoroughly. This method helps to evenly distribute the cleaner and prevents streaking, leaving your bathroom in Mississauga looking spotless. Don’t forget to pay special attention to the edges and corners of the mirror. These areas can easily be overlooked but often collect dust and grime. By ensuring these spots are clean, you can achieve a truly immaculate finish. The effort put into making your mirror shine will be reflected in the overall cleanliness and appeal of your bathroom in Mississauga.     5. Clean the Shower and Tub The shower and tub areas are often the most challenging parts of your bathroom in Mississauga to keep clean due to their constant exposure to moisture. Soap scum, mildew, and hard water stains can build up quickly, creating an unsightly and potentially unhygienic environment. To start, spray a generous amount of bathroom cleaner on all surfaces of the shower and tub. Allow the cleaner to sit for a few minutes; this will help break

How to Easily Clean Your Bathroom in Mississauga: 6 Essential Tips Read More »

Homemade natural cleaning solutions displayed on a sunny kitchen countertop.

How to Refresh Your Home: 5 Essential Oil Recipes for Natural Cleaning

Hey there! Ready to give your home that Essential Oil Recipes for Natural Cleaning? inviting vibe without resorting to harsh chemicals? Let’s dive into the world of essential oils and whip up some natural cleaning solutions that not only cleanse but also leave your space smelling divine. Essential oils are not just about the aroma; they come packed with powerful cleaning properties too. Here are 5 essential oil recipes to refresh your home naturally: 1. All-Purpose Lemon Lavender Cleaner Let’s expand further on the All-Purpose Lemon Lavender Cleaner with a detailed breakdown that highlights each component and step in the process, providing you with a deeper understanding and appreciation for this natural, aromatic cleaner: 1 cup of water: Acts as the base for the cleaner, diluting the vinegar and essential oils to make them safe for use on various surfaces. Water helps in spreading the cleaning solution evenly. 1 cup of white vinegar: A powerful natural disinfectant, vinegar cuts through grease, grime, and dirt with ease. Its acidic nature makes it effective against bacteria and viruses, ensuring your surfaces are not just clean but sanitized. 15 drops of lemon essential oil: Known for its refreshing scent and strong antibacterial properties, lemon essential oil is a key ingredient in combating kitchen messes and brightening surfaces. It leaves behind a clean, invigorating aroma that uplifts the mood. 15 drops of lavender essential oil: Adds a calming, floral scent to the mix, transforming cleaning into a more pleasant, stress-free experience. Lavender’s natural antiseptic properties complement the lemon and vinegar, enhancing the cleaner’s effectiveness. A spray bottle: The perfect container for your homemade cleaner, making it easy to mix, store, and use. A spray bottle allows for convenient application, ensuring you cover the desired areas with just the right amount of cleaner. How to Make It: Begin by pouring water, vinegar, and the carefully measured drops of essential oils directly into your spray bottle. This method ensures that the blend achieves a harmonious balance, maximizing both the cleaning capabilities and the aromatic benefits of the ingredients. Given the natural tendency of essential oils to separate from the vinegar and water mixture, it’s crucial to give the bottle a good shake prior to each use. This step guarantees that the oils are evenly dispersed throughout the solution, allowing for consistent application and effectiveness. When it comes to using this cleaner, its versatility truly shines. Designed for hard, non-porous surfaces, it works wonders on countertops, kitchen tables, appliances, and bathroom fixtures. The application process couldn’t be simpler: just spray the mixture onto the surface in question and wipe it down with a cloth or sponge to achieve a clean and shining finish. The benefits of this homemade cleaner extend far beyond its surface-cleaning prowess. The lemon essential oil and vinegar join forces to offer robust antibacterial and antiviral properties, forming a formidable barrier against the spread of common household germs. Meanwhile, the lavender essential oil envelops your space in its calming scent, transforming routine cleaning into a more pleasant and stress-relieving activity. This concoction is not only effective but also non-toxic and eco-friendly, ensuring it’s a safe choice for homes with children, pets, and a preference for green living solutions. 2. Peppermint Window and Mirror Cleaner Diving into the Peppermint Window and Mirror Cleaner, let’s unfold each element and the crafting process that combines to form a sparkling, pest-repellent marvel for your glass surfaces: 1 ½ cups of water: Serves as the foundation of this cleaner, effectively diluting the vinegar and essential oil to ensure they’re gentle yet effective on glass surfaces. Water facilitates the even distribution of the cleaning mixture, ensuring a streak-free shine. ½ cup of white vinegar: This ingredient is a cleaning powerhouse, renowned for its ability to dissolve grime, combat streaks, and leave a crystal-clear finish. Its natural acidity is hostile to germs, making it an excellent disinfectant for windows and mirrors. 10 drops of peppermint essential oil: Far more than a fresh scent, peppermint oil is a natural deterrent against spiders and ants. Its inclusion turns this cleaner into a dual-threat against dirt and unwanted critters, leaving behind a refreshing minty aroma that revitalizes your home environment. A spray bottle: An essential tool for this homemade concoction, the spray bottle ensures easy mixing, storage, and application. It allows for a fine mist that evenly coats windows and mirrors without over-saturating them, making your cleaning efforts more efficient and effective. How to Make It: Initiate the process by combining the water and white vinegar in your spray bottle, followed by the peppermint essential oil. This preparation strategy ensures a well-balanced mix, leveraging the cleaning strength and aromatic benefits of the components in equal measure. Because essential oils can separate from their water and vinegar base, a vigorous shake before use is imperative. This action guarantees the essential oil’s thorough integration, offering consistent cleaning power and fragrance with every spray. In application, the Peppermint Window and Mirror Cleaner shines with versatility. It’s specifically formulated for use on glass, making it your go-to for leaving windows and mirrors without smudges or streaks. Simply spray a light coating on the glass surface and wipe away with a cloth or sponge for an immediate gleam. But the advantages of this homemade cleaner go beyond mere aesthetics. The peppermint essential oil’s inclusion serves a dual purpose, not only imparting a clean, uplifting scent but also acting as a natural repellant against common household pests like spiders and ants. Additionally, the non-toxic and environmentally friendly nature of this cleaner makes it a safe and responsible choice for households, ensuring cleanliness doesn’t come at the cost of health or the planet. Equally effective in enhancing the ambiance of your living space, the Peppermint Window and Mirror Cleaner introduces a minty freshness that can energize and refresh. This blend doesn’t just clean; it transforms the act of cleaning into an enjoyable, beneficial task. Its utility extends across the home, from living room windows to bathroom mirrors, making it an

How to Refresh Your Home: 5 Essential Oil Recipes for Natural Cleaning Read More »

Sparkling clean bathroom drain amid glossy tiles.

7 Easy Tips for Keeping Your Bathroom Drain Sparkling Clean

A Bathroom Drain Sparkling Clean: that unsung hero of plumbing that we only notice when it’s too late and we’re standing in an unexpected puddle during our shower. Keeping it sparkling clean not only saves us from waterlogged feet but also keeps our bathroom smelling fresh and functioning well. Here are seven simple, yet super effective tips to keep your bathroom drain not just clear, but sparkling clean! 1. Boiling Water This simple yet powerful cleaning hack doesn’t require any fancy equipment or harsh chemicals, making it an eco-friendly choice for those of us looking to maintain our homes in a more sustainable way. To get the most out of this method, consider making it a regular part of your weekly bathroom maintenance. For instance, you could choose a specific day of the week to “boil the troubles away.” However, it’s important to exercise caution with this method, especially around bathroom fixtures made of delicate materials like porcelain. These can be susceptible to damage from sudden temperature changes. To mitigate this risk, you can pour the boiling water directly into the drain rather than letting it splash over the surrounding areas. Alternatively, if your sink or tub is particularly sensitive, consider using very hot water from the tap instead of boiling water to avoid any potential damage. For those hard-to-reach areas or stubborn buildup, you might follow up the boiling water with a plunger or a plumber’s snake to ensure everything is flowing smoothly. This one-two punch is often enough to keep your drains clear and functional without resorting to harsh chemicals or professional intervention. 2. Daily Flushing with Cold Water While it may seem counterintuitive, especially after discussing the benefits of boiling water, flushing your bathroom drain with cold water on a daily basis can also contribute significantly to keeping it clear and clean. Cold water, especially after using the sink or shower, can help solidify and flush away any residual oils or products that have been used. These substances, which might include hair conditioners, body oils, or shaving creams, often cling to the sides of pipes when they’re in their warmer, more viscous state. By running cold water through the drain for a minute or so, you’re essentially helping to harden these residues. This practice is particularly useful after shaving or washing hair in the sink, as it helps ensure that loose hairs are fully flushed away rather than getting caught in the drain. Over time, this can reduce the likelihood of clogs forming, maintaining a smoother flow of water through your pipes. Incorporating this simple step into your daily routine requires minimal effort but can have a meaningful impact on the maintenance of your bathroom’s plumbing. It’s an easy, yet effective strategy to complement the more intensive cleaning measures, ensuring that your bathroom drain remains as clear and functional as possible. 3. Old Toothbrush Beyond just the practicality, repurposing old toothbrushes for cleaning tasks is a nod towards environmental sustainability. Instead of contributing to landfill waste by throwing them away, you’re giving them a second life. This approach aligns with eco-friendly cleaning practices, emphasizing reuse and reducing waste without compromising on cleanliness. To effectively use an old toothbrush for cleaning your drain, start by dipping it in a cleaning solution. The liquid will help dissolve the grime, while the mechanical action of the toothbrush bristles works to scrub it away. For tougher buildup, consider using the toothbrush in conjunction with a plunger or drain snake for a comprehensive clean. The toothbrush’s design, initially intended for meticulous dental hygiene, translates well to meticulous home hygiene. Its handle offers a comfortable grip for sustained scrubbing sessions, while the varied bristle lengths typically found on toothbrushes can reach uneven surfaces within the drain area. Regular use of an old toothbrush for cleaning around the drain cover and inside visible parts of the drain can significantly reduce the likelihood of clogs forming. By incorporating this simple tool into your cleaning arsenal, you’re not just taking care of your home in an effective manner; you’re also doing your part for the planet by reusing and recycling what might otherwise be considered waste.     4. Hair Catcher This straightforward yet effective device is designed to fit snugly over the drain, trapping hair, soap scum, and any other debris that could potentially lead to blockages. By capturing these elements before they have a chance to enter your plumbing system, a hair catcher significantly reduces the risk of clogs forming deep within the pipes. The beauty of using a hair catcher lies in its simplicity and ease of use. Installation typically requires no tools or plumbing expertise; you simply place it over or inside your drain. Despite its simple design, the impact on your drain’s health and functionality is profound. With this guardian in place, water continues to flow freely, and the need for chemical cleaners or professional plumbing services can be drastically reduced. Regular maintenance of your hair catcher is crucial to ensure its effectiveness. This involves a simple routine of removing the catcher, discarding the collected debris, and giving it a quick clean. Depending on your household’s needs, this could be a weekly task, ensuring that the catcher remains efficient at trapping debris without impeding water flow. For an even deeper clean, soaking the hair catcher in a vinegar solution can help dissolve any soap residue or buildup, keeping it in top condition. Investing in a hair catcher is a proactive step towards sustainable home maintenance. Not only does it save you the hassle and expense of dealing with clogs, but it also reduces the need for potentially harmful chemical drain cleaners, aligning with eco-friendly cleaning practices. Moreover, the hair catcher’s longevity and reusability make it an economical choice, offering lasting protection for your drains with minimal environmental impact. 5. Professional Drain Cleaner The chemical composition of many professional drain cleaners allows them to power through tough blockages, but this potency also means they can be quite harsh on your plumbing

7 Easy Tips for Keeping Your Bathroom Drain Sparkling Clean Read More »

Person cleaning a sparkling white bathtub in a bright, airy bathroom.

7 Natural and Effective Ways to Clean Your Bathtub

Ready to sparkling Clean Your Bathtub without the harsh chemicals? You’re in the right place! Whether you’re tackling soap scum, hard water stains, or just giving your tub a regular refresh, natural solutions can be surprisingly effective and much kinder to the environment. Let’s dive into seven natural and effective ways to get your bathtub looking brand new. 1. Baking Soda Paste Baking soda, also known as sodium bicarbonate, is a versatile ingredient that shines beyond the kitchen. When it comes to cleaning, particularly your bathtub, it stands out for its gentle yet effective abrasive properties. The magic begins when you create a simple paste by mixing baking soda with a bit of water. This unassuming mixture transforms into a mighty cleaning agent that can tackle various issues, from everyday grime to more stubborn spots. Applying this paste directly onto the surface of your bathtub allows it to work its magic, particularly on soap scum and light stains that can dull the appearance of your bathroom centerpiece. The paste’s texture provides just the right amount of abrasiveness to scrub away these nuisances without scratching or damaging the tub’s surface. It’s a delicate balance that baking soda strikes perfectly, offering a safe and effective way to maintain the cleanliness and shine of your bathtub. After letting the paste sit on the surface for about 15 to 20 minutes, the baking soda has ample time to penetrate and break down the grime. This waiting period is crucial as it allows the natural chemical reaction of baking soda with the stains to loosen their grip on the tub’s surface. When it’s time to scrub, using a sponge or a soft brush ensures that you can effectively remove the softened grime without exerting too much force or causing any harm. The final step of rinsing the tub thoroughly is satisfying, as you wash away the residue and reveal a cleaner, more inviting bathtub. The beauty of this method lies in its simplicity and the fact that it relies on a non-toxic, environmentally friendly ingredient. It’s a testament to the power of natural cleaning solutions and their place in our homes for maintaining cleanliness in a safer, more sustainable manner.     2. Vinegar and Dish Soap Solution The simple act of mixing equal parts white vinegar and dish soap creates a potent cleaning solution that harnesses the strengths of both ingredients. The vinegar, known for its acidic properties, is a natural descaler and disinfectant. It effortlessly cuts through tough grime, dissolving the bonds that hold dirt and soap scum to your bathtub’s surface. On the other hand, dish soap brings its grease-fighting power to the mix. It’s designed to break down oils and fats, which makes it incredibly effective at tackling the oily residues that can accumulate in a bathtub from body washes, shampoos, and conditioners. When combined, these two household staples form a cleaning solution that’s not only easy to make but also hard on grime and gentle on your tub’s finish. Applying this solution is just as straightforward as making it. By storing it in a spray bottle, you’re equipped with a convenient and efficient tool for coating the bathtub’s surface evenly. This ensures that every nook and cranny is covered, allowing the solution to work its magic uniformly. Letting it sit for about an hour is crucial. This dwell time gives the acidic vinegar and the surfactants in the dish soap enough time to penetrate and break down the grime and soap scum. It’s this waiting period that really leverages the chemical capabilities of your solution, making the scrubbing process that follows much less laborious. When it’s time to scrub, the grime that once clung stubbornly to your bathtub’s surface will now be loosened and much easier to remove. A brush, especially one with stiff bristles, becomes an effective tool for this task, allowing you to target even the most persistent areas of buildup without damaging the tub. Rinsing away the solution after scrubbing reveals a clean, revitalized surface, often with minimal effort compared to conventional cleaning methods. This vinegar and dish soap solution stands out not only for its cleaning prowess but also for its accessibility and environmental friendliness. Almost every household has vinegar and dish soap, making this method cost-effective and easy to adopt. Additionally, it’s a more health-conscious choice, avoiding the harsh chemicals found in many commercial cleaners. 3. Lemon and Salt Scrub Using a lemon, a fruit celebrated for its high citric acid content, is key to this approach. Citric acid is a natural chelating agent, which means it’s capable of binding with minerals in the hard water stains, effectively loosening their grip on the surfaces of your bathtub. This action makes the stains much easier to remove without the need for harsh chemicals. By cutting a lemon in half, you directly apply these natural acids onto the stained areas, maximizing the lemon’s cleaning potential. Sprinkling salt onto the cut side of the lemon before scrubbing introduces a gentle abrasive element to this cleaning duo. Salt, being granular and somewhat coarse, works excellently in conjunction with the lemon’s acidity to physically break down and scrub away the stain particles. This combination ensures that you’re not just chemically loosening the stains but also physically removing them from the surface. Moreover, the lemon and salt scrub is a delightfully fragrant way to clean. Unlike the overpowering or chemical smells associated with traditional cleaners, this method leaves behind a fresh, citrusy scent that can make your bathroom feel cleaner and more inviting. It’s a natural deodorizer, ensuring that not only does your bathtub get a thorough clean, but your entire bathroom benefits from a fresher atmosphere. This approach is especially appealing for those seeking sustainable and non-toxic cleaning solutions. Lemons and salt, common kitchen staples, are readily biodegradable and safe for most surfaces, making this method a responsible choice for the environment and a safer option for homes with children or pets. In addition to its effectiveness and eco-friendliness,

7 Natural and Effective Ways to Clean Your Bathtub Read More »

Dish soap and its lots of uses, how dish soap is useful

How Dish Soap Can Transform Your Cleaning Routine: Top 8 Tips

Hey there! Ever thought dish soap could be the unsung hero of your cleaning arsenal? Well, buckle up because I’m about to show you how this kitchen staple can totally transform your cleaning routine. Dish soap, with its grease-fighting power, isn’t just for dishes anymore. Here are the top 10 tips to make the most out of dish soap and keep your home sparkling clean. 1. Make an All-Purpose Cleaner To create this cleaner, start with filling a spray bottle most of the way with water, then add a few drops of dish soap. The precise amount of dish soap doesn’t need to be exact, but aiming for about a teaspoon per cup of water is a good starting point. This ratio ensures that the solution has enough cleaning power to tackle dirt and grime without leaving surfaces covered in soap residue. After adding the dish soap to the water, tightly close the spray bottle and give it a gentle shake. This mixing action disperses the soap throughout the water, creating a uniform cleaning solution. Now, your all-purpose cleaner is ready to tackle a multitude of cleaning tasks. When using your homemade all-purpose cleaner, simply spray a light mist onto the surface you’re cleaning. Then, with a clean cloth or sponge, gently wipe the surface clean. The beauty of this cleaner lies in its versatility. It’s safe and effective on most surfaces, including countertops, appliances, cabinets, and even walls. Its gentle formula ensures that it won’t damage or discolor the surfaces it’s used on, making it ideal for daily use. For tougher stains or grime, let the solution sit on the surface for a minute or two before wiping it away. This brief dwell time allows the dish soap to penetrate and break down the grime, making it easier to wipe clean. 2. Revive Your Jewelry When using dish soap to clean your jewelry, the key is to create a solution that’s strong enough to tackle the grime but gentle enough not to damage the jewelry. Start by mixing a few drops of mild dish soap into a bowl of warm (not hot) water. The warmth of the water helps to loosen any dirt or oils clinging to the surface of your jewelry, making it easier to clean. Submerge your jewelry in the solution and let it sit for 15 to 30 minutes. This soaking time allows the soapy mixture to penetrate and break down the buildup of everyday pollutants, skin oils, and any products you’ve used that might have dulled the jewelry’s surface. After the soak, take a soft-bristle toothbrush, like a baby toothbrush or a soft jewelry cleaning brush, and gently scrub the jewelry. Pay special attention to crevices and intricate designs where dirt can easily accumulate. The bristles should be soft enough not to scratch the metal or stones but firm enough to remove the dirt. Rinse your jewelry thoroughly under running lukewarm water to wash away any remaining soap residue. It’s important to ensure the water flow isn’t too strong to avoid washing your jewelry down the drain. A strainer can be used during this process for extra safety. Finally, dry your jewelry with a soft, lint-free cloth. This step not only removes any water spots but also helps to buff the metal and stones back to their original shine. If necessary, you can use a hairdryer on the lowest setting to ensure no moisture is left in hard-to-reach areas, but keep the dryer at a safe distance to avoid heat damage.     3. Spot Treat Stains on Fabric To begin the treatment, identify the stained area on your garment. Applying a small amount of dish soap directly onto the stain is your first step. There’s no need for a large quantity; a dab roughly the size of a coin should suffice, depending on the size and severity of the stain. The concentrated power of the dish soap is typically strong enough to tackle the grease without the need for excessive amounts. Once you’ve applied the soap, the next step involves gently rubbing it into the fabric. This can be done using your fingertips or a soft-bristled brush, such as an old toothbrush, to work the soap into the fibers of the fabric. The goal here is to allow the soap to penetrate the stain thoroughly. However, it’s essential to perform this action gently to avoid damaging the fabric, especially if it’s delicate. After the dish soap has been adequately massaged into the stain, it’s crucial to let it sit for a few minutes. This waiting period allows the soap to break down the oils and grease, making the stain easier to remove during the washing process. Depending on the stain’s stubbornness, you may let the soap sit on the fabric for anywhere from five to thirty minutes. Before proceeding with this method, it’s wise to conduct a spot test on an inconspicuous area of the fabric. This precautionary step ensures that the dish soap won’t cause any discoloration or damage to the material. Some fabrics may react differently to dish soap, especially those with delicate dyes or compositions, so this step is crucial for avoiding unintended damage. Finally, wash the garment as you normally would, following the care instructions on the label. After the wash, inspect the stain area before drying. If the stain persists, you may repeat the treatment process before drying, as drying can set the stain further into the fabric. 4. Clean Your Tools and Outdoor Furniture Start by filling a bucket with warm water. The warmth of the water aids in dissolving the soap and loosening grime. Add a generous squirt of dish soap to the water, aiming for a ratio that creates a visibly soapy solution without being overly sudsy. This mixture strikes the perfect balance for effective cleaning without leaving a sticky residue. Submerge a scrub brush in this soapy water and begin to scrub your garden tools and outdoor furniture. The scrub brush’s bristles are firm

How Dish Soap Can Transform Your Cleaning Routine: Top 8 Tips Read More »