Cleaning Guide

Clean faux wood floor with a couch

Quick and Simple Faux Wood Floor Cleaning Routine for Busy Homes

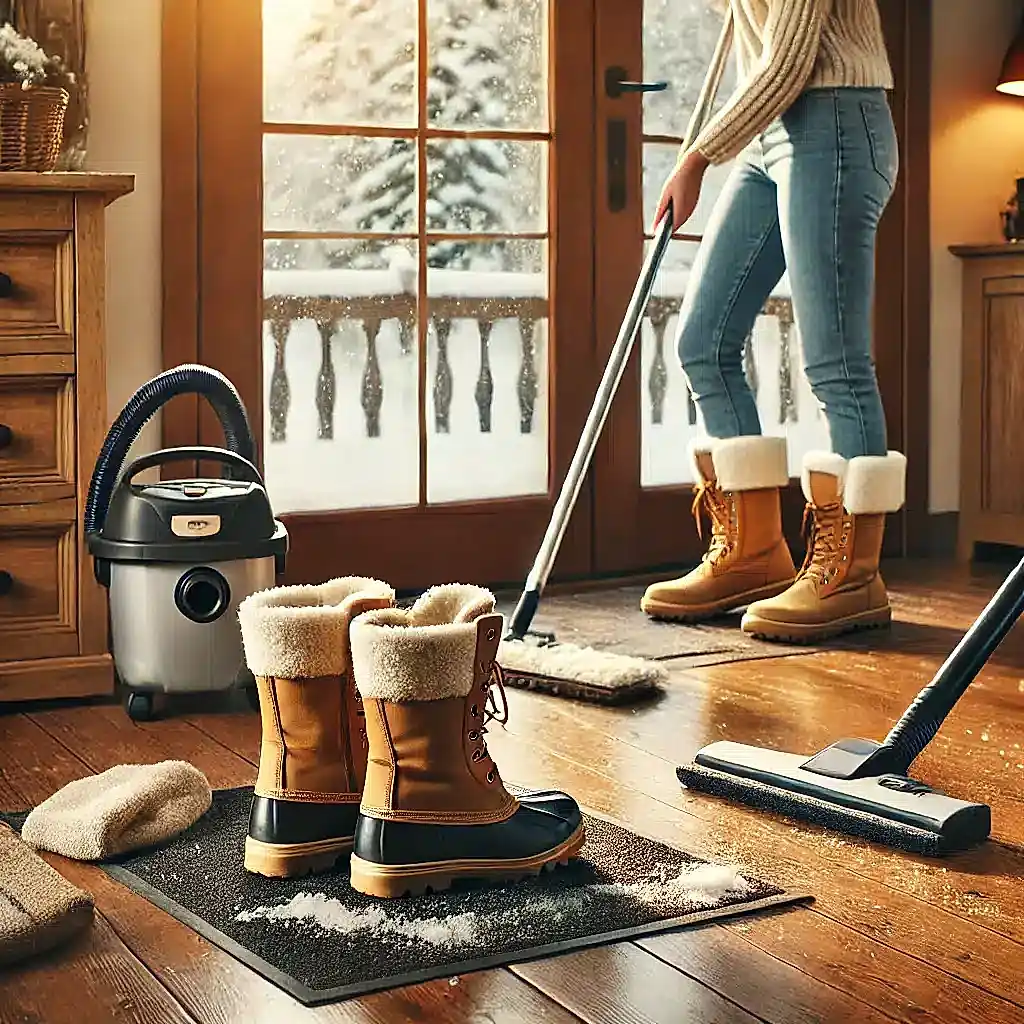
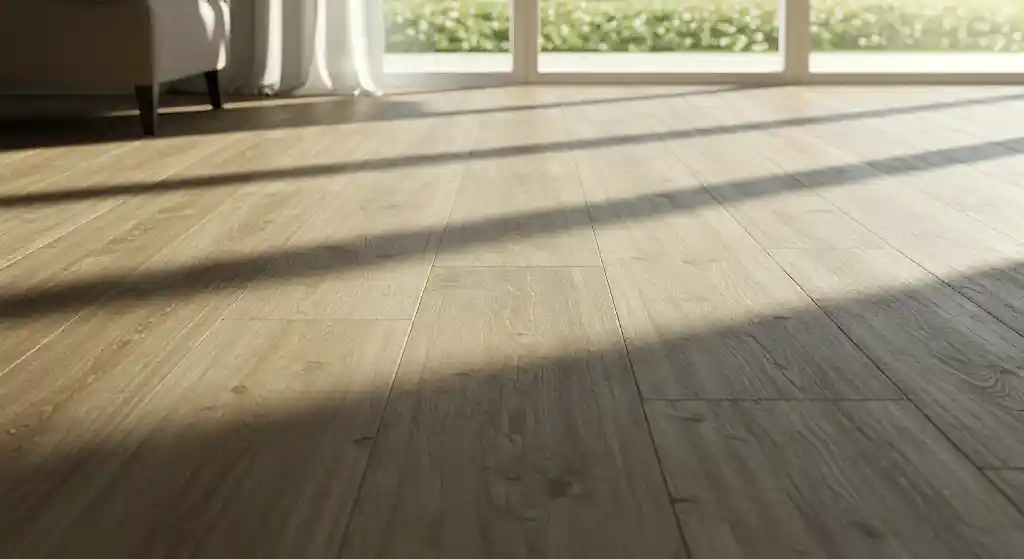
Keeping your faux wood floors clean doesn’t have to be a challenge, even in a busy home. With the right faux wood floor cleaning routine, you can maintain a spotless, streak-free look with minimal effort. Since faux wood flooring is designed to be low-maintenance, all it takes is a few simple steps to keep it looking fresh and polished. Whether you have faux wood laminate flooring, vinyl plank floors, or engineered wood, this quick and effective routine will help you clean your floors properly while preventing damage. Follow these steps for the best faux wood floor cleaning results. 1. Daily Dusting to Prevent Build-Up One of the easiest ways to maintain faux wood floors is by removing dust and dirt daily. Even though faux wood flooring is durable, dirt and small particles can scratch the surface over time, making it look dull. A simple daily faux wood floor cleaning routine prevents buildup and keeps your floors looking like new. Use a microfiber mop or a vacuum with a hard floor setting to remove dust efficiently. A microfiber mop traps dirt without causing scratches, while a vacuum can get into corners and edges where dirt tends to collect. If using a vacuum, make sure it doesn’t have a beater bar, as this can damage faux wood floors. For households with pets or children, consider dusting twice a day in high-traffic areas. This quick step will save you from deeper cleaning later and help your faux wood flooring maintain its shine. 2. Weekly Mopping for a Deeper Clean While dusting removes surface dirt, your faux wood floors still need a proper faux wood floor cleaning session at least once a week. Mopping helps remove grime, spills, and footprints that can make your floors look dull over time. The best method is to use a damp microfiber mop and a pH-neutral cleaner designed for faux wood flooring. Avoid excess water, as too much moisture can seep into the material and cause damage. Spray a small amount of faux wood floor cleaner onto the surface and mop in sections for a streak-free finish. If you want to add extra shine to your faux wood flooring, buff it with a dry microfiber cloth after mopping. This prevents water streaks and keeps the floors looking polished. Always avoid steam mops and harsh chemicals, as they can wear down the protective coating of faux wood floors. 3. Spot Clean Spills Immediately Spills are unavoidable, but how you handle them makes all the difference. Since faux wood flooring is water-resistant but not waterproof, leaving spills unattended can lead to stains or warping. Proper faux wood floor cleaning means acting fast when messes happen. For small spills, use a soft cloth or paper towel to soak up the liquid immediately. Follow up with a slightly damp microfiber cloth to clean any residue. For sticky spills, a mild faux wood floor cleaner can help break down the mess without harming the surface. If you notice scuff marks or tough stains, a melamine sponge (like a Magic Eraser) can be gently used to remove them. Just be careful not to scrub too hard, as this can wear down the finish of your faux wood floors. Keeping a quick-clean kit handy will make spot cleaning easier and prevent stains from setting in. 4. Protect Floors from Scratches A good faux wood floor cleaning routine isn’t just about cleaning—it’s also about prevention. Scratches and scuff marks can make even the cleanest floors look worn out. Taking a few extra steps to protect your faux wood flooring will help maintain its beauty for years to come. One of the easiest ways to prevent scratches is by using felt pads under furniture legs, especially chairs and tables that get moved frequently. If you have rolling office chairs, consider placing a protective floor mat underneath to reduce wear and tear. Another great tip is to use area rugs or runners in high-traffic areas. This not only adds style to your home but also protects faux wood floors from excessive foot traffic. Lastly, encourage a no-shoes policy to keep dirt and debris from being tracked inside, reducing the risk of scratches and scuff marks. 5. Monthly Deep Clean for Extra Shine While daily dusting and weekly mopping are enough for most homes, a monthly deep faux wood floor cleaning session will help remove stubborn grime and restore the shine. This is especially important in busy households with pets, kids, or frequent guests. For a deep clean, use a high-quality faux wood floor cleaner and a soft mop to thoroughly clean every part of the floor, including corners and baseboards. If your faux wood flooring looks dull, you can use a faux wood polish to bring back its natural shine—just make sure it’s safe for your specific flooring type. Avoid wax-based products, as these can create a residue buildup. Also, stay away from excessive water or steam mops, as they can damage the protective coating of faux wood floors. By using the right products and techniques, you can maintain the beauty of your floors without causing long-term damage. Final Thoughts Keeping your faux wood floors clean doesn’t have to be difficult, even in a busy home. By following a simple faux wood floor cleaning routine—daily dusting, weekly mopping, and monthly deep cleaning—you can maintain a polished, streak-free floor with minimal effort. If you’re short on time or need professional help, Toronto Shine Cleaning is here to make your life easier. Our expert cleaners specialize in faux wood floor cleaning and deep home cleaning, ensuring your floors stay spotless without the hassle. Contact us today and let our team handle the cleaning while you enjoy a fresh, sparkling home!

Quick and Simple Faux Wood Floor Cleaning Routine for Busy Homes Read More »

A cleaning setup featuring a blue bucket with a microfiber cloth

Spring Is Coming! Top Things to Clean in March

March is the perfect time to shake off the winter blues and get your home ready for spring. The changing season means more sunlight, warmer temperatures, and a fresh start. A deep clean in March will help you clear out winter dust, refresh your space, and prepare for the months ahead. Here are seven essential areas to focus on during your March cleaning routine. 1. Wash Your Windows Inside and Out Winter weather leaves behind streaks, dirt, and dust on windows, making them look dull and blocking natural light. That’s why one of the first things to clean in March should be your windows. Grab a microfiber cloth and a streak-free glass cleaner to give them a thorough clean. For extra shine, use a squeegee to remove any remaining residue. Don’t forget about the window tracks and sills! These areas collect dust, grime, and even dead bugs over time. Use a vacuum attachment or an old toothbrush to scrub away dirt before wiping everything down. If you have screens, take them out and rinse them with soapy water to remove built-up dust. A proper clean in March will ensure your windows let in more natural light, instantly brightening your home. With longer days ahead, you’ll want to enjoy all the sunshine you can get! 2. Deep Clean Carpets and Rugs Your carpets and rugs have taken a beating over the winter months, collecting dirt, pet hair, and dust from heavy foot traffic. Even if you vacuum regularly, a deep clean in March is essential to remove embedded dirt and allergens. A steam cleaner or professional carpet cleaning service can make a huge difference. Before deep cleaning, move furniture to vacuum underneath and along baseboards where dust collects. If you notice any stains, treat them with a carpet stain remover and let it sit before scrubbing gently. Baking soda is also great for freshening up carpets—just sprinkle it on, let it sit for 15 minutes, and vacuum thoroughly. A thorough clean in March will not only make your carpets look better but also improve indoor air quality. With allergy season approaching, getting rid of dust and allergens now will help you breathe easier in the coming months. 3. Declutter and Organize Closets Spring is the perfect time to go through your closets and get rid of clothing you no longer wear. One key step to clean in March is decluttering your wardrobe. Start by taking everything out and sorting items into keep, donate, and discard piles. If you haven’t worn something in over a year, it’s probably time to let it go. Once you’ve sorted your clothes, organize them by category or season to make finding outfits easier. Store away heavy winter coats, boots, and scarves to free up space for lighter clothing. Investing in storage bins or vacuum-sealed bags can help keep everything tidy and protected. A well-organized closet saves time and makes getting dressed in the morning much less stressful. Plus, donating clothes you no longer need helps others in need and gives your wardrobe a fresh start for spring. A proper clean in March will leave your space looking neat and refreshed. 4. Clean Out Your Fridge and Pantry March is a great time to go through your kitchen and clear out expired or unused food. A kitchen clean in March should start by emptying your fridge and wiping down shelves and drawers with warm, soapy water. Toss anything past its expiration date and reorganize what’s left to make it easier to access. The pantry needs attention too! Go through dry goods like pasta, rice, and canned foods, checking for anything expired. Wipe down shelves and organize items so you can easily see what you have. This is also a good time to plan meals using ingredients you already own, reducing food waste. A clean and organized kitchen makes meal prep easier and ensures that your food stays fresh. With warmer weather coming, you’ll want a refreshed space to start making lighter, healthier meals. Prioritizing a kitchen clean in March will set you up for a fresh and organized spring. 5. Wash Bedding and Rotate Your Mattress Your bed is where you spend a lot of time, and it collects dust, sweat, and bacteria over time. One of the most important things to clean in March is your bedding. Strip all your pillowcases, sheets, and comforters, and wash them in hot water. If you have a mattress cover, wash that too for an extra layer of cleanliness. While your bedding is in the wash, take time to rotate or flip your mattress. This helps prevent uneven wear and extends its lifespan. If you notice any stains, spot clean them with a mild detergent or upholstery cleaner. Sprinkling baking soda over the mattress and vacuuming it up after 30 minutes can also help eliminate odors. Fresh bedding and a clean mattress improve sleep quality and make your bedroom feel more inviting. After all, there’s nothing better than climbing into a crisp, clean bed at the end of the day. A proper clean in March will ensure your sleep space is fresh and hygienic. 6. Scrub Baseboards and Walls Baseboards and walls often get overlooked, but they collect dust, dirt, and scuff marks over time. To properly clean in March, use a damp microfiber cloth or a mild soap solution to wipe down baseboards, removing built-up grime. Pay special attention to corners and edges where dust accumulates. Walls also need a refresh, especially in high-traffic areas like hallways and kitchens. A gentle wipe with a damp cloth can remove fingerprints, stains, and dust. If you have stubborn marks, try using a magic eraser for a deeper clean. A good clean in March will instantly brighten up your home, making it feel fresh and well-maintained. It’s a simple but effective way to prepare for the new season while eliminating winter grime. 7. Refresh Outdoor Spaces As the weather warms up, you’ll want to spend more time outside, so now is

Spring Is Coming! Top Things to Clean in March Read More »

A cheerful spring scene featuring a broom leaning against a bucket with a cloth draped over it. The setting is an outdoor porch with warm sunlight, su

Preparing for Spring Cleaning: What to Do Before You Start

Preparing for spring cleaning is the perfect way to refresh your home, but diving straight into cleaning without a plan can make the process overwhelming. Proper preparation will make your spring cleaning more efficient and stress-free. Here’s what you need to do before you start scrubbing and dusting. Declutter Your Space First Before deep cleaning, take time to declutter each room. Go through closets, drawers, and cabinets to get rid of items you no longer use. Donate or recycle what you can and toss the rest. A clutter-free space makes cleaning easier and helps you see what really needs attention. Not only will this make your home look tidier, but it will also improve your mental clarity. Living in an organized space reduces stress and increases productivity. To make decluttering manageable, tackle one room at a time. Start with high-clutter areas like closets, pantries, and storage spaces. Sort items into categories: keep, donate, recycle, and trash. If you haven’t used something in over a year, chances are you don’t need it. Be honest with yourself about what’s essential. Preparing for spring cleaning by decluttering first will make the entire process smoother. Gather All Your Cleaning Supplies Nothing slows down cleaning like having to search for supplies mid-task. Stock up on essentials like microfiber cloths, sponges, disinfectants, and garbage bags. Make sure your vacuum, mop, and other tools are in working order. Having everything ready will keep you focused and efficient. Consider using eco-friendly cleaning products that are safe for your home and the environment. Many conventional cleaners contain harsh chemicals that can irritate the skin and respiratory system. Look for natural alternatives like enzyme-based cleaners, which break down dirt and grime without harmful side effects. Keeping a well-stocked cleaning caddy will allow you to move quickly from one task to the next. Preparing for spring cleaning with the right supplies ensures a seamless process.     Make a Cleaning Checklist A checklist keeps you organized and ensures no spot is missed. List tasks by room, prioritizing areas that need the most attention. Breaking it down into manageable sections makes the job feel less daunting and helps you track progress as you go. Your checklist should include tasks like dusting, vacuuming, mopping, disinfecting surfaces, and washing windows. Don’t forget overlooked areas like ceiling fans, baseboards, and behind appliances. A structured plan will make it easier to stay on track and complete your cleaning in an efficient manner. When preparing for spring cleaning, having a detailed checklist can make a big difference. Pre-Treat Stubborn Stains and Surfaces Tough stains on carpets, upholstery, or kitchen surfaces need time to break down. Apply stain removers or pre-treatment solutions before you start cleaning so they can work their magic while you tackle other tasks. This will save you time and effort later. For kitchen grease, use a degreaser on stovetops and range hoods to cut through buildup. In the bathroom, apply a grout cleaner to tile surfaces and let it sit before scrubbing. Carpet stains should be treated with the appropriate stain remover and left to absorb before blotting. Taking these pre-treatment steps will make deep cleaning much easier and more effective. Preparing for spring cleaning by treating stains ahead of time ensures a spotless home. Set a Schedule and Get Help Spring cleaning doesn’t have to be a one-day marathon. Spread tasks over several days or a weekend to avoid burnout. If possible, get family members involved or consider hiring professional cleaners for deep cleaning tasks. A little teamwork can make a big difference. Assign specific chores to each person in the household to speed up the process. Children can help with dusting, sorting laundry, and wiping down surfaces. If hiring professionals, focus on tasks that require expertise, such as carpet cleaning, window washing, or upholstery cleaning. Delegating tasks ensures that everything gets done efficiently without overwhelming yourself. Preparing for spring cleaning with a structured schedule will help you stay on top of everything.     Focus on One Room at a Time To make spring cleaning feel more manageable, work on one room at a time. Start with the most cluttered or frequently used spaces, such as the kitchen and living room, and gradually move to less trafficked areas. This method helps maintain motivation and allows you to see progress as you go. When cleaning each room, follow a top-to-bottom approach. Start with high surfaces like shelves and ceiling fans before moving to counters, furniture, and floors. This way, any dust or debris that falls will be cleaned up in the final step. Preparing for spring cleaning by focusing on one room at a time prevents burnout. Clean and Refresh Fabrics Spring cleaning isn’t just about surfaces—it’s also the perfect time to wash fabrics throughout your home. Launder curtains, bedding, and throw pillows to remove dust and allergens. Rotate and vacuum mattresses to extend their lifespan and improve sleep quality. Don’t forget about upholstered furniture. Use a fabric cleaner or steam cleaner to remove dirt and odors from sofas and chairs. Rugs and carpets should be deep cleaned to eliminate built-up grime and allergens. Taking these steps will leave your home feeling fresh and rejuvenated. Preparing for spring cleaning with a focus on fabrics ensures a fresh and clean home environment. Improve Air Quality After a long winter of closed windows and recirculated air, your home could benefit from an air refresh. Open windows to let fresh air in and improve ventilation. Consider using an air purifier to reduce allergens, dust, and pet dander. Replacing HVAC filters and cleaning air vents will also help improve indoor air quality. Dust and debris accumulate in these areas over time, affecting airflow and efficiency. Keeping them clean will ensure better air circulation and a healthier living space. Preparing for spring cleaning by improving air quality contributes to a healthier home.     Organize Storage Areas Spring cleaning is the ideal time to organize storage areas like closets, garages, and pantries. Invest in storage bins, baskets,

Preparing for Spring Cleaning: What to Do Before You Start Read More »

microfiber cloth, cleaning spray and a timer

A Fast Home Cleaning Guide for Busy People

Keeping your home clean can be challenging, especially with a hectic schedule. However, with the right approach, you can maintain a tidy space without spending hours scrubbing. Follow these quick home cleaning tips to keep your home spotless and organized effortlessly. Fast home cleaning techniques ensure efficiency while saving time. 1. Declutter Before You Clean Before diving into cleaning, take five minutes to declutter each room. Remove unnecessary items from counters, tables, and floors to create a clear space. A clutter-free environment makes fast home cleaning much more efficient. Try using baskets or bins to store loose items for easy organization. Decluttering not only helps in cleaning but also creates a sense of calm and order in your home. A room with fewer unnecessary items looks more spacious and inviting, making it easier to navigate and maintain. Once you have decluttered, consider setting up a routine to keep it that way. Take a few minutes each evening to put things back in their designated places. This simple habit ensures that clutter doesn’t accumulate over time, reducing the need for frequent deep-cleaning sessions. A well-organized home is easier to clean and helps you save time in the long run, making fast home cleaning a sustainable habit. 2. Speed Up Dusting and Wiping Use a microfiber cloth to quickly dust surfaces like shelves, coffee tables, and TV stands. For kitchen counters and bathroom sinks, a damp cloth with mild dish soap works wonders. Dusting and wiping down surfaces daily prevents buildup, reducing the time needed for deep cleaning later. Microfiber cloths trap dust effectively, preventing it from resettling on surfaces and improving indoor air quality. Fast home cleaning routines should include daily dusting to keep surfaces looking fresh. To make dusting even more efficient, use a top-to-bottom approach. Start from higher surfaces such as shelves and cabinets, then move down to tables and counters. This method ensures that dust particles don’t fall onto already cleaned areas. Additionally, consider using furniture polish or anti-static sprays to keep dust from accumulating quickly, prolonging the cleanliness of your home. For wiping down surfaces, keep disinfectant wipes handy in commonly used areas like the kitchen and bathroom. A quick wipe after preparing meals or washing up in the sink helps prevent grime and bacteria buildup. Establishing a habit of frequent, small cleanups reduces the workload when it’s time for a full house cleaning, making fast home cleaning easier.     3. Optimize Vacuuming and Sweeping Focus on high-traffic areas when vacuuming or sweeping. Hallways, living rooms, and kitchen floors tend to accumulate the most dirt and debris. A quick pass with a vacuum or broom every other day keeps floors looking fresh and reduces allergens in the home. If you have pets, vacuuming frequently helps remove pet hair and dander, contributing to a cleaner and healthier environment. Fast home cleaning practices include regular vacuuming to maintain cleanliness effortlessly. Using the right vacuum attachments can make a big difference in cleaning efficiency. A crevice tool helps clean edges and corners, while a brush attachment is perfect for upholstery and drapes. Investing in a cordless vacuum can also save time, allowing you to move quickly from one room to another without plugging and unplugging cords. For hard floors, consider using a damp mop after sweeping to pick up any leftover dust and dirt. If you’re short on time, a spray mop with a built-in cleaner can provide a fast and convenient solution. Regular floor maintenance prevents dirt from accumulating, making deep cleaning less frequent and more manageable, a key aspect of fast home cleaning.     4. Clean As You Go One of the best home cleaning tips is to clean as you go. Wipe spills immediately, put dishes in the dishwasher after meals, and fold laundry as soon as it’s dry. These small habits prevent messes from piling up, making overall home cleaning much easier. When tasks are handled in small increments, they feel less overwhelming and take less time to complete, making fast home cleaning a daily reality. Incorporating cleaning into your daily routine ensures that no single task becomes too time-consuming. For example, after brushing your teeth, take a moment to wipe down the bathroom sink. When cooking, clean utensils and cutting boards as you finish using them. These minor efforts add up and create a consistently clean environment. A helpful strategy is to designate certain tasks to specific times of the day. For instance, do a quick tidy-up before bed or spend five minutes in the morning organizing your living space. By integrating cleaning into your daily activities, you’ll always have a neat home without dedicating large blocks of time to chores, keeping fast home cleaning at the forefront. 5. Use Multipurpose Cleaning Products Save time by using multipurpose cleaners for different surfaces. A good all-purpose cleaner can handle kitchen counters, bathroom tiles, and even doorknobs. This eliminates the need for multiple products and speeds up your home cleaning routine. Having fewer cleaning supplies also means less clutter in storage areas, making it easier to access the products you need. Fast home cleaning is made simpler with fewer, high-quality cleaning products. When choosing a multipurpose cleaner, look for one that is safe for various surfaces such as wood, glass, and metal. Natural options, like enzyme-based cleaners, effectively break down grease and grime without harsh chemicals. These products help maintain a healthier indoor environment while simplifying your cleaning process. Consider using reusable spray bottles to mix your own cleaning solution with safe ingredients. A simple mix of mild dish soap and warm water can clean most household surfaces effectively. Keeping a spray bottle in key areas like the kitchen and bathroom allows for quick touch-ups throughout the day, reinforcing fast home cleaning habits. 6. Focus on High-Impact Areas If you’re short on time, prioritize areas that make the most visual impact. Cleaning mirrors, wiping kitchen counters, and making the bed can instantly make your home look tidier. These quick fixes can give the illusion

A Fast Home Cleaning Guide for Busy People Read More »

mop standing and a clock at his side

Speed Cleaning Tips: How to Clean Your Home in Under an Hour

Keeping your home spotless doesn’t have to take all day. With the right strategy, you can get your home looking fresh and clean in under an hour. Whether you have last-minute guests or just want a quick refresh, these speed cleaning tips will help you tackle every area efficiently. The key to speed cleaning is focusing on the most impactful tasks and working systematically through each area of your home. Instead of spending hours scrubbing and organizing, breaking the process into manageable steps allows for efficiency. This not only saves time but also ensures that every area gets the attention it needs. With the right approach, you can maintain a clean home without dedicating an entire day to it. Follow these extended tips to make speed cleaning even more effective. 1. Gather Your Cleaning Supplies Before you start, make sure you have everything you need. Grab microfiber cloths, an all-purpose cleaner, a mop, a broom, a vacuum, and trash bags. Having everything on hand will help you avoid wasting time searching for supplies. Keeping your supplies organized in a caddy or a portable storage bin ensures easy access and mobility as you move from room to room for effective speed cleaning. Preparation is crucial in speeding up the cleaning process. If you have to pause to find the right cleaner or swap out tools, it disrupts your flow and adds unnecessary minutes to your speed cleaning routine. Consider keeping frequently used supplies in each major area of the home, such as under the kitchen sink or in the bathroom cabinet. This will help you streamline your speed cleaning routine even further. Another time-saving tip is to use multi-purpose cleaning products. Instead of switching between multiple cleaners, a high-quality all-purpose cleaner can handle most surfaces, making your speed cleaning work much more efficient. Choosing the right tools, such as microfiber cloths that trap dust better than traditional rags, also makes a difference in speed cleaning effectiveness. 2. Declutter First Go through each room quickly and remove any clutter. Toss trash, put items in their rightful places, and organize as you go. A clutter-free space will make speed cleaning much faster and more effective. Clutter not only slows down the speed cleaning process but also makes spaces appear messier than they actually are. By removing unnecessary items, you create a cleaner and more visually appealing environment. Decluttering doesn’t have to be time-consuming. Set a timer for five to ten minutes and focus on tidying up high-traffic areas like the living room, kitchen, and entryway. Use a laundry basket or storage bin to quickly gather items that belong in other rooms and put them away later. This simple technique prevents unnecessary back-and-forth trips while speed cleaning. Additionally, maintaining a habit of daily decluttering can prevent buildup, making speed cleaning even faster. Encourage household members to pick up after themselves and designate storage spaces for frequently used items. The less clutter accumulates, the easier and quicker it is to perform speed cleaning.     3. Start with Dusting Dust all surfaces, starting from the highest points and working your way down. Use a microfiber cloth to trap dust efficiently. Don’t forget areas like shelves, tables, baseboards, and ceiling fans. This step prevents dust from settling on freshly cleaned floors, ensuring your speed cleaning routine is effective and thorough. Ceiling fans, light fixtures, and vents are often overlooked but accumulate significant dust. Using an extendable duster can help you reach high places without needing a step stool. For delicate surfaces like electronics or decorative items, use a damp microfiber cloth to gently remove dust without causing damage during your speed cleaning session. If you struggle with allergies, consider using a dusting spray to help capture and trap particles. Regular dusting not only keeps your home looking cleaner but also improves air quality, making speed cleaning an essential routine for a healthier home. 4. Wipe Down Surfaces Use an all-purpose cleaner to wipe down countertops, tables, appliances, and high-touch areas like light switches and doorknobs. This step not only removes dirt and grime but also helps sanitize your home quickly. Wiping down surfaces regularly prevents buildup, making deep cleaning sessions less frequent and more manageable, which is key to efficient speed cleaning. Kitchen countertops, in particular, tend to accumulate spills and crumbs. Using a disinfectant wipe or spray ensures that these surfaces remain hygienic, especially in food preparation areas. Additionally, keeping a microfiber cloth handy allows for quick touch-ups throughout the week, maintaining your speed cleaning results. High-touch areas such as doorknobs, remote controls, and light switches often harbor bacteria and germs. Incorporating these areas into your routine speed cleaning not only enhances cleanliness but also reduces the spread of illness. A quick wipe every few days can make a significant difference in maintaining a sanitary home.     5. Focus on the Kitchen and Bathroom These areas tend to get dirty the fastest, so give them extra attention. Wipe down kitchen counters, clean the sink, and remove any food spills. In the bathroom, quickly scrub the sink, toilet, and mirror. Replacing hand towels and taking out the trash instantly makes these spaces feel fresher. Kitchens and bathrooms require regular maintenance to prevent grime buildup, making them a priority in speed cleaning. In the kitchen, focus on wiping down appliance handles, cabinet doors, and the stovetop. Grease and food splatters can accumulate quickly, making these surfaces appear dirty. A quick spray and wipe help maintain a neat look without requiring extensive scrubbing, keeping your speed cleaning time efficient. For bathrooms, using a disinfectant cleaner helps eliminate bacteria and odors. Keeping a disposable wipe container near the sink allows for easy daily wipe-downs, reducing the need for frequent deep cleans. Regular upkeep ensures these spaces remain fresh and inviting, essential for maintaining a speed cleaning routine. 6. Vacuum and Mop Floors Vacuum carpets and rugs to remove dust and dirt. For hard floors, use a mop to give them a quick refresh. Start from one corner

Speed Cleaning Tips: How to Clean Your Home in Under an Hour Read More »

Cleaning countertop from germs with microfiber cloths wearing gloves

Germ-Free Home: 6 Top Cleaning Hacks

Keeping your home germ-free is essential for a healthy living environment. With the right cleaning hacks, you can eliminate bacteria and viruses while maintaining a fresh and spotless home. Here are six top cleaning hacks to keep your space germ-free and hygienic. 1. Disinfect High-Touch Surfaces Daily High-touch surfaces like doorknobs, light switches, countertops, and remote controls harbor germs. Use a disinfectant spray or wipes with at least 70% alcohol to kill bacteria and viruses effectively. Wipe down these surfaces daily to minimize the spread of germs, especially during flu season. Regular disinfection of these areas can significantly reduce the presence of harmful pathogens in your germ-free home. Additionally, consider using disposable wipes or a microfiber cloth designated only for high-touch areas to prevent cross-contamination. Keeping a small bottle of disinfectant near entry points can remind household members to clean surfaces frequently. Be mindful of electronics, using a disinfectant safe for screens when cleaning devices like phones and tablets. Another effective method is incorporating UV sanitizers for objects that are frequently touched but difficult to clean, such as keys and wallets. UV light has been proven to eliminate bacteria and viruses effectively, providing an extra layer of protection for your germ-free household. 2. Use Hydrogen Peroxide for Deep Cleaning Hydrogen peroxide is an excellent disinfectant that eliminates bacteria, mold, and viruses. Pour some into a spray bottle and use it to sanitize kitchen counters, bathroom sinks, and cutting boards. Let it sit for a few minutes before wiping clean for maximum effectiveness. Unlike harsh chemical cleaners, hydrogen peroxide is a safer, non-toxic alternative that is just as effective in maintaining a germ-free home. Besides sanitizing surfaces, hydrogen peroxide is also great for tackling stains and eliminating mildew. It can be used to remove tough stains on white fabrics, clean tile grout, and even disinfect toothbrushes. Simply soak your toothbrush in a small cup of hydrogen peroxide overnight to kill bacteria and ensure a germ-free start every morning. For an added boost, mix hydrogen peroxide with baking soda to create a powerful paste that helps scrub away stubborn grime in the kitchen and bathroom. This combination is highly effective for breaking down grease, whitening surfaces, and leaving your home sparkling clean and germ-free. 3. Steam Clean Your Upholstery and Carpets Soft surfaces like carpets, curtains, and sofas can trap dust, dirt, and bacteria. A steam cleaner helps kill germs and allergens without harsh chemicals. Use steam cleaning regularly to maintain a fresh and germ-free home environment, particularly if you have pets or allergies. The high temperature of steam effectively removes hidden bacteria and dust mites, reducing allergens in your living space. Additionally, using a steam cleaner can help refresh upholstery, making it look and smell new. Steam penetrates deep into fibers, lifting out embedded dirt and neutralizing odors. This is particularly beneficial in homes with pets, as it removes pet dander and eliminates lingering smells while keeping your space germ-free. For an extra layer of protection, consider using a HEPA-filtered vacuum before steam cleaning to remove surface dirt. This ensures that your steam cleaner can focus on deeper sanitation rather than just lifting superficial debris, providing a more thorough and germ-free clean.     4. Keep Your Sponges and Cleaning Cloths Bacteria-Free Kitchen sponges and cleaning cloths can harbor harmful bacteria if not properly maintained. Disinfect sponges by microwaving them for a minute or soaking them in hydrogen peroxide. Wash cleaning cloths frequently in hot water with detergent to keep them germ-free. Using disposable alternatives, such as biodegradable wipes, can also help reduce the risk of spreading germs and maintaining a germ-free home. It’s also a good practice to replace sponges regularly, as they tend to accumulate bacteria over time despite frequent disinfection. Instead of traditional sponges, consider using silicone scrubbers, which are more resistant to bacteria buildup and easier to clean, ensuring a germ-free kitchen. Furthermore, store sponges in a well-ventilated area to dry between uses. A constantly damp sponge is a breeding ground for bacteria, so ensuring proper drying can significantly reduce germ accumulation and keep your cleaning tools effective for longer, helping to maintain a germ-free environment. 5. Sanitize Your Bathroom Regularly Bathrooms are breeding grounds for bacteria and mold. Use a disinfecting cleaner on sinks, toilets, and shower surfaces to prevent germ buildup. Scrub grout with a paste of baking soda and water to remove mold and mildew effectively. Keep your bathroom well-ventilated to reduce moisture buildup, as humidity encourages bacterial growth and makes it harder to maintain a germ-free space. For added protection, consider using a squeegee on shower walls after each use to minimize soap scum and mildew formation. Regularly replace bath mats and towels, washing them in hot water to eliminate germs. Maintaining a clean shower curtain or glass door by wiping it down weekly can also help reduce mold growth and maintain a germ-free bathroom. Using a toilet brush with a built-in disinfecting solution can make cleaning easier and more effective. Consider applying a toilet bowl cleaner that contains bleach to kill bacteria and prevent stains. Small daily efforts can prevent your bathroom from becoming a hotspot for harmful microbes, keeping it fresh and germ-free.     6. Wash Bedding and Towels Frequently Bedding, pillowcases, and towels collect sweat, dead skin, and bacteria over time. Wash them weekly in hot water to kill germs and allergens. Using a high-quality laundry detergent with antibacterial properties ensures your linens stay fresh and germ-free. Adding an extra rinse cycle can help remove any remaining detergent and potential irritants. Pillows and mattresses also need occasional deep cleaning. Using a vacuum with a HEPA filter on your mattress helps remove dust mites and allergens. Additionally, consider using mattress protectors that are machine-washable to reduce exposure to bacteria and ensure a germ-free sleeping environment. For an extra layer of freshness, line-drying your bedding in the sun can naturally kill bacteria and dust mites. The UV rays from the sun have disinfecting properties, making air-drying an effective, chemical-free way

Germ-Free Home: 6 Top Cleaning Hacks Read More »

Blank paper and pen with apple at side

February Cleaning Checklist: Keep Your Home Fresh

As February rolls in, keeping your home clean and fresh is essential to combat winter dust and germs. A well-planned cleaning checklist will ensure your home stays cozy, healthy, and organized. Follow these steps to refresh your space and prepare for the upcoming spring season. 1. Deep Clean High-Traffic Areas Winter months bring in dirt and moisture from outside, making entryways, hallways, and living rooms prone to buildup. Vacuum carpets thoroughly to remove trapped dirt and allergens. Using a high-quality vacuum with a HEPA filter can help improve air quality while ensuring dust and pet dander are minimized. For hardwood or tile floors, mopping with a gentle but effective cleaner will remove grime without damaging surfaces. Baseboards and corners often collect dust and debris, making them important areas to clean regularly. Wipe down baseboards with a damp microfiber cloth to remove accumulated dirt. If scuff marks are visible, a magic eraser can work wonders in restoring the look of your baseboards. Don’t forget to clean under furniture, where dust can accumulate unnoticed. Entryways tend to get especially messy in winter, with salt, snow, and mud being tracked in from outside. Consider placing a heavy-duty doormat by the front door and asking family members to remove their shoes upon entering. A shoe rack or storage bench near the entry can help keep things organized and prevent unnecessary messes from spreading throughout the home. 2. Dust and Disinfect Frequently Used Surfaces Germs thrive during the colder months, making it crucial to disinfect countertops, doorknobs, and light switches regularly. Using a disinfectant spray or wipes ensures bacteria and viruses are eliminated, reducing the risk of illness spreading throughout the household. Pay special attention to kitchen surfaces where food is prepared, as these areas can harbor germs and contaminants. Dusting should be a part of your weekly cleaning checklist to prevent allergens from accumulating. Use a microfiber cloth or an electrostatic duster to trap dust rather than simply spreading it around. Ceiling fans, air vents, and window blinds often collect dust that can trigger allergies if left unattended. Regularly wiping down these surfaces will contribute to a healthier indoor environment. Electronics are another common source of dust and germs. Wipe down remote controls, computer keyboards, and smartphones with a disinfectant wipe. These high-touch items can accumulate bacteria quickly, so making this a habit will help maintain a cleaner and healthier home.     3. Refresh Upholstery and Bedding Soft surfaces like couches, curtains, and mattresses trap dust and odors. Over time, these fabrics can develop musty smells, especially during winter when windows remain closed. To combat this, vacuum upholstered furniture thoroughly using an upholstery attachment. Be sure to get into crevices and under cushions, where dirt and crumbs often collect. Bedding should be washed regularly to maintain freshness and hygiene. Pillowcases, sheets, and comforters should be laundered at least once a week using warm water to kill bacteria and dust mites. If possible, hang bedding outside on a dry, sunny day to naturally freshen and eliminate odors. Rotating and flipping your mattress every few months also helps maintain even wear and prolongs its lifespan. For an added freshness boost, consider using fabric sprays or placing baking soda on upholstery before vacuuming. This can help neutralize odors and leave your home smelling clean and inviting. If you have pets, using a pet-specific upholstery cleaner will help remove fur and dander while keeping fabrics in great condition. 4. Clean and Organize Kitchen Spaces Kitchens require regular maintenance to avoid grease and bacteria buildup. Begin by wiping down cabinets and countertops with a grease-cutting cleaner to remove any residue from cooking. Pay special attention to areas around the stove, where grease splatters are most common. A mixture of warm water and mild dish soap works well for general cleaning checklist without leaving harsh chemical residues. Your oven is another area that needs to be in the deep cleaning checklist. Use a baking soda paste or a commercial oven cleaner to remove baked-on grime and spills. Let the cleaner sit for a few hours before wiping it away with a damp cloth. Don’t forget to clean the stovetop, including burner grates and knobs, to keep your kitchen looking spotless. Pantry organization is key to maintaining an efficient kitchen. Go through your pantry and discard expired items. Group similar items together and use storage bins or labeled jars to keep everything neat. This will not only make meal prep easier but also prevent food waste by ensuring you use ingredients before they go bad.     5. Tackle Bathroom Grime and Mold The humidity from hot showers can lead to mold growth in bathrooms. To prevent this, always use an exhaust fan or open a window to improve ventilation. Mold and mildew thrive in damp environments, so keeping air circulation strong will help prevent buildup. Scrubbing tile grout is an essential part of any cleaning checklist. Use a grout brush and a baking soda paste to lift dirt and discoloration. For tougher stains, a hydrogen peroxide solution can work wonders in restoring grout to its original brightness. Regularly cleaning grout helps maintain a fresh and hygienic bathroom space. Mirrors and fixtures should also be cleaned frequently to prevent water spots and soap scum buildup. A streak-free glass cleaner works best for mirrors, while a vinegar-free cleaning solution is ideal for faucets and showerheads. Replacing old sponges, shower liners, and towels ensures a fresh and inviting bathroom environment. 6. Declutter and Prepare for Spring Take advantage of the last winter month to declutter closets, donate unused items, and prepare for a seasonal refresh. Start by sorting items into categories: keep, donate, and discard. This method makes decluttering more manageable and ensures that only essential items remain. Closets can easily become overstuffed during winter. Rotate seasonal clothing by storing bulky winter coats and sweaters in vacuum-sealed bags to free up space. Organizing clothes by type and color can also make it easier to find outfits and maintain order in your

February Cleaning Checklist: Keep Your Home Fresh Read More »

How to Clean Basement: 6 Best Methods for a Dust-Free Space

A clean basement is essential for maintaining a healthy home environment. Basements often collect dust, mold, and clutter, leading to poor air quality and potential health risks. Regular cleaning helps prevent allergens, odors, and moisture buildup, making your basement a safer and more functional space. By following these six best methods, you can achieve a clean basement that stays fresh and organized for longer. 1. Declutter and Organize The first step to a clean basement is decluttering. Over time, basements become a dumping ground for unused items, creating dust and making cleaning difficult. Start by sorting through storage boxes, old furniture, and miscellaneous items. If something hasn’t been used in a year, consider donating or discarding it. Removing unnecessary clutter helps reduce dust and makes maintenance easier. To keep your clean basement organized, use plastic bins instead of cardboard boxes, which can attract moisture and dust. Shelving units can also help keep stored items off the floor, reducing dust buildup. Labeling each container ensures easy access to belongings without disrupting your organized space. Once decluttering is complete, give the basement a quick vacuum and dusting before placing everything back. This will eliminate any loose dust stirred up during the process, ensuring a clean basement free from allergens and debris. 2. Vacuum and Dust All Surfaces Dust is a major issue in basements, so thorough vacuuming and dusting are necessary for a clean basement. Use a vacuum cleaner with a HEPA filter to remove fine dust particles from floors, walls, and furniture. HEPA filters are especially effective in trapping allergens, preventing them from recirculating in the air. For surfaces like shelves, exposed pipes, and ceiling beams, use a microfiber cloth or an extendable duster. Microfiber traps dust better than regular cloths, reducing airborne particles. Pay special attention to corners and behind large furniture, as these areas tend to collect the most dust. After vacuuming, wipe down all surfaces with a damp microfiber cloth to capture any remaining dust. Keeping up with this routine will ensure a consistently clean basement that is free from allergens and dirt. 3. Clean and Seal Concrete Floors Concrete floors in basements can be a major source of dust, making it difficult to maintain a clean basement. Unsealed concrete releases fine particles that settle on surfaces. Start by sweeping the floor with a broom, followed by vacuuming to pick up any remaining dust. Mop the floor using a pH-neutral cleaner to remove grime and stains. Avoid excessive water, as basements are prone to moisture retention. Once the floor is dry, apply a concrete sealer to prevent future dust buildup. A sealed floor is easier to clean and helps maintain a clean basement over time. For basements with tile or vinyl flooring, regular sweeping and mopping with a suitable floor cleaner will keep the space dust-free and fresh. 4. Improve Ventilation and Airflow A clean basement isn’t just about removing dust; it also requires good air circulation. Since basements tend to have poor ventilation, dust and odors can accumulate quickly. Opening windows when possible or using an exhaust fan can help improve airflow and reduce stale air. A dehumidifier is an excellent investment for maintaining a clean basement. High humidity levels encourage dust and mold growth, making it essential to keep moisture levels below 50%. A good dehumidifier will extract excess moisture and help maintain a fresh environment. Additionally, using an air purifier with a HEPA filter can trap airborne dust, keeping the basement air cleaner. Regularly cleaning HVAC vents and replacing filters also prevents dust from spreading throughout your home. With proper ventilation, your clean basement will stay fresher for longer. 5. Remove Mold and Mildew Mold and mildew can quickly ruin a clean basement, leading to musty odors and potential health risks. Since basements are prone to dampness, it’s important to regularly check for mold growth. Inspect walls, ceilings, and corners for black spots or a musty smell, as these are signs of mold. To remove mold, use hydrogen peroxide or a commercial mold remover. Apply the solution to affected areas, let it sit for a few minutes, then scrub with a brush. Avoid using bleach, as it doesn’t penetrate deep enough to eliminate mold spores. Prevent future mold growth by fixing leaks, sealing cracks, and maintaining proper humidity levels. Using a dehumidifier and ensuring proper airflow will help keep your clean basement mold-free. 6. Regular Maintenance and Deep Cleaning A clean basement requires ongoing maintenance. Set a monthly cleaning schedule to vacuum floors, dust surfaces, and check for moisture issues. Keeping up with these small tasks will prevent dust and dirt from accumulating, making deep cleaning easier. Twice a year, perform a deep cleaning by washing windows, sanitizing storage containers, and wiping down walls. If your basement has carpets or rugs, steam clean them to remove embedded dirt and allergens. Regularly inspect HVAC ducts to ensure they aren’t circulating dust into your clean basement. If your basement serves as a living space, consider using washable area rugs instead of carpeting. Rugs are easier to clean and help maintain a fresher environment. A well-maintained clean basement not only improves air quality but also adds value to your home. Why Choose Toronto Shine Cleaning for Basement Cleaning? A clean basement takes time and effort, especially if dust, mold, and clutter have built up over time. If you need professional help, Toronto Shine Cleaning is here for you! Our expert team specializes in deep basement cleaning, removing dust, mold, and grime to restore freshness to your home. We use high-quality cleaning products and professional equipment to ensure a spotless, clean basement that stays fresh longer. Don’t let dust and dirt take over your basement! Contact Toronto Shine Cleaning today for reliable, professional basement cleaning services in Toronto. Let us help you achieve a cleaner, healthier home!

How to Clean Basement: 6 Best Methods for a Dust-Free Space Read More »

Cold Weather Cleaning

Cold Weather Cleaning: Easy Organize Your Space in 7 Days

When the cold weather arrives, it’s the perfect time to declutter and refresh your home. A well-organized space can create a warm and cozy environment during winter. Follow this simple 7-day cold weather cleaning plan to tackle your home and enjoy a cleaner, more comfortable space. Day 1: Declutter Your Entryway Start by organizing your entryway, as it’s the first place people see when they enter your home. Put away shoes, coats, and accessories. Use storage bins and hooks to keep everything tidy. Wipe down surfaces and sweep the floor to remove dirt and debris brought in from the cold. Cold weather cleaning starts at the front door, ensuring a tidy and inviting entrance. Next, evaluate what you really need in your entryway. If there are old or unused shoes, donate or store them elsewhere. Consider adding a small bench or shoe rack to make storage more accessible. Keeping this area organized will help you transition smoothly when coming and going. Finally, check the lighting in your entryway. Winter days can be darker, so ensure you have adequate lighting to create a welcoming atmosphere. A well-lit and clutter-free entryway makes a great first impression and sets the tone for the rest of your home.     Day 2: Tidy Up the Living Room A clean and organized living room makes relaxing in winter much more enjoyable. Fold blankets, fluff cushions, and clear clutter from coffee tables. Dust surfaces, vacuum the floor, and organize books or magazines. Consider adding a cozy rug or extra throw pillows to enhance the warm atmosphere. Cold weather cleaning in the living room ensures a comfortable and inviting space for family and guests. Take a moment to rearrange furniture for better flow and comfort. If you have a fireplace, clean it out and prepare logs for use. Organizing your entertainment center by hiding cables and tidying remote controls can also create a more streamlined look. Add seasonal decorations like warm-toned candles or fairy lights to make your living space feel extra inviting. Creating a cozy ambiance will make winter nights more enjoyable for you and your family. Day 3: Refresh the Kitchen Clear countertops by storing away small appliances and unnecessary items. Wipe down cabinets, deep clean the sink, and organize the pantry. Dispose of expired food items and rearrange shelves for easy access. A tidy kitchen will make cooking in winter more enjoyable. Cold weather cleaning in the kitchen helps maintain a hygienic and functional space. Take the time to deep clean your fridge and freezer. Remove old leftovers, wipe down shelves, and organize food into labeled containers. This will make meal prep easier and reduce unnecessary waste. Lastly, ensure your kitchen is stocked with winter essentials like hot drinks and hearty ingredients. Keeping everything well-organized will make cooking and dining more convenient and pleasant throughout the colder months.     Day 4: Organize Your Bedroom A clutter-free bedroom creates a peaceful space for better sleep. Declutter nightstands, fold clothes, and organize your closet by storing summer outfits away. Change your bedding to warmer sheets and vacuum the floors to eliminate dust and allergens. Cold weather cleaning in the bedroom promotes comfort and relaxation during winter nights. Assess your closet space and remove any items you no longer wear. Store out-of-season clothing in labeled bins to free up room for winter essentials. Organizing your closet will help you find what you need quickly and keep everything neat. Consider adding soft lighting, such as bedside lamps or dimmable bulbs, to create a relaxing atmosphere. A well-maintained bedroom promotes restful sleep, making winter more comfortable and cozy. Day 5: Clean and Disinfect the Bathroom Cold weather can increase germs in your home, so deep Cold Weather Cleaning the bathroom is essential. Scrub the sink, tub, and toilet thoroughly. Replace old towels with fresh, clean ones. Organize toiletries in storage bins to keep countertops clear and create a spa-like feel. Cold weather cleaning in the bathroom ensures a fresh and germ-free space. Don’t forget to clean the grout between tiles and replace any worn-out shower curtains or mats. A fresh, sanitary bathroom helps maintain a healthy living space during flu season. Stock up on winter-friendly self-care items like moisturizing lotions and bath salts. Keeping your bathroom well-maintained will make it a more enjoyable place to unwind after a long, cold day.     Day 6: Tidy Up the Home Office If you work from home, an organized office can improve productivity. Clear off your desk, sort through paperwork, and store away unused office supplies. Wipe down electronics and arrange cables neatly. A clean workspace can boost focus and motivation during colder months. Cold weather cleaning in the home office ensures a clutter-free and efficient work environment. Declutter digital files and organize important documents into labeled folders. Keeping a clutter-free digital and physical workspace will make your daily tasks easier to manage. Consider investing in a cozy chair or additional lighting to create a more comfortable work environment. A well-maintained home office ensures efficiency and helps you stay on top of your responsibilities during the winter. Day 7: Final Touches and Maintenance Now that each area is organized, spend the last day making final adjustments. Light scented candles, add seasonal decor, and do a quick sweep through each room to ensure everything is in place. Keep a routine to maintain cleanliness throughout winter and enjoy a stress-free home. Cold weather cleaning habits will help you maintain a warm and welcoming environment. Walk through your home and make any necessary touch-ups. If any spaces have accumulated clutter again, take a few minutes to tidy them up. Staying consistent with small daily Cold Weather Cleaning tasks will help maintain a warm and welcoming environment. If deep Cold Weather Cleaning feels overwhelming or you want professional help, consider hiring Toronto Shine Cleaning. Their expert team ensures a spotless and organized home, making winter cleaning effortless. With professional assistance, you can enjoy a fresh, cozy, and clutter-free space all season long! Cold

Cold Weather Cleaning: Easy Organize Your Space in 7 Days Read More »

Winter January cleaning the floor

January Cleaning Checklist: Removing Snow, Slush, and Ice Indoors

Winter brings plenty of challenges when it comes to keeping your home clean. Snow, slush, and ice can easily be tracked indoors, leading to wet floors, salt stains, and potential slip hazards. To maintain a clean and safe space, follow this January cleaning checklist to keep your home in top condition. 1. Place Heavy-Duty Mats and Boot Trays at Entrances Preventing snow and slush from spreading inside starts at your entryway. Placing heavy-duty, absorbent mats at all doors will help trap moisture and dirt before they enter your home. A good combination includes a rough-textured mat outside to remove excess snow from shoes and a super-absorbent mat inside to soak up any remaining moisture. Boot trays are another essential tool for January cleaning. These trays collect water and debris from shoes, preventing puddles and dirt from spreading onto your floors. They also help keep footwear organized, making your entryway look neater and more welcoming. Regularly cleaning and drying these mats is key to their effectiveness. Shake out mats daily, vacuum them weekly, and wash them as needed to ensure they continue to do their job. A well-maintained entryway setup will significantly reduce the amount of snow and slush tracked indoors.     2. Regularly Mop and Dry Floors Moisture buildup from snow and slush can create slippery and hazardous conditions. Using a microfiber mop or an absorbent cloth to wipe up water immediately helps prevent slips and falls. The key to effective mopping during January cleaning is frequent maintenance and using the right cleaning tools. Salt and dirt buildup can cause long-term damage to floors. A damp mop with warm water and a mild detergent can help remove grime without harming your flooring. Avoid using too much water, as excess moisture can seep into cracks and cause warping or mildew. To keep floors completely dry, follow up mopping with a dry microfiber mop or towel. This extra step ensures no lingering moisture remains, reducing the risk of slip hazards and maintaining the overall cleanliness of your home. 3. Remove Salt Stains from Floors and Carpets During winter, salt is commonly used to melt ice and prevent slipping outdoors, but it can also create stubborn stains on floors and carpets. These white, powdery marks can dull the appearance of your flooring and cause damage if not addressed promptly. To remove salt stains effectively, mix warm water with a few drops of dish soap and apply the solution to the affected area. Use a microfiber cloth or a soft brush to gently scrub the stains. Avoid using excessive moisture, especially on carpets, to prevent water damage or mold growth. For carpets, blot the stained area with a damp cloth, then use a dry towel to absorb any remaining moisture. Vacuuming regularly also helps prevent salt buildup. Making salt stain removal a key part of your January cleaning routine will keep your floors looking fresh all season.     4. Vacuum and Deep Clean Entryway Mats Entryway mats collect significant amounts of dirt, salt, and moisture during winter. Regular vacuuming helps keep them effective at trapping debris before it spreads throughout your home. Using a HEPA-filtered vacuum ensures dust and allergens are efficiently removed. For deeper cleaning, shake out mats daily and wash them weekly with warm water and mild detergent. Allow them to air dry completely before placing them back at the entrance to avoid mold or mildew growth. Maintaining these mats ensures they continue to function properly in your January cleaning efforts. Another useful tip is to rotate mats if you have extra ones available. Swapping them out allows them to fully dry between uses, keeping your entryway consistently clean and dry.     5. Wipe Down Doors and Walls Near Entrances Snow and slush often splash onto doors and walls, leaving streaks and dirt marks. Keeping these surfaces clean is an important yet often overlooked part of January cleaning. Regular wiping prevents grime buildup and maintains a polished appearance. Use a damp microfiber cloth or a gentle all-purpose cleaner to remove dirt from doors and walls. For stubborn stains, a mixture of warm water and mild detergent works well. Avoid harsh chemicals that could damage paint or finishes. Pay attention to high-touch areas like door handles and frames, which tend to collect dirt quickly. Regular cleaning of these surfaces ensures a welcoming and hygienic home environment, even during the harshest winter months. 6. Maintain Indoor Humidity Levels and Heating Vents Keeping indoor humidity levels balanced is essential during winter. Excess humidity can lead to condensation, which may cause slippery floors and mold growth. On the other hand, overly dry air can make dust and dirt more airborne, contributing to respiratory issues. Using a humidifier can help maintain the right humidity levels, making it easier to manage indoor air quality. If excess moisture is an issue, a dehumidifier can help prevent condensation from forming on floors and windows. Regularly cleaning heating vents is another crucial aspect of January cleaning. Dust and debris can accumulate in vents, reducing efficiency and circulating allergens. Vacuum vents weekly and replace air filters as needed to keep your home’s air clean and fresh. 7. Keep Entryways Dry and Safe A dry and well-maintained entryway is key to preventing accidents and keeping your home clean. Snow, slush, and ice can make floors slippery, increasing the risk of falls. Implementing a strict drying routine will help minimize hazards. After wiping up moisture, using a dry towel or squeegee to remove excess water ensures a safe walking surface. Keeping towels or extra mats near the entrance can also help absorb unexpected wet spots quickly. Regularly inspecting entryways for water buildup and addressing it immediately keeps your home safe and presentable. This final step in your January cleaning checklist ensures a comfortable and hazard-free environment throughout winter.     Let Toronto Shine Cleaning With Your January Cleaning! By following this January cleaning checklist, you can effectively manage snow, slush, and ice indoors while maintaining a safe and clean environment.

January Cleaning Checklist: Removing Snow, Slush, and Ice Indoors Read More »