Blog

Tiles, Bathroom floor

5 Effective Ways to Clean Your Tile Floors

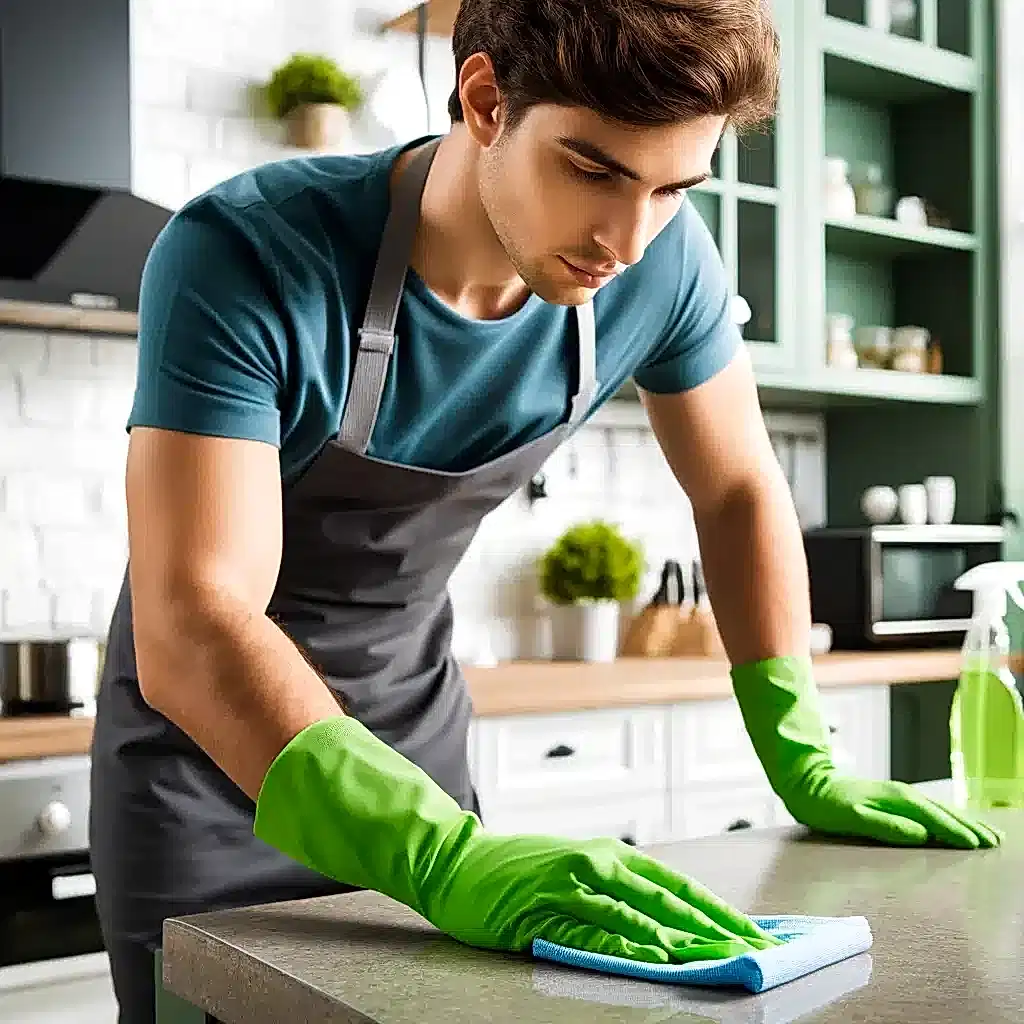
Tile floors are a popular choice for many homeowners due to their durability and low maintenance. However, keeping them looking their best requires some special attention. Here are five effective ways to clean your tiles, ensuring they shine and stay in pristine condition over time. 1. Regular Sweeping or Vacuuming To keep your tiles looking spotless and vibrant, initiating your cleaning routine with regular sweeping or vacuuming is crucial. Tiles are prone to gathering everyday dust, pet hair, and various kinds of debris which, if left unattended, can dull their appearance. Employing a soft-bristle broom for sweeping ensures that you gently collect any loose dirt without scratching the surface of your tiles. When using a vacuum cleaner, it’s beneficial to switch to a hard floor setting. This adjustment helps prevent any abrasive action that could otherwise damage the tiles. By routinely removing these particles, you ensure that subsequent cleaning methods, such as mopping, are more effective and less likely to scratch or mar the tiles’ finish. Consistent sweeping or vacuuming not only maintains the aesthetic appeal of your tile flooring but also extends its lifespan by preventing build-up that can be harder to clean over time. Regular removal of surface dirt and debris keeps the tiles in optimal condition and makes deeper cleaning tasks easier and less frequent. This simple yet effective first step is fundamental in preserving the tiles’ lustrous look and overall integrity.     2. Mopping with the Right Solution When it comes to routine cleaning, mopping your tiles can significantly enhance their appearance and hygiene. To begin, mix a mild detergent with warm water in a bucket—this is your basic yet effective cleaning solution. It’s important to choose a detergent that is gentle enough not to erode or dull the tiles’ finish. Using warm water helps dissolve dirt and grime more effectively, making the cleaning process smoother and quicker. For the mopping itself, opt for a microfiber mop or a soft rag. Microfiber is particularly effective because it does not scratch the surface and can attract and hold onto particles, ensuring a thorough clean. The softness of the material, along with its absorbent properties, allows for a delicate yet deep clean that protects the integrity of your tiles. While regular detergent and water are usually sufficient for most cleaning needs, adding a capful of white vinegar to your mopping solution can boost the effectiveness of your routine. Vinegar is a natural disinfectant and degreaser, making it excellent for tackling more stubborn spots or oily residues that sometimes accumulate on kitchen tiles or entryways. Additionally, vinegar helps in leaving a streak-free finish, enhancing the tiles’ natural shine without leaving any harmful residues. It’s crucial to avoid using harsh chemicals or abrasive cleaning tools, as these can scratch or damage the tiles’ surface, leading to dullness or other forms of wear over time. 3. Tackle Stains Immediately When dealing with spills on your tiles, time is of the essence. Quickly addressing spills helps prevent the liquids from seeping into any porous grout and stops stains from setting into the tiles themselves. For everyday messes, a simple wipe with a damp cloth can often do the trick, efficiently removing the spill before it has a chance to cause lasting damage. However, certain spills like coffee, wine, or greasy substances can be more challenging and require a bit more effort. In these cases, a homemade paste made from baking soda and water becomes an invaluable cleaning agent. Spread this paste generously over the stain on your tiles and let it sit for about 15 minutes. This waiting period allows the natural cleaning properties of baking soda to penetrate and lift the stain. After the paste has set, take a soft brush—ensuring it’s gentle enough not to scratch the surface of your tiles—and scrub the area gently. The soft bristles will agitate the baking soda mixture, helping to release any deep-set dirt or discoloration without harming the tile’s finish. Once you’ve thoroughly scrubbed the stain, rinse the area with clean water to remove any residue from the cleaning process. This method not only clears away tough stains but also preserves the integrity and appearance of your tiles. Prompt and appropriate action keeps your tiles looking as good as new, prolonging their lifespan and maintaining their beauty and functionality in your home. 4. Grout Cleaning Is Crucial Keeping the grout clean is essential for maintaining the overall appearance of your tile floors. Grout, being porous, tends to absorb dirt, spills, and grime, which can lead to unsightly discoloration that detracts from the beauty of your tiles. Proper grout maintenance is crucial to prevent this and to keep your flooring looking pristine. For a deep and effective grout cleaning, a mixture of hydrogen peroxide and baking soda can be particularly effective. Combine these two ingredients into a thick paste. This mixture harnesses the natural whitening power of hydrogen peroxide along with the abrasive, cleaning properties of baking soda. Together, they create a powerful cleaning agent that can penetrate the porous surface of the grout to lift and remove built-up dirt and stains. Apply this paste directly to the grout lines and allow it to sit for several minutes. This dwelling time is critical as it gives the paste enough time to break down the dirt and discoloration. After the paste has had time to work, use a grout brush or an old toothbrush to scrub the grout lines vigorously. These tools are ideal for getting into the narrow spaces and providing the agitation needed to remove the dirt effectively. Once you’ve thoroughly scrubbed the grout, finish the cleaning process by wiping the area with a clean, damp cloth.     5. Seasonal Deep Cleaning Incorporating seasonal deep cleaning into your maintenance routine can significantly enhance the longevity and appearance of your tiles. Over the course of daily use, tiles and grout accumulate layers of dirt and grime that regular cleaning might not fully remove. Every few months, it’s beneficial to undertake a

5 Effective Ways to Clean Your Tile Floors Read More »

Inviting bedroom with clean white sheets and soft natural light.

5 Steps to Perfectly Clean Sheets

If you’re looking to turn your bedroom into a haven of freshness, nothing beats slipping into perfectly clean sheets at the end of the day. Keeping your sheets clean not only feels great but can also enhance your sleep quality. Here’s a simple guide to help you achieve impeccably clean sheets every time. 1. Choose the Right Detergent Choosing the right detergent for your sheets is the first and most crucial step in achieving that perfectly clean and inviting bed. When you pick a detergent, it’s essential to find one that can tackle stains effectively while still being gentle enough not to harm the fabric of your sheets. For those with sensitive skin, a hypoallergenic detergent is key to avoiding any irritation that might disturb your slumber. These detergents are formulated without harsh chemicals and fragrances that could trigger allergies, ensuring your sheets come out of the wash soothing and gentle on your skin. Moreover, for finer fabrics like silk or high-thread-count cotton, consider detergents specifically designed for delicate materials. These specialized products help maintain the integrity and feel of your sheets, ensuring they stay luxurious and last longer. Using the right detergent not only keeps your sheets feeling fresh and comfortable but also contributes to their durability by preventing the breakdown of fibers that can occur with harsher cleaning agents. By carefully selecting your detergent, you’re setting the stage for a great night’s sleep on sheets that are impeccably clean and wonderfully soft. 2. Pre-Treat Stains Pre-treating stains on your sheets is a pivotal step to ensure they come out of the wash looking as good as new. Before you even think about starting the washing machine, take a thorough look over your sheets for any noticeable stains. Common culprits like body oils, lotions, and accidental spills are often the offenders. If you spot any such blemishes, applying a stain remover directly to these areas can make a significant difference. Alternatively, a small amount of your chosen detergent can be used just as effectively. Work the stain treatment gently into the fabric with your fingers or a soft brush, allowing the solution to penetrate the fibers and start breaking down the stain. Let it sit for a few minutes; this pause lets the cleaning agent work its magic on the stain, loosening it up before the main wash. By tackling these stains before the sheets go into the wash, you help ensure that the entire fabric comes out uniformly clean, without any residual marks or discolored patches. This simple but effective pre-treatment preserves the pristine appearance of your sheets, extending their lifespan and maintaining their freshness wash after wash.     3. Set the Right Temperature Setting the right temperature for washing your sheets is essential to ensure they are thoroughly cleaned without causing any damage to the fabric. Typically, warmer water is more effective in removing dirt and sanitizing the sheets, making it ideal for most cotton and linen materials. The heat helps to dissolve and lift off oils and stains that have accumulated on the fabric, ensuring your sheets emerge from the wash spotlessly clean. However, it’s important to always refer to the care label on your sheets before selecting the wash temperature. Some sheets, particularly those made from delicate fibers like silk or fine synthetics, require cooler temperatures to maintain their texture and color. Washing these delicate sheets in hot water could lead to shrinking, fading, or even breaking down the fibers over time. Adjusting the water temperature according to the fabric type not only protects your sheets but also conserves their quality and appearance in the long run. 4. Proper Loading and Washing Cycle When washing your sheets, it’s crucial to properly load your washing machine to ensure effective cleaning. Sheets require sufficient space to move and agitate freely in the washer, which helps the water and detergent circulate through the fabric, ensuring a thorough clean. Overloading the machine can restrict this movement, preventing the sheets from being fully cleaned and potentially leading to them coming out of the wash still dirty or even more wrinkled. Additionally, an overloaded washer works harder, which not only puts strain on the machine but can also increase wear and tear on your sheets. Choosing the right washing cycle is equally important. For most cotton sheets, a regular cycle provides the right balance of agitation and soaking to get them clean without excessive wear. However, for sheets made from more delicate materials, such as linen or certain blends, a gentle cycle is preferable. This softer approach reduces the stress on the fibers, minimizing the potential for damage and extending the life of your sheets.     5. Drying and Storage Proper drying and storage of your sheets are key steps to ensuring they stay fresh and last longer. Once your sheets are washed, you have a couple of options for drying them. Tumble drying on a low heat setting is effective for getting your sheets dry quickly while minimizing damage and shrinkage from high heat. Alternatively, hanging your sheets outside to air dry can be a great choice, especially on sunny days, as the natural airing helps to freshen up the fabric and can reduce energy usage. If you opt to use a dryer, a handy tip is to remove the sheets while they are still slightly damp. This strategy prevents over-drying, which can lead to set-in wrinkles and make the fabric stiff. It also makes ironing much easier, should you choose to iron your sheets for that crisp, hotel-like feel. Once dry, folding your sheets neatly or placing them directly back on the bed ensures they remain smooth and ready for a night of comfortable sleep. Storage is the final step in caring for your sheets. Keep your sheets in a cool, dry place to prevent any mildew or mustiness from developing. A linen closet or a drawer dedicated to bedding provides an ideal environment. Ensuring that the storage area is well-ventilated will help maintain the freshness

5 Steps to Perfectly Clean Sheets Read More »

Luxurious white pillow and pastel duvet on a serene bed setting.

7 Easy Steps for a Pillow Deep Clean

Hey there! Ever wondered if there’s a simple way to freshen up those pillows you cozy up with every night? Good news—you can give your pillows a deep clean without breaking a sweat! Regular washing not only keeps your bedding fresh but also extends the life of your pillows. Here’s a straightforward guide to getting your pillows clean, fluffy, and ready for some serious snoozing. 1. Introduction to Pillow Cleaning Keeping your pillows clean is more than just a matter of good hygiene; it’s essential for ensuring a comfortable and allergen-free sleep environment. Over time, pillows can accumulate dust, skin cells, and even dust mites, which can exacerbate allergies and disrupt your sleep. Regular cleaning not only removes these irritants but also helps maintain the structural integrity and comfort of your pillows. By adhering to a consistent cleaning schedule, you ensure that the pillows you rest your head on every night are fresh, fluffy, and conducive to a good night’s sleep. The benefits of regular pillow maintenance go beyond just cleanliness. Freshly cleaned pillows can significantly enhance the overall feel of your bedding, making your sleep environment more inviting and restful. Additionally, regular washing helps extend the lifespan of your pillows by preventing the buildup of oils and skin cells that can break down the materials over time. This means not only better sleep quality but also cost savings, as your pillows will need replacing less frequently. If the thought of deep cleaning your pillows seems daunting or if you simply don’t have the time, Toronto Shine Cleaning can help. Our professional deep cleaning services are designed to rejuvenate your bedding and other household items, ensuring they are thoroughly cleaned and refreshed. Trust us to handle the heavy lifting when it comes to maintaining your home’s cleanliness, so you can enjoy a healthier, more comfortable living environment. 2. Check the Care Label Checking the care label is the first and crucial step in your pillow cleaning journey. Before diving into the cleaning process, take a moment to locate and read the care label attached to your pillow. This tag is packed with essential information that guides you on how to properly handle and clean your pillow without causing any damage. It’s like having a mini instruction manual stitched right into your pillow! Most pillows, especially those filled with synthetic fibers or down, are generally safe to wash in a machine. This makes it convenient to keep them clean and fresh. However, if you’re dealing with specialty pillows, like those made from memory foam or latex, the care label might advise against machine washing. These materials often require more gentle care, such as spot cleaning or airing out, rather than a spin in the washer. So, always check this label first to ensure you’re taking the best care of your pillow, keeping it fresh and extending its lifespan.     3. Remove Pillow Covers When it’s time to deep clean your pillows, the first step after checking the care labels is to remove all pillowcases or protective covers. These covers often collect a majority of the oils, sweat, and dust that accumulate through regular use, acting as the first line of defense for your pillow. To ensure that both your pillow and its cover are thoroughly clean, it’s crucial to wash these covers separately. Following the specific care instructions on the tags of your pillowcases and protective covers will help maintain their quality and durability. Washing them separately also prevents any possible transfer of colors or textures that might happen if they were washed with your pillows or other laundry items. Additionally, cleaning the covers at the same time as the pillows ensures that once everything is clean and dry, you can immediately dress your pillows in fresh, clean covers, keeping your sleeping environment hygienic and inviting. 4. Prep Your Pillows Prepping your pillows before washing them is an essential step in the deep cleaning process. Start by giving your pillows a vigorous shake. This helps to fluff them up and loosen any dust particles that have settled into the fibers. Shaking not only revives the pillow’s shape but also makes the cleaning process more effective by exposing more surface area to the cleaning agents. For an added touch of freshness, lightly sprinkle baking soda across the surface of each pillow. Baking soda is a fantastic natural deodorizer that works by absorbing unpleasant odors rather than just masking them. Allow the baking soda to sit on the pillows for about 15 minutes. This brief period gives the baking soda enough time to neutralize odors and slightly pull out moisture and oils from the pillow fabric. After the time has elapsed, simply brush off the excess baking soda lightly or vacuum it with an upholstery attachment before proceeding with the wash.     5. Machine Wash If your pillow is labeled as machine washable, you’re in luck because it simplifies the cleaning process significantly. To get started, place two pillows in the washing machine to help keep the machine balanced. This ensures that the load runs smoothly without causing excessive vibration or noise during the cycle. If your washer is large enough, fitting two pillows shouldn’t be a problem, but do make sure they aren’t squeezed too tightly; they need some room to move around in order to get properly cleaned. Select a gentle cycle on your washing machine to treat your pillows with care. Use warm water combined with a mild detergent that won’t be harsh on the pillow’s fabric or filling. This combination helps to clean effectively while being gentle enough to preserve the integrity and comfort of your pillows. A pro tip to keep in mind during the drying phase is to throw a couple of tennis balls into the dryer along with your pillows. Place the tennis balls into clean socks to avoid any color transfer and add them to the dryer. As the dryer tumbles, these tennis balls will bounce around and help fluff up the

7 Easy Steps for a Pillow Deep Clean Read More »

Middle-aged person changing linens in a serene, tidy bedroom with a large white bed.

How to Clean Your Mattress: 5 Proven Methods for a Deep Clean

When it comes to keeping your home clean, one often overlooked item is your mattress. Despite being used every night, many of us don’t think to give it a proper clean. But just like any other part of your home, your mattress can accumulate dust, dirt, and allergens, and therefore benefits greatly from regular cleaning. Whether you’re dealing with dust mites, stubborn stains, or just want to freshen things up, here are five proven methods to deep clean your mattress effectively. 1. Start with Vacuuming To kick off your mattress cleaning routine, begin with a thorough vacuuming session. This step is essential for removing surface dust, dead skin cells, and other small particles that have gathered over time. The process is simple but effective and serves as an excellent foundation for deeper cleaning methods. You’ll need a reliable vacuum cleaner equipped with an upholstery attachment. This specialized tool is designed to handle the soft fabric of your mattress without causing any damage. First, remove all the bedding from your mattress, including sheets, mattress covers, and any protectors you might be using. Wash these items as recommended on their care labels to eliminate dust and allergens. Once your bedding is in the wash and your mattress is bare, attach the upholstery tool to your vacuum cleaner. Begin to vacuum the entire surface of the mattress. Make sure to go over the top and the sides thoroughly. Focus particularly on the seams and crevices, as these areas tend to trap more dirt and dust. While vacuuming might seem like a basic step, it’s incredibly effective at maintaining the cleanliness and longevity of your mattress. Regular vacuuming every couple of months will ensure that the everyday accumulation of debris doesn’t get a chance to build up, keeping your sleeping environment fresh and hygienic.     2. Spot Cleaning Stains The next step in achieving a deeply cleaned mattress involves tackling those inevitable stains that result from spills, accidents, or just general use. Spot cleaning is a targeted approach that focuses on removing these blemishes without having to clean the entire mattress. For effective spot cleaning, gather a mild dish soap or an enzyme-based cleaner, which is particularly good at breaking down organic stains like sweat or urine. You’ll also need some cold water and a clean, absorbent cloth. Begin by mixing a small amount of your chosen cleaner with cold water. The cold water helps to prevent the stain from setting further into the mattress. Dip your clean cloth into this solution, ensuring it’s damp but not overly wet. Next, press the damp cloth gently against any stains on your mattress. It’s crucial to blot these spots gently. Rubbing can push the stain deeper into the mattress fibers or cause it to spread, making it more noticeable. After you’ve successfully lifted the stain, use another dry cloth to dab the cleaned area. This helps absorb any remaining moisture, which is important for preventing mold or mildew from developing in your mattress. This method is particularly effective for removing specific stains and should be employed as soon as any spill or accident occurs. Prompt action increases the likelihood of completely removing the stain, keeping your mattress looking and smelling fresh. By maintaining a stain-free mattress, you contribute significantly to the overall cleanliness and longevity of your sleeping area. 3. Deodorize with Baking Soda An essential step in the deep cleaning process for your mattress is deodorization. Over time, mattresses can start to accumulate smells from sweat, spills, and other environmental factors. Baking soda, with its natural odor-absorbing properties, is an excellent and simple solution for refreshing your mattress and eliminating any unpleasant odors. All you need is some baking soda, which is readily available and highly effective for this purpose. To make the application easier, use a sieve or a shaker for even distribution. Start by evenly sprinkling a generous amount of baking soda across the entire surface of your mattress. Make sure you cover all areas, including the mattress sides if accessible. The baking soda works by absorbing moisture and odors from the fabric and fillings of the mattress. For the best results, leave the baking soda on the mattress for several hours, or even better, overnight. This extended exposure allows the baking soda ample time to absorb as much odor and moisture as possible. After the waiting period, thoroughly vacuum up all the baking soda from the mattress. Use the upholstery attachment of your vacuum cleaner to ensure you remove all the powder, particularly from seams and crevices where it might accumulate. This deodorization method not only leaves your mattress smelling fresh but also plays a crucial role in maintaining a clean and hygienic sleeping environment. Regular application of baking soda can significantly extend the fresh feel and overall lifespan of your mattress.     4. Steam Cleaning Steam cleaning is a highly effective and thorough method for deep cleaning your mattress. This technique not only helps in removing surface dirt and stains but also penetrates deep into the mattress fibers to eliminate dust mites and bacteria. Given the importance of maintaining a clean and allergen-free sleeping area, steam cleaning your mattress can significantly enhance the cleanliness of your bedroom. What You Need: To get started, you’ll need a garment steamer or you can opt to rent a steam cleaner if you don’t own one. Both tools are effective at producing the steam needed for this deep cleaning method. Steps to Follow: First, fill your steamer with water and allow it to heat up until steam begins to form. Then, slowly move the steamer over the entire surface of your mattress. It’s important to keep the steamer moving to avoid saturating any single area, which could inadvertently dampen the mattress too much. The steam will penetrate the mattress fibers, killing dust mites and bacteria that are residing deep within. After steaming, it’s crucial to let your mattress air dry completely. This step might take several hours, depending on the ventilation of

How to Clean Your Mattress: 5 Proven Methods for a Deep Clean Read More »

Dusty attic interior with visible beams and sunlit window.

6 Essential Tips for Efficient Attic Cleaning

Cleaning your attic might not be at the top of your to-do list, but it’s a task that can significantly improve the cleanliness and functionality of your home. Whether you’re looking to declutter, organize, or simply dust off some old cobwebs, these six essential tips will help you tackle your cleaning efficiently. 1. Start with a Plan Starting with a plan is crucial when it comes to attic cleaning. Before you venture into the attic, it’s important to have a clear idea of what you intend to achieve. Are you setting out to declutter the space, search for specific items that might have been stored away, or are you planning a thorough deep clean? Knowing your main goal will help guide your efforts and ensure that you stay focused. Once you have your objective in mind, the next step is to break down the tasks into manageable parts. Consider dividing your attic into specific zones or sections. This segmentation allows you to concentrate on one area at a time, making the process less daunting and more systematic. For instance, you might designate one corner of the attic for sorting through old boxes, another area for furniture, and a different section for items that need thorough cleaning or repair. This strategic approach not only keeps the workload manageable but also helps in preventing the feeling of being overwhelmed, which is common in large, cluttered spaces. By tackling one zone at a time, you can see clear progress, which can be motivating and make the entire cleaning process feel more achievable.     2. Dress Appropriately When it comes to attic cleaning, dressing appropriately is key to ensuring your safety and comfort throughout the process. Attics are often less maintained than other parts of a home, which means they can become havens for dust, debris, and potentially harmful insulation fibers. To minimize your exposure to these elements, it’s important to wear protective clothing. Opt for long sleeves and pants to cover as much skin as possible, reducing the risk of irritation or allergic reactions from contact with insulation fibers and dust. These materials can be particularly abrasive and irritating, so covering up can provide a crucial barrier between your skin and the environment. In addition to clothing, don’t forget to wear gloves. Gloves are essential not just for handling dirty items, but they also protect your hands from splinters, sharp edges, and any other hazardous materials you might encounter. For complete protection, choose a sturdy pair that won’t easily tear or puncture. A dust mask is another critical piece of gear when cleaning your attic. It will help filter out fine particulates and prevent them from entering your respiratory system. This is especially important if your attic is dusty or if there’s any chance of mold or mildew spores, which can be harmful to your health. 3. Bring the Right Tools Equipping yourself with the right tools is crucial for efficient attic cleaning. This means having everything you might need on hand before you begin, to avoid frequent trips downstairs or to the store, which can disrupt your workflow and drag out the cleaning process. Start by gathering heavy-duty garbage bags. These are indispensable for disposing of old, unwanted items or debris that you may find in your attic. Due to the nature of what you might be throwing away—old boxes, broken items, or dusty textiles—it’s wise to choose bags that are tough enough to handle sharp edges without tearing. Boxes for sorting items are another essential. These will help you organize what you want to keep, donate, or sell. Having a few different categories of boxes can make it easier to keep track of where everything goes, streamlining the organization process and making it easier to clear out the space efficiently. A powerful vacuum cleaner equipped with a HEPA filter is key for cleaning your attic effectively. Attics can accumulate a lot of dust and allergens, and a HEPA filter will help ensure that these particles are properly captured and not released back into the air. This is particularly important in an enclosed space like an attic, where stirred up dust can quickly reduce air quality. Cleaning sprays formulated to combat mold and mildew should also be on your list of tools. These areas are prone to moisture issues, and you might encounter mold or mildew which not only poses health risks but can also cause damage to your home. A good cleaning spray can help you tackle these problems effectively, ensuring that your attic remains safe and clean. Finally, don’t overlook the importance of a sturdy step ladder. Attics often have high shelves or storage areas that are difficult to reach. A reliable ladder will make it easier to access these spots safely, preventing strain from reaching and reducing the risk of accidents.     4. Sort Items into Categories Sorting items into categories as you clean your attic is an effective way to streamline both the cleaning and organizing processes. This method not only simplifies decision-making about each item’s fate but also helps in maintaining a clearer, more organized space moving forward. When you begin the sorting process, consider establishing specific categories such as ‘keep’, ‘donate’, ‘sell’, and ‘throw away’. This clear categorization can guide you in making quick decisions and keep you focused during the clean-up. For example, items that you want to keep should be those that you use regularly, have sentimental value, or will likely need in the future. Donations can include things that are no longer useful to you but could benefit someone else. Items to sell are those that may have value to others and can provide you with some return, while things to throw away are typically damaged beyond repair or would not be accepted by charities. This sorting process helps in reducing the clutter within your attic significantly. By removing items you no longer need or want, you free up space and make the attic easier to navigate and clean in

6 Essential Tips for Efficient Attic Cleaning Read More »

Spotless living room window sills adorned with colorful plants.

7 Easy Steps to Maintain and Clean Window Sills Easily

Window sills are one of those areas in the house that can gather dust, dirt, and even mold if not cleaned regularly. But keeping them neat and tidy doesn’t have to be a chore. Here are seven easy steps to effectively maintain and clean your window sills, ensuring they stay looking great all year round! 1. Gather Your Cleaning Supplies Before you embark on the task of cleaning your window sills, it’s crucial to have all your cleaning supplies ready and at arm’s reach. This preparatory step ensures a smooth and efficient cleaning process, allowing you to tackle the task without interruptions. Start by securing a vacuum cleaner equipped with a brush attachment. This tool is essential for gently removing dust and small particles from the window sills without scratching the surface. Next, you’ll want to have a couple of microfiber cloths on hand. These cloths are perfect for cleaning as they don’t leave behind lint and are gentle on all types of surfaces, making them ideal for both glass and the sills themselves. For the actual cleaning solution, mild soap will often suffice, especially when mixed with warm water in a bucket. This simple mixture can effectively lift dirt and reduce the accumulation of grime. For those tougher spots or areas where mold might begin to show, white vinegar is a great addition to your cleaning arsenal. Its natural acidity helps break down stains and combat mold growth without the harshness of chemical cleaners. And finally, if your window sills are made of wood, having a wood cleaner specifically designed for such surfaces is necessary. Wood cleaners not only clean but also offer protection to the sills, maintaining their integrity and appearance.     2. Clear the Debris Clearing the debris is the first hands-on step in effectively cleaning your window sills. Start by carefully removing any objects that you might have placed on the sills over time. These can include plants that bask in the sunlight, various decorations that add charm to your room, or any part of window treatments like blinds or curtains that may rest on the sills. Once these items are removed, you’ll have full access to the entire surface, making it easier to clean thoroughly. After you’ve cleared the space, grab your vacuum cleaner equipped with a brush attachment. This tool is especially useful for picking up dust and loose dirt from the sills without causing any scratches or damage. By vacuuming before you start wiping, you effectively prevent the redistribution of dust and dirt particles around the area, which could otherwise make your cleaning efforts more difficult. This step ensures that when you do begin to wipe down the sills, you’re working on removing any remaining dirt or stains rather than just pushing around what’s already there. It’s a simple but crucial part of maintaining clean and attractive window sills. 3. Wipe Down After you’ve effectively removed the loose dirt and dust, it’s time to focus on thoroughly wiping down the window sills. Start by dampening a microfiber cloth in warm, soapy water. The soap acts as a gentle cleanser that helps break down and lift any remaining dirt or oily residues without harsh chemicals, which makes it ideal for almost any type of window sill material. When cleaning, it’s crucial to be gentle and methodical, paying special attention to the corners and edges where dirt tends to accumulate. For those who have vinyl or plastic sills, this gentle wiping with soapy water will generally be adequate to restore cleanliness and shine. These materials are particularly forgiving and don’t require abrasive cleaners or vigorous scrubbing that might be necessary for other types of surfaces. It’s important to ensure that the microfiber cloth is well wrung out before it comes into contact with the window sills. Using too much water can be problematic, especially if it seeps into areas it shouldn’t. Excess moisture can lead to water damage, swelling in wood sills, or the growth of mold and mildew, which can be both unsightly and potentially harmful.     4. Tackle Tough Stains When you come across stubborn stains or mold on your window sills, a more targeted approach is necessary to restore their cleanliness. One of the most effective for dealing with these tougher issues is white vinegar.The acidity of the white vinegar is excellent for breaking down grime and mold without the harshness associated with chemical cleaners, making it safe for most window sill materials. After preparing your vinegar, apply it directly to the stains or moldy areas on the window sills. It’s best to let the solution sit for a few minutes. This dwell time allows the vinegar to penetrate the stains or mold, breaking down the molecular bonds that hold the dirt or spores to the surface. After letting it sit, take a soft cloth and gently wipe away the solution. You will find that the previously tough stains or mold wipe away much more easily, leaving your window sills looking refreshed and clean. 5. Dry the Sills Once the window sills have been cleaned and any tough stains have been addressed, it’s essential to dry them thoroughly. This step is critical in preventing any potential water damage, which can be particularly detrimental to wooden sills. Water that lingers can seep into the pores or crevices of wood, leading to swelling, warping, or even rot over time. Furthermore, damp surfaces are prime breeding grounds for mold and mildew, which not only pose health risks but can also cause unsightly stains and damage. To ensure your window sills are properly dried, use a clean, absorbent towel or cloth. Gently pat the sills dry, making sure to absorb all residual moisture. Pay special attention to any nooks and crannies where water might collect. Ensuring the sills are completely dry helps maintain their structure and appearance, preventing any long-term damage and keeping your window sills in pristine condition. 6. Treat Wooden Sills Maintaining wooden window sills requires a bit more specialized care

7 Easy Steps to Maintain and Clean Window Sills Easily Read More »

Middle-aged woman organizing living room table, casual attire.

7 Easy and Quick Cleaning Hacks Every Homeowner Needs to Know

Keeping your homeowner task can sometimes feel like a full-time job. But, what if you could cut corners without sacrificing cleanliness? Here are seven quick cleaning hacks every homeowner needs to know that can make keeping up with the chores a little less overwhelming and a lot more efficient. Get ready to make your cleaning routine quicker and easier! 1. Microwave Cleaning Magic Let’s start with the microwave, a notorious hotspot for spills and splatters. For homeowners looking for an easy and effective way to tackle this common kitchen trouble spot, there’s a simple trick that doesn’t involve endless scrubbing. Just grab a microwave-safe bowl and fill it with water, adding a few slices of lemon for a natural cleaning boost. Place this in your microwave and set it to high for about five minutes. The heat helps the water to boil and produce steam, while the lemon not only adds a refreshing scent but also contributes acidic properties that break down the food residues. As the steam fills the microwave, it softens the splatters and baked-on food particles. After the timer goes off, carefully remove the hot bowl (using oven mitts to protect your hands). You’ll find that a simple wipe with a cloth will now effortlessly remove the gunk. Plus, the fresh lemon scent leaves your microwave smelling clean without the use of harsh chemicals. This quick hack not only saves homeowners time but also keeps the microwave ready for its next use with minimal effort. 2. Vinegar: Your New Best Friend White vinegar truly is a powerhouse when it comes to cleaning, making it a must-have for homeowners seeking a versatile and eco-friendly solution for their cleaning needs. To harness the full potential of white vinegar, start by mixing a solution of equal parts water and vinegar in a spray bottle. This mixture works wonders as a glass cleaner—simply spray it on windows or mirrors and then wipe them down with a lint-free cloth. You’ll notice it leaves a streak-free shine that rivals commercial cleaners, all without any harsh chemicals. But the benefits of white vinegar don’t stop at glass cleaning. It’s also incredibly effective for descaling kettles and coffee makers, a common headache for many homeowners. The acidic nature of vinegar helps to dissolve lime and mineral build-ups that can affect the performance and taste of your appliances. Just fill the kettle or coffee maker’s reservoir with a mixture of half vinegar and half water, run it through a brewing cycle, then rinse thoroughly with plain water to eliminate any vinegar smell. This simple step extends the life of your appliances and ensures they operate efficiently.     3. Baking Soda for Cleaner Sofas For homeowners dealing with the common problem of stained and odorous sofas, baking soda offers a simple and effective cleaning solution. Start by sprinkling a liberal amount of baking soda directly onto the sofa fabric. The natural properties of baking soda make it excellent for absorbing both odors and stains. Allow it to sit on the fabric for about 20 minutes, giving it enough time to penetrate the surface and neutralize any unpleasant smells while also working to lift stains from the material. Once the baking soda has had time to do its magic, use the brush attachment on your vacuum cleaner to thoroughly remove the powder from the sofa. This step not only clears away the baking soda but also any loosened dirt and debris that has been brought to the surface. The result is a fresher, cleaner look for your sofa without the need for harsh chemical cleaners or expensive professional services. This method is especially beneficial for homeowners looking for a cost-effective way to maintain their furniture in a pet-friendly home or in busy households where spills and accidents are frequent. 4. Dust with Dryer Sheets Homeowners often seek efficient and effective ways to manage household dust, and an innovative approach involves using dryer sheets instead of traditional dusting tools. Dryer sheets are excellent for picking up dust due to their electrostatic properties, which attract and hold dust particles rather than just moving them around. This makes them particularly effective on a wide range of surfaces, from wooden furniture to electronics and even baseboards. Additionally, dryer sheets leave behind a light, pleasant scent, which enhances the freshness of any room. They also significantly reduce static on surfaces. This reduction in static is particularly beneficial as it prevents dust from resettling quickly after it’s been wiped away, keeping surfaces cleaner for longer. For homeowners looking to maintain a dust-free home with less frequent dusting required, integrating dryer sheets into their cleaning arsenal can be a game-changer. 5. Rubber Gloves for Pet Hair Homeowners with pets understand the challenge of keeping furniture free from pet hair. One surprisingly effective technique involves using a simple pair of rubber gloves, a method that can save significant time compared to traditional lint rolling. Start by slightly dampening the rubber gloves with water; this increases the gloves’ ability to attract and hold onto pet hair. Then, simply run your hands over the surfaces of your upholstery where pet hair tends to accumulate. As you move your gloved hands over the fabric, the pet hair will adhere to the damp rubber, pulling it away from the sofa, chairs, or cushions with ease. Once you’ve collected the hair, it can be effortlessly rinsed off the gloves under running water, preparing them for another use. This method not only reduces the time spent cleaning but also avoids the need for sticky tape rollers or repeatedly emptying vacuum containers. It’s a straightforward, quick solution that helps pet-owning homeowners keep their living spaces clean and comfortable with minimal fuss.     6. Toothpaste: Not Just for Teeth Homeowners often encounter tough spots around the house that are difficult to clean, such as scuffed walls and dirty piano keys. An unexpected but highly effective solution for these issues is white toothpaste. This common bathroom staple can be used far beyond

7 Easy and Quick Cleaning Hacks Every Homeowner Needs to Know Read More »

Person polishing wooden island with essential oils in sunny kitchen.

How to Develop a Housekeeping Schedule That Works for You

Creating a housekeeping schedule that fits perfectly into your lifestyle can transform your home into a consistently clean and pleasant space without feeling overwhelmed by chores. Whether you’re juggling a busy schedule or just prefer to keep things orderly with minimum fuss, a well-thought-out housekeeping plan is key. Here’s how to develop a housekeeping schedule that works specifically for you. 1. Assess Your Needs and Preferences To extend on assessing your needs and preferences for a housekeeping schedule, it’s essential to consider not just what areas of your home require cleaning, but also how these areas are used throughout the week. This will help you prioritize tasks more effectively. For instance, high-traffic areas like the kitchen or family room might need a quick sweep daily, whereas bedrooms might only need a thorough dusting once a week. Think about your household’s specific needs as well. If you have pets, regular vacuuming might become a daily necessity to manage fur and dander. Alternatively, if you’re dealing with allergies, you might prioritize reducing dust and pollen with more frequent window cleaning and surface wiping. In the process, take stock of all the cleaning tasks you find yourself tackling, both the obvious and the overlooked. This includes everything from the regular wiping down of countertops to the occasional deep clean of your storage areas. This comprehensive approach ensures that nothing gets missed and that your housekeeping efforts are as effective as possible, maintaining a clean and inviting home environment. 2. Break It Down Into Manageable Tasks To further develop your housekeeping schedule by breaking it down into manageable tasks, think about the flow of your week and the rhythm of your household activities. Start by identifying which tasks need attention daily to maintain a basic level of cleanliness and order. For example, managing the clutter that accumulates throughout the day and handling dishes are fundamental to keeping your space functional. Then, consider what housekeeping tasks can be tackled on a weekly basis. These might include more thorough cleaning activities such as vacuuming all carpets, dusting surfaces, and mopping floors, ensuring that each part of your home gets regular attention. This keeps your living areas pleasant and hygienic without daily fuss. For monthly housekeeping duties, look at tasks that contribute to the upkeep and efficiency of your home but don’t need constant attention. Cleaning windows, for instance, not only helps with the aesthetics of your home but also maximizes natural light. Checking and maintaining smoke detectors and deep-cleaning major appliances like your oven and refrigerator are also crucial for safety and functionality. Finally, consider those housekeeping tasks that fit a seasonal schedule. These might include jobs like clearing out gutters to prevent water damage, deep cleaning the garage, or organizing closets as the seasons change. These tasks are typically more labor-intensive and require more time, so scheduling them during specific times of the year helps distribute your workload evenly and keeps everything manageable. By categorizing your cleaning tasks into daily, weekly, monthly, and seasonal activities, you create a balanced housekeeping routine that keeps your home in top shape while remaining adaptable to your lifestyle and energy levels.     3. Allocate Time Slots When allocating time slots for your housekeeping tasks, it’s essential to align them with your personal schedule and energy peaks throughout the day. This consideration ensures that your cleaning routine integrates seamlessly into your life rather than disrupts it. For those who work from home or have flexible hours, you might find that breaking up tasks into smaller segments throughout the day keeps your home tidy without becoming too burdensome. For example, you could set aside time after breakfast to do quick surface cleans and save vacuuming or laundry for your energy peak in the late morning or early afternoon. On the other hand, if you have a more structured day job, you might prefer to designate evenings for light cleaning tasks to refresh your space for the next day. Meanwhile, more intensive cleaning could be reserved for a particular day over the weekend when you can dedicate a few hours to thorough housekeeping without the pressure of work commitments. Moreover, consider how your energy fluctuates during the week. Some people might feel more motivated and energetic at the beginning of the week, making it an ideal time to tackle the more demanding housekeeping chores, leaving lighter tasks for later in the week when fatigue sets in. By thoughtfully allocating time slots for different housekeeping activities around your personal energy levels and daily routine, you ensure your cleaning schedule is not only manageable but also feels naturally integrated into your daily life. 4. Use Tools and Resources Incorporating tools and resources effectively can significantly enhance your housekeeping strategy by providing structure and reminders to help you stay organized and efficient. Beyond using basic tools like checklists and calendars, you can explore a variety of apps designed specifically for housekeeping tasks. These apps often feature customizable reminders, task lists, and even tips for cleaning techniques, which can be particularly helpful for more complex tasks such as seasonal deep cleaning or maintenance checks. Additionally, integrating smart home technology can further streamline your housekeeping routine. For example, smart thermostats can remind you when it’s time to change filters, and smart refrigerators can keep track of groceries and suggest when it’s time to clean out old items. There are also smart vacuum robots that can be scheduled to clean your floors daily without manual intervention, saving you time and effort. Using these tools not only helps in keeping track of routine tasks but also ensures that nothing is overlooked. For instance, setting a monthly reminder to descale your coffee maker or check the smoke detectors can prevent larger issues down the line. With the right digital tools at your disposal, you can ensure that every aspect of your housekeeping schedule is managed with precision, making your cleaning routine as effective and effortless as possible.     5. Involve Others Involving others in the housekeeping process

How to Develop a Housekeeping Schedule That Works for You Read More »

Professional house cleaner in uniform and green gloves sanitizes kitchen countertop.

House Cleaners: 5 Tips for Building a Great Relationship With Them

Maintaining a clean and tidy home is a goal many of us aspire to, but with the fast-paced lives we lead, keeping up can be tough. That’s where professional house cleaners come in handy, especially in bustling cities like Toronto. But once you’ve hired a cleaner, how do you make sure the relationship stays solid and your home gets the best care? Here are five top tips for building a great relationship with your house cleaners: 1. Clear Communication When you first start working with house cleaners, setting the stage with clear communication is crucial. As soon as you welcome them into your home, take the time to discuss what your specific expectations are. Perhaps you need them to focus on the kitchen and bathrooms, or maybe you have rooms that you’d prefer remain private and untouched. Sharing these details upfront can help prevent any misunderstandings that might arise later on. It’s also important to be straightforward about how you like things done. If you have a preferred method of cleaning or special products you’d like used on certain surfaces, letting your house cleaners know from the beginning can make things more efficient for everyone involved. This initial conversation sets the tone for a professional relationship where both parties understand and respect each other’s expectations. Additionally, maintaining open communication throughout your relationship with your house cleaners ensures that any new preferences or issues are addressed promptly. For example, if you notice a spot that was missed or if you’d like to adjust the focus of the cleaning session, speaking up sooner rather than later helps your cleaners adapt quickly and continue providing the best service possible. This ongoing dialogue not only leads to better results but also builds a strong, mutual respect between you and your house cleaners, fostering a partnership that can last for years. 2. Respect Their Time Understanding and respecting the schedule of your house cleaners is essential for a smooth and effective cleaning experience. These professionals carefully manage their time to serve multiple homes each day. By ensuring that your space is accessible and prepared for their arrival, you greatly assist in maximizing their efficiency and the quality of cleaning they can provide. Preparing your home might include small tasks like clearing the floors of clutter, toys, or clothes, which can otherwise hinder your cleaners’ ability to get straight to work on more intensive tasks like vacuuming or mopping. Think of it as setting the stage for them to perform their best work without unnecessary obstacles. Moreover, life can be unpredictable, and sometimes you might need to cancel or reschedule a cleaning session. In such cases, providing as much notice as possible is not just courteous but also crucial for house cleaners to adjust their schedules accordingly. They appreciate having the opportunity to rearrange their appointments or fill the slot with another client.     3. Provide a Friendly Environment Creating a welcoming and considerate atmosphere for your house cleaners goes beyond just the cleanliness of the space; it’s about how you treat them as individuals. Small gestures of kindness, such as offering a glass of water or a quick snack, can significantly enhance their comfort and energy levels while they work. This type of hospitality not only makes the cleaning session more pleasant but also fosters a positive and respectful relationship. Additionally, a simple thank you or a compliment on a job well done can make a big difference in how valued and appreciated your house cleaners feel. Recognizing their efforts not only boosts morale but also encourages a deeper commitment to their work. When house cleaners feel respected and acknowledged, they are more likely to go above and beyond, ensuring that every nook and cranny of your home receives attention. Furthermore, maintaining a friendly dialogue, asking about their day, or showing interest in their well-being can reinforce a positive working environment. This level of personal interaction shows that you see them as more than just service providers but as vital contributors to your home’s upkeep. Ultimately, when house cleaners are treated well and respected in their work environment, it reflects in the quality of their cleaning and the ongoing relationship you share with them. 4. Trust Their Expertise When you hire professional house cleaners, you’re not just paying for their time; you’re also benefiting from their wealth of experience and knowledge in effective cleaning methods and products. It’s important to remember that these individuals are trained and skilled in their field. Trusting their expertise means being open to their suggestions and recommendations. For instance, if your house cleaners recommend a specific type of cleaning agent for your hardwood floors or a particular approach to treating stains on upholstery, they likely have good reason based on past successes. By trusting their judgment, you can ensure that your home is not only clean but also maintained properly to avoid damage from incorrect cleaning techniques or harsh chemicals. Moreover, house cleaners often have insights into cleaning schedules and maintenance routines that might be beneficial for your home. If they suggest increasing the frequency of cleaning sessions during certain seasons or advise on areas that need more regular attention, considering their advice can help keep your home in top condition year-round. Embracing their expertise can also lead to a more efficient cleaning process. When house cleaners are given the autonomy to apply their best practices, they can work more effectively, ensuring that each cleaning session is as thorough and productive as possible. 5. Stay Consistent and Loyal Consistency and loyalty are key components in nurturing a fruitful relationship with your house cleaners. If you find that their service meets or exceeds your expectations, it makes sense to continue using the same team or individual for your cleaning needs. Regular appointments not only help your cleaners become more familiar with your home and its specific cleaning requirements but also allow them to tailor their services more closely to your preferences. By sticking with the same house cleaners, you

House Cleaners: 5 Tips for Building a Great Relationship With Them Read More »

Caucasian hand meticulously cleans miniature house model with cloth.

7 Steps to a Thorough Home Cleaning: From Top to Bottom

Home Cleaning can feel like a daunting task, but with the right strategy, it doesn’t have to be! Whether you’re prepping for guests, tackling spring cleaning, or just giving your space a much-needed refresh, follow these seven steps to ensure your home shines from top to bottom. 1. Plan and Prepare When planning your home cleaning, it’s also smart to check the inventory of your cleaning products to ensure you have enough supplies to avoid any interruptions. For instance, make sure your cleaning solutions are full, check that your mop heads are clean, and see if your vacuum cleaner bags or filters need replacing. This kind of preparation not only streamlines the cleaning process but also prevents the frustration of having to stop midway to run to the store. Additionally, consider the logistics of your home cleaning. For example, if you live in a multi-story home, plan to start from the top floor and work your way down to efficiently manage the dust and dirt without tracking it back into cleaned areas. This approach saves time and energy, making your cleaning more effective. By taking the time to thoroughly plan and prepare, you can transform what might seem like an overwhelming chore into a series of manageable tasks, making the entire home cleaning process less daunting and more productive.     2. Start at the Top When you begin your home cleaning by starting at the top, it’s efficient to also tackle the cobwebs that might be lurking in the upper corners of your rooms and any dust that has settled on high shelves or ledges. This strategy ensures that you capture all the loose particles before they have a chance to settle elsewhere after you’ve cleaned the lower areas. After dusting the ceiling fans and light fixtures, move on to cleaning any wall hangings, such as picture frames or mirrors, which also tend to accumulate a surprising amount of dust. This top-down approach in home cleaning means that by the time you reach the surfaces and floors, much of the preliminary dust and debris has already been dealt with. 3. Dust and Wipe Surfaces Once you’ve effectively managed the higher areas of your home, continue your home cleaning by focusing on all remaining surfaces. Extend your attention to other furniture pieces, such as tables, chairs, and desks. Utilize your microfiber cloth or duster to pick up dust from these areas, ensuring you reach under any objects and into the corners where dust tends to gather. In your living room and bedrooms, remember to wipe down electronics and appliances, as these can also gather dust that affects their performance and appearance. For fabric surfaces like sofas and armchairs, use an upholstery attachment on your vacuum cleaner to remove dust and allergens, which can significantly freshen up the space. As you move into the kitchen and bathrooms, switch to more robust cleaners designed to handle grease and grime. In the kitchen, make sure to clean the fronts of cabinets, the stovetop, and any counters, particularly around appliances where crumbs and food residues can accumulate. For the bathrooms, give extra care to disinfecting surfaces like faucets, handles, and countertops to ensure they are not just clean but also hygienic. By systematically dusting and wiping from one room to the next, you ensure that no surface is overlooked, contributing to a comprehensive and effective home cleaning session. 4. Tackle the Bathrooms When it comes to home cleaning, giving extra care to the bathrooms is crucial because of the high potential for germ accumulation. Start by applying cleaners to the sink, bathtub, and toilet, allowing them to sit for a few minutes to break down the dirt and grime. During this waiting period, you can tackle other parts of the bathroom such as the mirrors and windows. Use a glass cleaner to ensure these surfaces are streak-free and clear. After allowing the cleaning agents to soak, scrub each area thoroughly with a suitable brush or sponge. For tough grime and lime scale in the toilet or around fixtures, consider using a pumice stone or a specialized cleaning tool that can handle these challenges without damaging the surfaces. Additionally, turn your attention to the grout between tiles, which can often become discolored and moldy. Using a grout brush with a bleach-based cleaner can restore the whiteness and prevent mold from spreading. Once you have scrubbed and rinsed all the major fixtures, finish up by cleaning the floor. The bathroom floor can harbor bacteria and dirt, especially in corners and around the toilet base. Use a disinfectant cleaner and, if possible, a steam mop to ensure the floor is not only clean but also sanitized.     5. Clean the Kitchen Giving the kitchen detailed attention is vital because this space is a central hub of activity and requires hygiene and cleanliness for safety and health. Begin with deep-cleaning the appliances, which involve not just wiping the exteriors but also tackling the interiors. For instance, remove any food particles and grease from the microwave with a cleaning solution designed for appliances. For the oven, use a dedicated oven cleaner to cut through baked-on grime, and consider running a self-cleaning cycle if it’s available. For your refrigerator, take out all items and removable shelves or bins to wash them separately with warm soapy water. Wipe the inside of the fridge with a baking soda solution to remove odors and stains, ensuring all surfaces are dry before replacing the items back neatly. This is also an excellent opportunity to discard any expired or spoiled food, helping to keep the fridge organized and functional. Moving on to the countertops, use a disinfectant cleaner suitable for the material, whether it’s granite, laminate, or stainless steel, to ensure they are not only clean but also germ-free. Don’t forget to clean the backsplash, which can accumulate splatters from cooking. A degreaser can be particularly effective here, especially around the stove area. Cleaning cabinets is another crucial part of kitchen maintenance. Wipe

7 Steps to a Thorough Home Cleaning: From Top to Bottom Read More »