Blog

Spotless shiny wall reflecting light, showcasing immaculate smooth surface.

How to Easy Clean Walls in Mississauga: Top 5 Tips for Spotless Walls

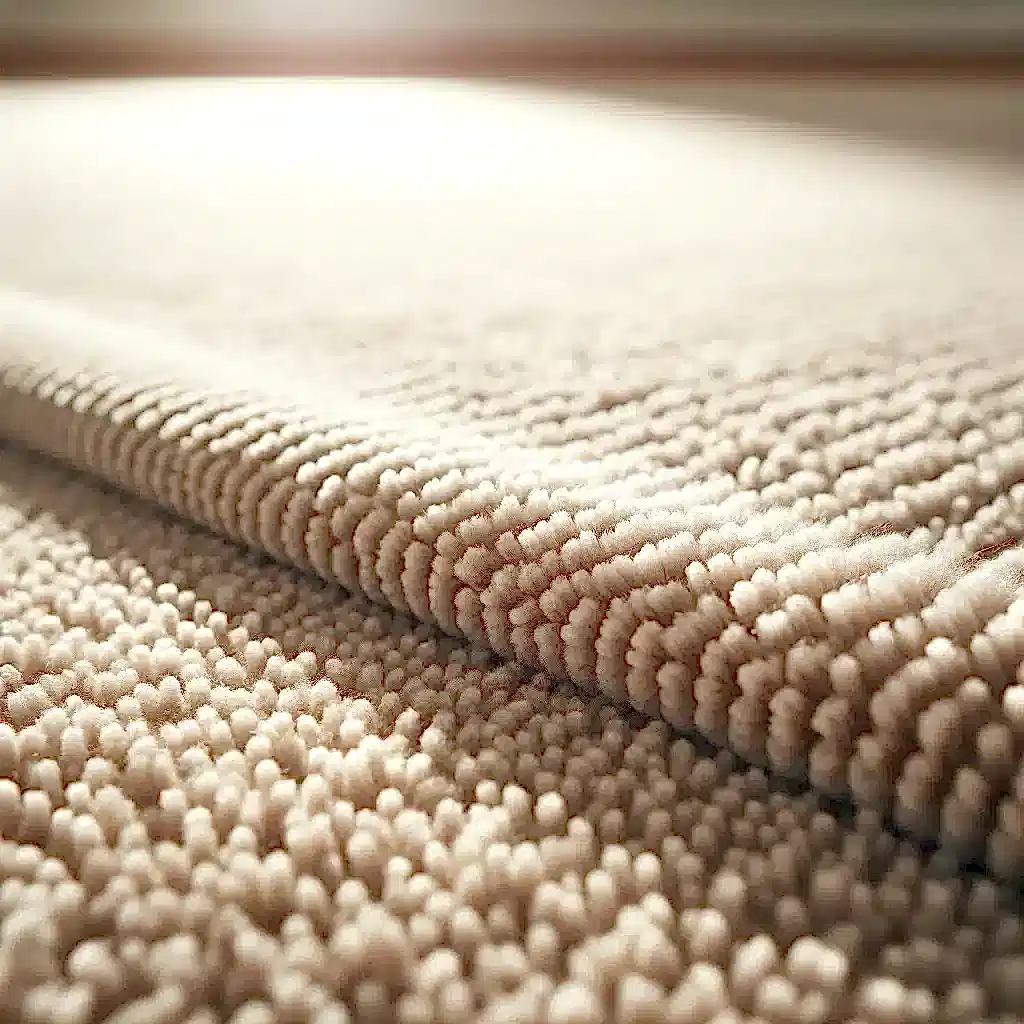
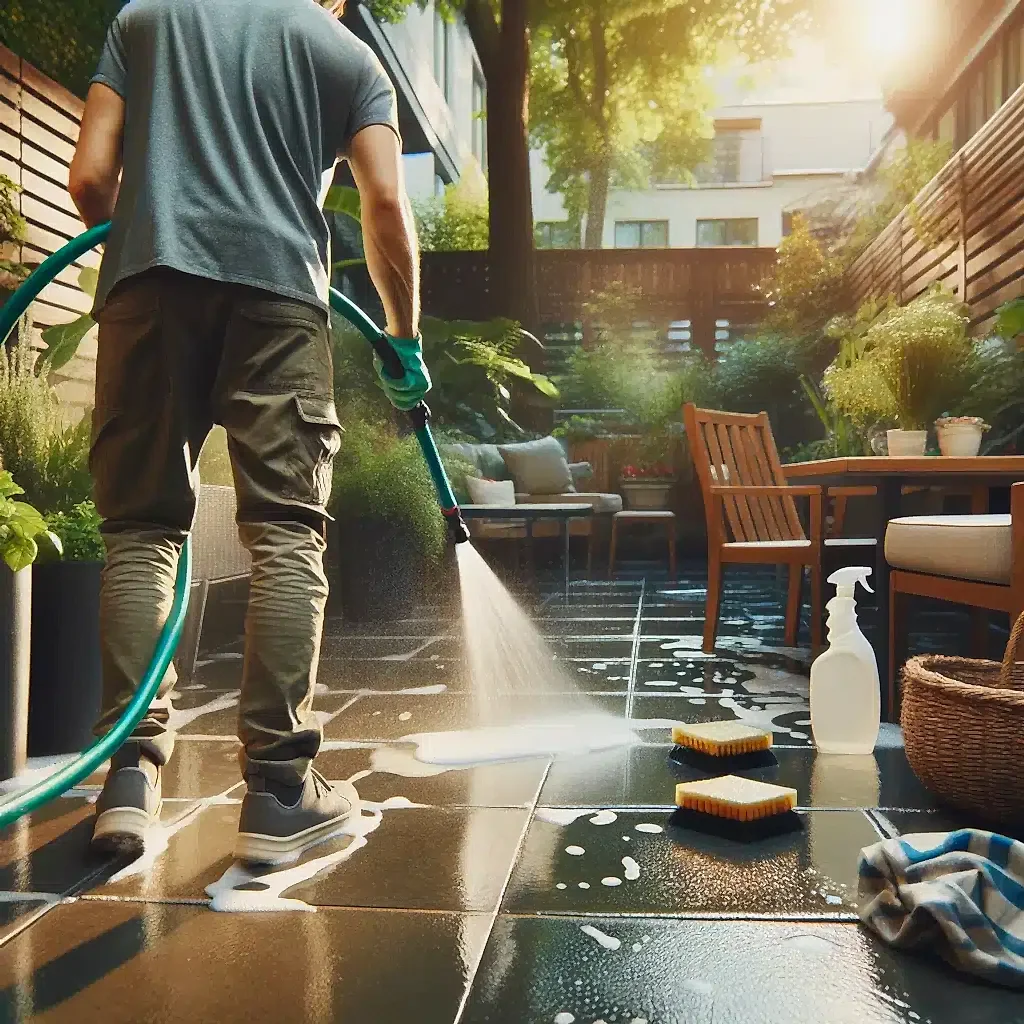
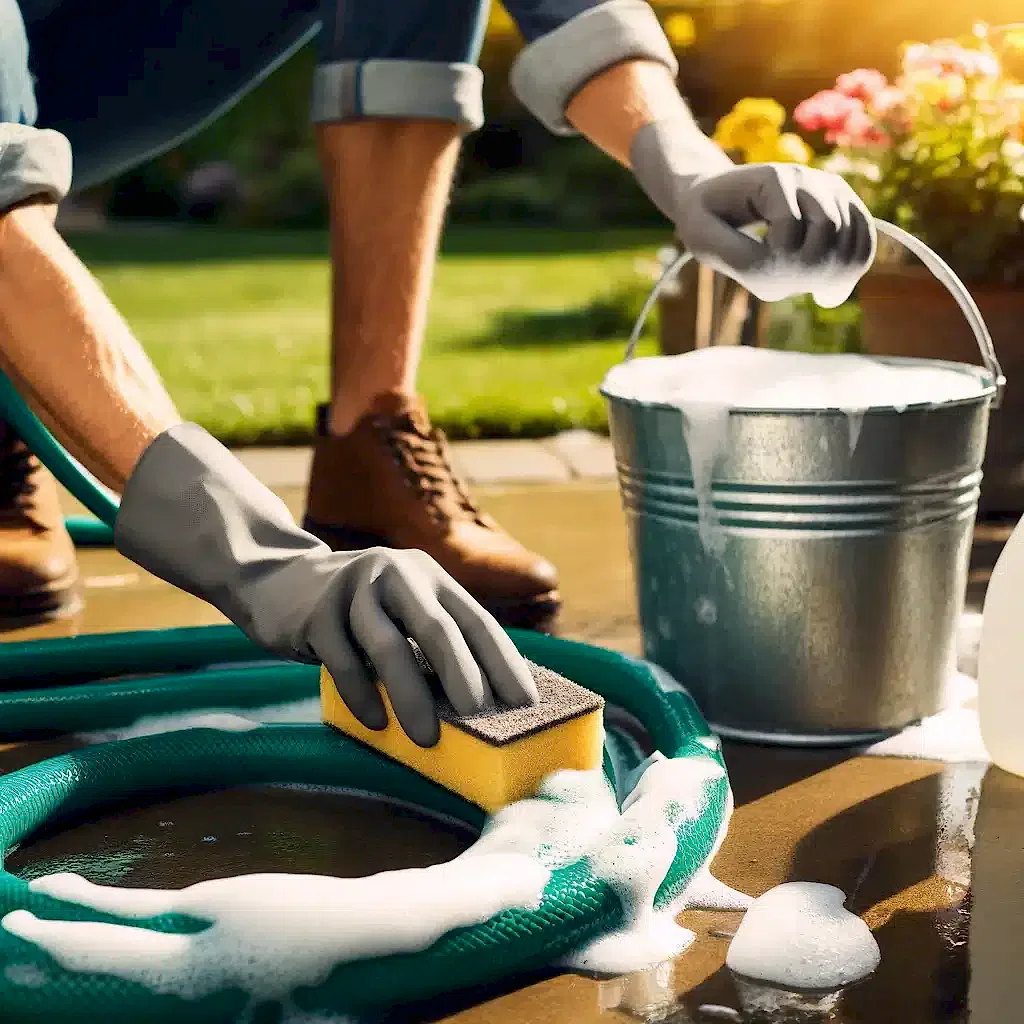
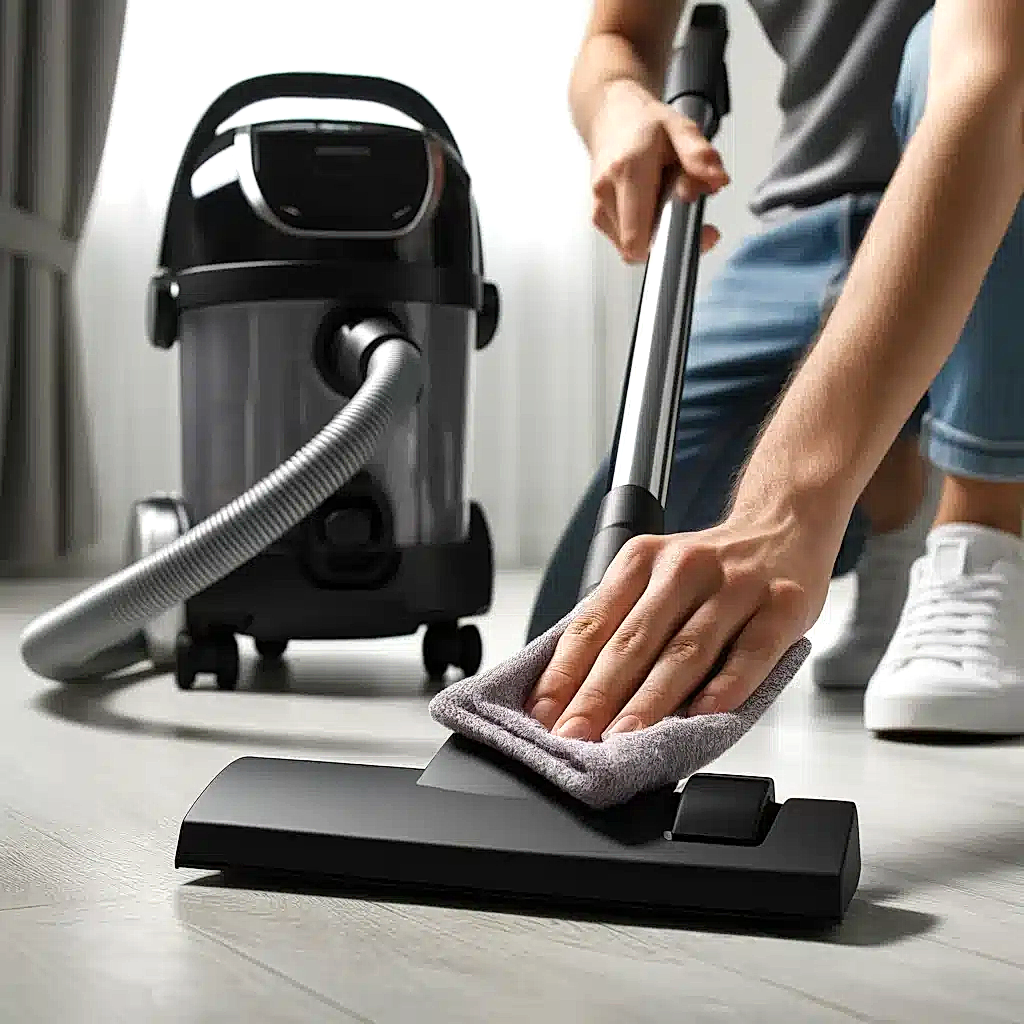
Keeping your walls in Mississauga clean is essential for maintaining a fresh and inviting home environment. Whether you’re preparing for a special occasion or just doing routine maintenance, knowing how to clean walls effectively can make a big difference. If you’re in Mississauga and looking for the best ways to keep your walls spotless, we’ve got you covered! Here are the top 5 tips on how to clean walls in Mississauga. 1. Gather Your Cleaning Supplies Before diving into cleaning, it’s essential to gather the right cleaning supplies. This preparation step is crucial to ensure that you have everything you need to effectively clean your walls in Mississauga. Start by grabbing a soft sponge or a microfiber cloth, which are gentle on surfaces and excellent for lifting dirt without causing damage. A bucket is necessary for mixing and carrying your cleaning solutions, while mild detergent or dish soap will help in cutting through everyday grime and stains. White vinegar is a must-have for tougher spots and greasy residues, as its natural acidity makes it an effective cleaning agent. Baking soda is another valuable addition to your cleaning arsenal, perfect for creating a gentle abrasive paste to tackle stubborn marks without scratching the paint. A soft-bristled brush can be very useful for scrubbing areas that need a bit more attention, especially textured surfaces or corners that collect more dirt. Don’t forget to have plenty of towels or rags on hand for drying and buffing your walls to a perfect finish. If you’re dealing with high spots, a sturdy step ladder will help you reach every area safely. By ensuring you have all these supplies ready, you can approach the task of cleaning your walls in Mississauga with confidence and efficiency, making the process smoother and more manageable.     2. Dust and Vacuum First To ensure your walls in Mississauga are thoroughly cleaned, begin by removing any dust or cobwebs that have accumulated. This initial step is crucial because it prevents dust from turning into grime when you start washing the walls. Using a vacuum with a brush attachment is highly effective for this task. The brush attachment is gentle on the wall surface and efficiently lifts off dust and loose particles, preparing your walls for a more detailed cleaning process. For those hard-to-reach areas, especially the higher spots, a duster with an extendable handle is invaluable. This tool allows you to reach every corner without straining yourself or risking injury by climbing on furniture. Ensuring that all dust and cobwebs are removed not only makes the cleaning process more effective but also enhances the overall appearance of your home by eliminating those unsightly webs and dust layers. By thoroughly dusting and vacuuming your walls in Mississauga before washing them, you set the stage for a deeper clean. This preparatory step ensures that when you apply cleaning solutions, they can penetrate and remove stains and dirt more effectively. This way, you avoid creating a muddy residue that can occur if dust and dirt are mixed with water. 3. Test Your Cleaning Solution Before applying any cleaning solution to the entire wall, it’s essential to test it on a small, inconspicuous area. This precautionary step is crucial when cleaning walls in Mississauga, as it helps prevent any unexpected damage or discoloration to your wall paint. Start by mixing a small amount of mild detergent with warm water. Dip your sponge into the mixture and gently scrub a hidden spot, such as behind a piece of furniture or a low corner. Observing how your wall reacts to the solution will give you peace of mind and allow you to proceed with confidence. For more stubborn stains that the mild detergent solution doesn’t tackle, consider creating a paste using baking soda and water. Baking soda is a gentle yet effective abrasive that can lift tough stains without harming the paint. Apply this paste directly to the stain and let it sit for a few minutes to break down the grime. After it has had time to work, gently scrub the area with your sponge or a soft-bristled brush. This method can be particularly useful for dealing with marks from hands, scuffs, or other persistent spots that are common on walls in Mississauga homes. Conducting this test not only protects your walls but also ensures that the cleaning process will be as effective as possible. By confirming the safety and efficiency of your cleaning solution, you avoid the risk of larger-scale damage and can be assured that the products you’re using will achieve the best results. This step is especially important if your walls have a unique finish or older paint, as it ensures compatibility and maintains the integrity of your home’s interior.     4. Clean from Bottom to Top When tackling the task of cleaning your walls in Mississauga, it’s essential to employ the right techniques to ensure a streak-free finish. One effective method is to start cleaning from the bottom of the wall and work your way up. This approach is particularly useful because it prevents streaks that can occur if dirty water drips down onto already cleaned sections. By moving upward, you can easily catch any drips and maintain a consistently clean surface. Using a sponge or cloth dampened with your chosen cleaning solution, gently wipe the wall in a circular motion. This technique not only helps in lifting dirt and grime but also avoids the harshness of scrubbing in a single direction, which can sometimes damage the paint. The circular motion ensures that you cover all areas evenly, leaving no part of the wall untouched. When cleaning walls in Mississauga, where homes often face diverse environmental factors, this thorough method is particularly beneficial. For areas that have accumulated grease or more persistent stains, adding a bit of white vinegar to your cleaning solution can make a significant difference. Vinegar is a natural cleaner that cuts through grime effectively, leaving your walls looking fresh and revitalized. Simply mix it with

How to Easy Clean Walls in Mississauga: Top 5 Tips for Spotless Walls Read More »

Pristine beige carpet close-up, freshly vacuumed and spotless.

How to Clean Stains on Carpets in Richmond Hill: Top 5 Expert Tips

Carpets add a cozy and luxurious feel to any home, but they also attract stains on carpets. Whether it’s a wine spill during a dinner party or muddy footprints from an outdoor adventure, stains on carpets can be a real headache. Don’t worry! With these top 5 expert tips, you can tackle even the toughest stains and keep your carpet looking fresh and clean. Let’s dive into how you can master carpet stain removal in Richmond Hill! 1. Act Quickly When it comes to managing stains on carpets, speed is of the essence. The longer a stain sits on your carpet, the more it settles into the fibers, making it increasingly difficult to remove. As soon as you notice a spill, your first step should be to gently blot it with a clean cloth. This action helps to absorb as much of the liquid as possible right away. It’s crucial to avoid rubbing the stain, as this can inadvertently push the stain deeper into the carpet fibers, spreading it further and making it more entrenched. The type of cloth you use for blotting is also significant. For liquid spills, a white cloth is recommended to prevent any color transfer onto your carpet, which could compound the problem. Colored cloths might bleed dye onto your carpet, adding to the stain issue. When blotting, start from the outer edges of the stain and work your way towards the center. This method helps contain the stain, preventing it from spreading further across your carpet. Blotting, as opposed to rubbing, is essential because it lifts the stain particles from the surface without grinding them into the fibers. Moreover, the immediate response to a spill can significantly impact the ease of stain removal. Acting quickly not only prevents the liquid from soaking deep into the carpet but also reduces the risk of permanent discoloration and damage. By addressing the spill promptly and using the proper technique, you enhance the likelihood of restoring your carpet to its original state. The importance of quick action cannot be overstated, as it is the first and most crucial step in managing stains on carpets effectively. 2. Use the Right Cleaning Solutions When dealing with stains on carpets, it’s essential to choose the right cleaning solutions tailored to the specific type of stain you’re tackling. Different stains require different treatments to be effectively removed. For example, a mixture of white vinegar and water is particularly effective for removing coffee and tea stains, breaking down the pigments and lifting them from the carpet fibers. On the other hand, greasy stains such as those from food or oily substances respond well to a solution of dish soap mixed with warm water, which cuts through the grease and makes it easier to blot away. Before applying any cleaning solution to a large or visible area of your carpet, it’s crucial to test it on a small, inconspicuous section first. This step ensures that the solution will not cause any unwanted discoloration or damage to your carpet fibers. Even though many home remedies and store-bought solutions are generally safe, carpets can vary greatly in their material and dye stability. By performing a spot test, you can avoid the potential risk of worsening the stain or creating a new one. Store-bought carpet cleaners can also be very effective in dealing with stains on carpets, provided they are suitable for both your carpet type and the specific stain you’re addressing. These products often come with detailed instructions from the manufacturer that should be followed carefully for the best results. Using the right cleaner in the correct manner can significantly enhance its effectiveness, ensuring that the stain is removed without leaving behind any residue or causing damage to the carpet. Always read the label and follow the recommended usage instructions to achieve the best possible outcome.     3. Blot, Don’t Scrub When dealing with stains on carpets, the technique you use can make all the difference. It is crucial to blot the stain rather than scrubbing it. Scrubbing might seem like the natural thing to do when you’re trying to remove a stain, but this action can actually cause more harm than good. Scrubbing can damage the carpet fibers, leading to fraying and wear, and can also push the stain deeper into the carpet, making it more difficult to remove. Instead, blotting involves pressing gently on the stain with a clean, absorbent cloth or paper towel, which helps to lift the stain from the carpet fibers without spreading it. The key to effective blotting is using the right motion and materials. Start by gently pressing the cloth onto the stained area to absorb the spill. It’s important to use a clean section of the cloth or a fresh paper towel each time you blot to avoid reapplying the stain to the carpet. As you continue blotting, you should notice the stain transferring from the carpet to the cloth. This method is not only gentle on your carpet fibers but also more efficient in lifting the stain out of the carpet. It’s also essential to be patient and persistent when blotting stains on carpets. Depending on the size and type of the stain, it may take several attempts to completely remove it. Repeating the blotting process, while ensuring you replace the cloth frequently, can gradually eliminate the stain without causing additional damage to your carpet. Remember, the goal is to lift the stain out of the fibers, not to rub it deeper in. By adhering to this blotting technique, you can effectively manage and remove stains, keeping your carpet in excellent condition and extending its lifespan. 4. Rinse and Dry Properly After successfully treating stains on carpets, it’s crucial to thoroughly rinse the area with clean water to eliminate any leftover residue from the cleaning solution. Residual cleaning products can attract dirt, making your carpet look dirty again much sooner than it should. To rinse effectively, simply use a damp cloth or sponge soaked in clean

How to Clean Stains on Carpets in Richmond Hill: Top 5 Expert Tips Read More »

Elegant, wrinkle-free curtain on rod with soft, flowing folds.

7 Tips on How to Clean Curtains Without Damaging Them

Curtains are more than just window dressings; they add style, color, and personality to your home. Keeping them clean can be a bit tricky, but with the right approach, you can maintain their beauty without causing any damage. Here are seven tips on how to clean curtains without damaging them. 1. Check the Label for Cleaning Instructions Before diving into any cleaning method, it’s crucial to check the care label on your curtains. This label provides essential information from the manufacturer, guiding you on the best cleaning practices for your specific type of curtains. The care instructions will tell you whether your curtains can be safely machine washed, need to be hand washed, or require professional cleaning. Following these guidelines is vital because disregarding them can lead to several issues, including shrinking, fading, or other forms of damage. For example, if the label indicates that the curtains are machine washable, you can proceed with confidence, knowing that this method won’t harm the fabric. However, if the label specifies dry cleaning, attempting to wash them at home could result in irreversible damage. Similarly, for curtains that need to be hand washed, using a machine might cause the fabric to stretch or tear. Therefore, always start with a thorough read of the care label to ensure you’re using the safest and most effective cleaning method for your curtains. Ignoring the care label’s instructions might seem like a time-saver, but it can lead to costly mistakes. Shrinking is a common issue when curtains are washed inappropriately, particularly with natural fabrics like cotton or linen. Once shrunken, curtains may no longer fit your windows properly, leading to additional expenses for replacements. Fading is another concern, especially for curtains with vibrant colors or intricate patterns. Using the wrong cleaning agents or methods can strip away the dye, leaving your curtains looking dull and worn. 2. Regular Dusting and Vacuuming Dust and dirt can accumulate on curtains over time, making them look dull and dingy. To maintain the fresh appearance of your curtains, regular dusting and vacuuming are essential. Using a soft-bristle brush to gently dust your curtains helps remove the surface layer of dust that can settle on the fabric. This simple action prevents dust from embedding deeper into the material, which can lead to a more challenging cleaning process later on. Additionally, employing the upholstery attachment on your vacuum cleaner is an effective way to keep your curtains clean. This tool is designed specifically for delicate fabrics, ensuring that the suction is gentle enough not to damage the curtains while effectively removing dust and dirt. Running the vacuum over your curtains on a regular basis can help maintain their appearance and freshness, making your home look well-kept and inviting. Incorporating regular dusting and vacuuming into your cleaning routine can also significantly extend the intervals between deep cleanings. By keeping your curtains free of accumulated grime, you reduce the need for more intensive cleaning methods, which can be time-consuming and sometimes harsh on the fabric. This proactive approach not only preserves the longevity of your curtains but also saves you time and effort in the long run. Regular maintenance through dusting and vacuuming can help improve the overall air quality in your home. Curtains can trap allergens such as dust mites and pollen, which can then circulate in the air you breathe. By keeping them clean, you contribute to a healthier living environment, particularly for those with allergies or respiratory issues.     3. Spot Cleaning for Stains Accidents happen, and sometimes your curtains can get stained despite your best efforts to keep them clean. When dealing with small stains on your curtains, spot cleaning is an effective and gentle method to address the problem without resorting to a full wash. Start by preparing a solution of mild detergent mixed with water. Using a soft cloth or sponge, gently dab the stained area. This method helps to lift the stain from the fabric without spreading it further or causing damage to the material. It is important to avoid rubbing the stain, as this can cause it to penetrate deeper into the fabric fibers and make it more difficult to remove. Rubbing can also wear down the fabric, potentially leading to thinning or tearing over time. Instead, use a light dabbing motion to treat the stained area. By being gentle and methodical, you can effectively remove the stain while preserving the integrity of your curtains. Before applying any cleaning solution, always test it on a small, inconspicuous area of the curtains. This precaution ensures that the detergent does not cause discoloration or damage to the fabric. Different curtain materials react differently to cleaning agents, so this step is crucial to avoid unintended consequences. Once you have confirmed that the solution is safe to use, proceed with confidence to clean the stained area. Spot cleaning is particularly useful for dealing with localized stains from spills, fingerprints, or other minor accidents. By addressing these issues promptly, you can prevent stains from setting and becoming more difficult to remove. Regularly inspecting your curtains for small stains and treating them as they occur can keep your curtains looking fresh and well-maintained. 4. Machine Washing Tips If your curtains are machine washable, there are several important tips to keep in mind to ensure they come out looking their best without any damage. First and foremost, always opt for a gentle cycle with cold water. Using cold water helps to prevent shrinking and fading, which are common issues when washing fabrics in hot water. A gentle cycle minimizes the agitation, reducing the risk of fabric damage or excessive wear. To further protect your curtains during the wash, place them in a mesh laundry bag. This simple precaution prevents them from getting tangled with other items in the washing machine, which can cause tears or stress on the fabric. The mesh bag acts as a barrier, keeping the curtains contained and reducing the friction they experience during the wash cycle. When it

7 Tips on How to Clean Curtains Without Damaging Them Read More »

Person using hose to clean stone patio with greenery and furniture.

5 Steps to Effective Patio Cleaning with Hose

Cleaning with Hose your patio clean is essential for creating an inviting outdoor space, especially during the warm months when you want to enjoy your backyard to the fullest. One of the simplest and most effective ways to maintain your patio is by cleaning with a hose. Here’s a step-by-step guide to make your patio sparkle: 1. Clear the Patio To kick off your patio cleaning session, it’s essential to start with a clear space. Begin by removing all furniture and accessories. This includes chairs, tables, potted plants, and any decorative items that might be adorning your patio. Clearing the area not only gives you full access to every nook and cranny of your patio but also prevents any accidental damage to your belongings while cleaning with a hose. By taking a few extra minutes to move everything out of the way, you set the stage for a thorough and efficient cleaning process. Once your patio is cleared, the next step is to address the loose debris. Grab a broom and start sweeping away any leaves, dirt, or small branches that have accumulated. This step is crucial because it removes the bulk of the dry debris that could otherwise turn into a muddy mess when water is introduced. A clean sweep ensures that when you start cleaning with a hose, the water can work directly on the surface dirt and grime without being hindered by loose particles. It might seem like a simple step, but thorough sweeping makes a significant difference in the overall cleanliness of your patio. Cleaning with a hose becomes much more effective once the patio is free from loose debris. Without small twigs and leaves getting in the way, the water can flow smoothly across the surface, targeting stubborn dirt and stains more directly. This preparatory step not only makes the hosing down process more efficient but also reduces the amount of time and effort required for scrubbing later on. So, taking a few minutes to clear and sweep your patio sets a strong foundation for a successful and satisfying cleaning session.     2. Pre-Treat Stains Before diving into the main cleaning with a hose, it’s essential to identify and pre-treat any stubborn stains on your patio. These stains might come from various sources such as spilled drinks, food, or natural elements like moss and algae that have taken hold over time. Thoroughly inspecting your patio and pinpointing these problem areas is the first step. Once identified, use a suitable cleaning solution to tackle these stains. A popular and effective choice is a mixture of baking soda and water, which is both gentle on surfaces and tough on stains. Apply this solution generously to the stained areas and allow it to sit for about 10-15 minutes to break down the grime. After giving the cleaning solution enough time to penetrate and loosen the stains, it’s time to roll up your sleeves and scrub. Use a scrub brush with stiff bristles to gently work on the stained areas. The key here is to scrub gently but thoroughly, ensuring you do not damage the surface of your patio while effectively lifting the stains. This preparatory scrubbing is crucial because it helps to break down the most stubborn spots, making them much easier to rinse away later when you start cleaning with a hose. The effort you put into pre-treating and scrubbing the stains will significantly enhance the overall cleanliness of your patio. Cleaning with a hose after pre-treating stains is much more effective. The combination of a high-pressure water stream and the pre-treated areas ensures that even the toughest grime and stains are washed away. By addressing stains beforehand, you ensure that your patio will look uniformly clean and refreshed once the entire cleaning process is complete. This method not only saves you time in the long run but also guarantees a more polished and professional finish, making your patio a pleasant and welcoming outdoor space. 3. Start Hosing Down Now that your patio is prepped and ready, it’s time to begin the main cleaning process. Start by attaching a nozzle to your hose. This small but crucial step allows you to control the water pressure, making your cleaning with a hose more efficient and effective. High-pressure settings are excellent for dislodging embedded dirt and grime, which can accumulate over time and become quite stubborn. Conversely, a gentle setting is ideal for rinsing away loose debris and ensuring that the surface remains intact without causing any damage. With the nozzle attached and adjusted to the appropriate setting, begin spraying the entire patio. This initial rinse helps to loosen any remaining dirt and debris, making it easier to clean the surface thoroughly. Start from one end of the patio and work your way systematically to the other, ensuring that every inch is covered. This methodical approach ensures that no area is missed and that the water pressure can effectively reach all the dirty spots. For areas that are particularly dirty or have more stubborn stains, you may need to go over them a few times. This repetition helps to ensure that all the grime is adequately loosened and ready to be washed away. Cleaning with a hose can be quite satisfying as you see the immediate impact of your efforts. As you spray, watch for areas where the dirt is particularly stubborn and adjust your water pressure accordingly. A high-pressure blast can break up tough dirt, while a gentle spray can be used to rinse off the loosened debris. This combination of techniques ensures a thorough cleaning. As you continue to work your way across the patio, the transformation will become evident, leaving you with a cleaner and more inviting outdoor space. 4. Apply a Cleaning Solution With the initial hosing down complete, it’s time to apply a cleaning solution tailored to your patio’s material. The choice of cleaning solution is crucial for achieving the best results without damaging your patio. For concrete and stone surfaces, a

5 Steps to Effective Patio Cleaning with Hose Read More »

Person scrubbing garden hose with soapy sponge in backyard.

How to Clean a Hose in 5 Easy Steps

Keeping your hose clean is essential for maintaining its functionality and prolonging its lifespan. Whether you’re using it for watering the garden, washing the car, or other household tasks, a clean hose ensures better performance and hygiene. Here’s a simple guide on how to clean in 5 easy steps. Step 1: Gather Your Supplies Before you start cleaning your hose, it’s important to gather all the necessary supplies to make the process smooth and efficient. First and foremost, you’ll need a bucket of warm water. Warm water is perfect for loosening dirt and grime that has accumulated on the exterior. It also helps in mixing the cleaning agents more effectively. Speaking of cleaning agents, mild dish soap or vinegar will be your go-to choices. Both of these are excellent for cutting through dirt and organic buildup. Mild dish soap is gentle yet effective, ensuring that material isn’t damaged while still providing a thorough clean. On the other hand, vinegar is a fantastic natural cleaner that not only breaks down mold and mildew but also helps to deodorize the hose. In addition to your cleaning agents, a sponge or soft brush will be essential tools in your cleaning arsenal. A sponge is soft enough to avoid scratching the surface, yet firm enough to scrub away dirt and stains. A soft brush can be particularly useful for getting into any textured areas where dirt might be more deeply embedded. The gentle bristles can help lift away grime without causing abrasions. It’s important to choose a brush that is not too stiff to prevent damaging the exterior. Another important item on your list is a garden hose nozzle. This will come in handy when you need to flush the interior of the hose. A good nozzle can help you control the water pressure and ensure a strong stream of water passes through the hose, effectively dislodging any internal debris or buildup. Finally, a clean towel will be crucial for drying after cleaning. Proper drying is essential to prevent mold and mildew from developing inside once it’s stored away. By having all these supplies ready and within reach, you’ll streamline the cleaning process, making it more efficient and ensuring that remains in excellent condition for all your watering and cleaning needs.     Step 2: Disconnect and Drain the Hose The first task in cleaning your hose is to disconnect it from the water source and remove any attachments. This step is essential to ensure that you can thoroughly clean both the interior and exterior without any obstructions. By disconnecting the hose, you also avoid the risk of accidentally turning the water on during the cleaning process, which could lead to unnecessary mess and complications. Make sure to unscrew carefully from the faucet or spigot, and set aside any nozzles or sprinklers that might be attached. Once the hose is disconnected, the next step is to let it drain completely. Holding one end of the hose higher than the other allows gravity to assist in expelling any residual water inside. This is an important step because water left inside the hose can harbor bacteria, mold, or other unwanted residues that could affect your cleaning efforts. Shake as you drain it to help release any trapped water pockets, ensuring the interior is as dry as possible before you proceed. Draining the hose fully is crucial for preventing water-related issues during the cleaning process. Any remaining water inside the hose could mix with your cleaning agents, diluting their effectiveness. Moreover, stagnant water can encourage the growth of mold and mildew, which are exactly what you aim to remove by cleaning. Ensuring that the hose is thoroughly drained sets a solid foundation for the rest of your cleaning efforts, making sure that stays in top condition and free from contaminants. Step 3: Clean the Exterior To begin cleaning the exterior, dip your sponge or soft brush into the warm, soapy water or vinegar solution you prepared earlier. The warm water helps to loosen any stubborn dirt, while the soap or vinegar works to break down grime and kill any mold spores. Carefully apply the sponge or brush to the surface , ensuring you cover all areas. Move systematically along the length of the hose to ensure you don’t miss any spots. As you scrub, pay special attention to areas where dirt and mold are more likely to accumulate, such as near the ends and any sections that may have been coiled or left on the ground. The goal is to be thorough yet gentle. Excessive scrubbing or using a brush that is too hard can damage the hose’s material, leading to cracks or abrasions that could shorten its lifespan. Take your time to ensure that you effectively remove all dirt and grime without causing harm. After you have scrubbed the entire exterior, take a moment to inspect your work. Ensure that no areas have been overlooked and that all visible dirt and mold have been removed. This step is vital not just for aesthetic purposes, but also to prevent from degrading over time. Dirt and mold can cause wear and tear, potentially leading to leaks or other issues. By thoroughly cleaning the exterior, you maintain the integrity and ensure it remains functional for a longer period.     Step 4: Flush the Interior To ensure the inside of your hose is as clean as the outside, you need to flush it thoroughly. Begin by reattaching to a water source, such as an outdoor faucet or spigot. Turn on the water and let it run through the hose at high pressure. This high-pressure flow will help to dislodge and expel any debris, dirt, or buildup that may be lurking inside. If you want to give the interior an extra deep clean, consider adding a bit of the soapy solution you used for the exterior. To do this, mix a small amount of soap with water and pour it into the hose before you attach it to the

How to Clean a Hose in 5 Easy Steps Read More »

Person wiping vacuum cleaner parts with cloth.

6 Simple Steps to Clean Vacuum Cleaner

Keeping your vacuum cleaner in top-notch condition is crucial for maintaining a clean home. A clean vacuum cleaner not only performs better but also lasts longer. Here’s a step-by-step guide to ensure your vacuum is always in its best shape. 1. Empty the Bag or Canister First things first, always start by emptying the bag or canister to ensure a clean vacuum cleaner. A full bag or canister reduces suction power and makes your vacuum work harder, significantly affecting its performance. For those with a bagless vacuum, it’s essential to regularly detach the canister and properly dispose of the collected dirt and debris. This prevents clogs and maintains the vacuum’s efficiency. If your vacuum uses bags, replace the bag when it’s about two-thirds full. This not only helps in maintaining optimal suction but also extends the life of the vacuum by preventing the motor from overworking. Emptying the bag or canister is not just about maintaining suction power; it’s also about ensuring that the air quality in your home remains high. When a vacuum cleaner bag or canister is full, dust and allergens can be expelled back into the air, defeating the purpose of vacuuming. By keeping the bag or canister empty, you are not only keeping your floors clean but also minimizing the amount of dust and allergens in your home environment. This is particularly important for households with pets or individuals who suffer from allergies. A clean vacuum cleaner with an empty bag or canister operates more hygienically and contributes to a healthier living space. Moreover, regularly emptying the bag or canister can prevent potential damage to your vacuum cleaner. When the bag or canister is full, the vacuum motor has to work harder, which can lead to overheating and eventually reduce the lifespan of the appliance. Additionally, a full bag or canister can cause the vacuum to lose suction, making it less effective at picking up dirt and debris. By making it a habit to check and empty the bag or canister before it reaches maximum capacity, you can ensure that your clean vacuum cleaner performs at its best for a longer period. This simple maintenance step can save you money in the long run by reducing the need for repairs or replacements. 2. Clean or Replace the Filters Maintaining a clean vacuum cleaner involves more than just emptying the bag or canister; it also requires regular attention to the filters. Filters play a critical role in trapping dust and allergens, ensuring that the air expelled by the vacuum is clean and free of contaminants. To begin, consult your vacuum’s manual to locate the filters, as their placement can vary by model. Most vacuums are equipped with both a pre-motor filter and an exhaust filter. These components are essential for maintaining the vacuum’s performance and the air quality in your home. For vacuums with washable filters, it’s important to rinse them under lukewarm water to remove any accumulated dust and debris. Be sure to allow the filters to air-dry completely before reinserting them into the vacuum. This prevents any moisture from causing mold or mildew to form inside the vacuum, which could compromise its efficiency and create unpleasant odors. Regularly cleaning these filters ensures that your vacuum maintains strong suction and operates efficiently, contributing to a truly clean vacuum cleaner. If your vacuum’s filters are not washable, it is crucial to replace them according to the manufacturer’s recommendations, typically every 3 to 6 months. Over time, non-washable filters become clogged with particles and lose their effectiveness, which can strain the vacuum motor and reduce suction power. By adhering to the replacement schedule, you help maintain optimal performance and extend the lifespan of your vacuum cleaner. Keeping the filters clean or replacing them as needed ensures that your clean vacuum cleaner continues to perform at its best, capturing dust and allergens effectively and promoting a healthier living environment.     3. Inspect and Clear the Brush Roll Maintaining a clean vacuum cleaner involves regular attention to the brush roll, also known as the beater bar. This component is crucial for agitating carpets and effectively picking up dirt and debris. However, it often becomes tangled with hair, string, and other materials, which can impede its performance. To keep your brush roll in optimal condition, turn your vacuum over and carefully inspect it for any entangled materials. Using a pair of scissors, gently cut away any hair, string, or debris that has wrapped around the brush roll. It’s important to be gentle during this process to avoid damaging the bristles, which are essential for the brush roll’s effectiveness. Taking the time to regularly clean the brush roll ensures that it remains free of obstructions and can continue to perform its role efficiently. This not only improves the vacuum’s ability to clean carpets but also helps in maintaining a clean vacuum cleaner overall. By consistently inspecting and clearing the brush roll, you prevent potential blockages that could strain the vacuum’s motor and reduce its suction power. A clean brush roll can move freely and agitate carpet fibers effectively, allowing the vacuum to pick up more dirt and debris with each pass. This maintenance step is especially important for households with pets or high-traffic areas, where hair and debris accumulate more rapidly. 4. Check the Hose and Attachments Ensuring a clean vacuum cleaner involves more than just maintaining the main unit; it also requires regular checks and cleaning of the hose and attachments. Over time, hoses and attachments can become clogged with debris, which significantly reduces the vacuum’s suction power. To maintain optimal performance, start by detaching the hose from the vacuum. Using a broomstick or a similar tool, carefully push out any blockages that may be lodged inside the hose. This step is crucial to restoring full suction and ensuring that your vacuum operates efficiently. If your vacuum’s hose is washable, take the time to run water through it to clear out any remaining dirt and debris. Be sure to

6 Simple Steps to Clean Vacuum Cleaner Read More »

Person cleaning mattress with vacuum in sunny bedroom.

6 Easy Steps on How to Clean with Vacuum Cleaner

Keeping your home clean and dust-free is a breeze when you know how to use your vacuum cleaner effectively. Whether you’re a cleaning pro or just getting started, these simple steps will help you get the most out of your vacuuming sessions. Let’s dive into the process and make your cleaning routine a whole lot easier! Step 1: Choose the Right Vacuum Cleaner The first step to efficient cleaning is picking the right for your needs. Start by considering the type of flooring in your home. Do you have carpets, hardwood floors, or a mix of both? If you primarily have large carpeted areas, an upright vacuum cleaner is an excellent choice due to its powerful suction and wide cleaning path. For homes with a variety of surfaces and hard-to-reach spots, a canister vacuum cleaner offers versatility and maneuverability, making it easier to clean under furniture and along baseboards. If you’re looking for something lightweight and perfect for quick clean-ups, a stick vacuum cleaner might be your best bet. These models are easy to handle and store, making them ideal for small apartments or quick touch-ups. Finally, for those who prefer a hands-off approach, robot vacuum cleaners provide an effortless way to maintain cleanliness. These smart devices can navigate your home, cleaning under furniture and around obstacles, allowing you to enjoy a clean house with minimal effort. Choosing the right type of vacuum cleaner will ensure you get the best results with minimal effort. By selecting a vacuum that fits your specific cleaning needs and home layout, you’ll make your cleaning routine more efficient and effective. Whether you need the deep-cleaning power of an upright model, the versatility of a canister, the convenience of a stick, or the automation of a robot, there’s a perfect option out there to help keep your home spotless.     Step 2: Prepare the Area Before you start vacuuming, it’s important to prepare the area properly. Begin by removing small objects such as toys, clothes, and other items that could obstruct your vacuum cleaner. This prevents the vacuum from getting clogged and ensures a smooth cleaning process. Next, dust surfaces like shelves, tables, and other furniture. Dusting these areas first allows any fallen dust to be picked up by the vacuum cleaner, making the overall cleaning more thorough. In addition, move light furniture around to access all areas of the room. Shifting items like chairs, small tables, and floor lamps will help you reach spots that are typically missed during a standard cleaning session. This step is crucial for ensuring that you don’t leave any hidden dirt or dust behind. Proper preparation makes the actual vacuuming process much smoother and more effective, as it allows your vacuum cleaner to do its job without unnecessary interruptions. By taking these steps, you set yourself up for a more efficient and comprehensive cleaning session. Step 3: Check and Clean the Vacuum A well-maintained vacuum cleaner works more efficiently, so it’s essential to keep it in good condition. Start by emptying the dust bag or canister, as a full bag significantly reduces the suction power of your vacuum cleaner. Regularly checking and cleaning or replacing the filters is also crucial to maintaining proper airflow. Clogged filters can hinder performance and reduce the lifespan of your vacuum cleaner. Additionally, inspect the brush roll for any hair or debris tangled around it. This can affect the vacuum cleaner’s ability to pick up dirt and can even damage the motor if left unattended. By removing these obstructions, you ensure that your vacuum cleaner operates at its best, these quick maintenance steps are vital for optimal performance and longevity of your vacuum cleaner, making your cleaning sessions more effective and efficient. Regular upkeep enhances the vacuum cleaner’s functionality and extends its life, saving you money in the long run.     Step 4: Start Vacuuming Strategically When you start vacuuming, it’s important to use a systematic approach to ensure thorough cleaning. Begin in the farthest corner of the room and gradually work your way back towards the exit. This method prevents you from walking over freshly vacuumed areas, keeping them clean and avoiding any extra work. Using overlapping strokes is another key technique. Vacuum in straight lines, slightly overlapping each stroke to make sure you cover the entire area without leaving any spots untouched. This approach ensures that every inch of your floor gets cleaned, removing dust and dirt effectively. Adjusting the settings on your vacuum cleaner is also crucial for optimal performance on different floor types. For example, you might need to change the height and suction settings when moving from carpet to hardwood. Tailoring these settings helps the vacuum cleaner perform more efficiently, providing the best results for each specific surface. By following these strategic steps, you can ensure a comprehensive cleaning session. This methodical approach not only enhances the effectiveness of your vacuum cleaner but also makes the entire process more efficient and satisfying. Step 5: Focus on High-Traffic Areas High-traffic areas, such as hallways and living rooms, tend to collect the most dirt and debris. To tackle these spaces effectively with your vacuum cleaner, it’s important to adjust your approach. Begin by moving the vacuum cleaner slowly over these heavily soiled areas. This allows the vacuum more time to suction up the dirt and dust deeply embedded in the carpet fibers. Additionally, vacuuming in different directions can significantly enhance the cleaning process. By moving the vacuum cleaner north-south and then east-west, you ensure that dirt is lifted from all angles, leaving the carpet thoroughly clean. This method helps in dislodging particles that might be missed when vacuuming in just one direction. Paying extra attention to spots and stains in high-traffic areas is also crucial. Go over these spots multiple times with your vacuum cleaner to ensure they are thoroughly cleaned. Stubborn stains may require you to slow down and allow the vacuum more time to work its magic. Concentrating on these high-traffic areas helps maintain overall cleanliness

6 Easy Steps on How to Clean with Vacuum Cleaner Read More »

Clean laminate flooring with light wood finish reflecting natural light.

How to Clean Laminate Floor 7 Simple Steps for a Shiny Finish

Keeping your laminate floors looking pristine and shiny doesn’t have to be a chore. With these simple steps, you’ll learn how to clean laminate floors effectively, ensuring they stay spotless and gleaming. 1. Gather Your Supplies Before you start cleaning your laminate floor, it’s essential to gather all the necessary supplies. Having the right tools on hand will make the process more efficient and ensure the best results. First, get a microfiber mop. This type of mop is gentle on the surface and highly effective at picking up dirt and dust without causing any scratches. Additionally, you’ll need a soft-bristle broom or a vacuum cleaner equipped with a soft brush attachment. These tools are crucial for removing loose debris and preventing any potential damage to the laminate floor’s surface. Next, you’ll need to prepare a cleaning solution. A spray bottle will be handy for this. For the solution, you have a couple of options. You can make a homemade mixture using white vinegar, which is excellent for breaking down grime and doesn’t leave behind any residue. Alternatively, you can opt for a commercial laminate floor cleaner that is specifically designed for this type of flooring. Both options are effective, but be sure to avoid harsh chemicals or soap-based products, as they can harm the laminate finish. Finally, gather some soft, dry cloths. These will be essential for drying and polishing the floor after mopping. Using a soft, dry cloth ensures that no water spots or streaks are left behind, giving your laminate floor a shiny, polished finish. With all these supplies ready, you’ll be well-prepared to tackle the task of cleaning your laminate floor, ensuring it remains spotless and gleaming.     2. Sweep or Vacuum When starting the cleaning process for your laminate floor, begin by removing loose dirt, dust, and debris from the surface. This initial step is vital because it prevents scratches and keeps your laminate floor looking smooth and pristine. Use a soft-bristle broom to gently sweep the floor, ensuring that all dust and small particles are collected. If you prefer, a vacuum cleaner with a brush attachment can also be very effective. The brush attachment is gentle enough to avoid any damage while thoroughly picking up dirt and debris. Ensuring that your laminate floor is free from loose dirt and dust before you mop is crucial for maintaining its appearance and longevity. Tiny particles of dirt can act like sandpaper, causing scratches and dulling the surface over time. By regularly sweeping or vacuuming, you can prevent this type of damage and keep your laminate floor looking as good as new. Additionally, this step makes the subsequent cleaning stages more effective, as there will be fewer particles to interfere with the cleaning solution and mop. Taking the time to properly sweep or vacuum your laminate floor not only helps in maintaining its aesthetic appeal but also extends its lifespan. Regular removal of dirt and debris ensures that your floor remains smooth and free from unsightly marks. 3. Prepare the Cleaning Solution Preparing the cleaning solution for your laminate floor, start by mixing one part white vinegar with three parts warm water in a spray bottle. This homemade solution is highly effective for cleaning laminate floors as it breaks down grime without leaving behind any residue. The mild acidity of the vinegar helps to dissolve dirt and makes the floor shine, while the warm water enhances its cleaning power. If you prefer not to use a homemade mixture, you can opt for a commercial laminate floor cleaner. These cleaners are specifically formulated for laminate surfaces, ensuring they clean effectively without causing any damage. However, it’s important to read the labels and choose a product that is free from harsh chemicals. Many commercial cleaners are designed to be gentle yet effective, preserving the integrity and appearance of your laminate floor. Avoid using soap-based products or other harsh chemicals when cleaning your laminate floor. Such products can leave a sticky residue that dulls the finish and can even cause long-term damage to the surface. By sticking to a mixture of white vinegar and warm water or a recommended laminate floor cleaner, you ensure that your floor remains clean, shiny, and in excellent condition for years to come. 4. Mop the Floor To effectively mop your laminate floor, start by spraying the cleaning solution onto the floor in small, manageable sections. This targeted approach ensures that you can clean each area thoroughly without the solution drying too quickly. Once you’ve sprayed a section, use a microfiber mop to gently clean the area. Microfiber mops are ideal for laminate floors as they are soft and won’t scratch the surface. Additionally, they do an excellent job of picking up dirt and grime. As you mop, be sure to follow the grain of the laminate. This technique helps to remove dirt more effectively and prevents streaking, leaving your floor looking uniformly clean. One crucial point to remember is to wring out the mop thoroughly before using it on the floor. Excess water can be harmful to laminate flooring as it can seep into the seams and cause swelling or other damage. By keeping the mop slightly damp rather than soaking wet, you protect the floor from potential water damage while still achieving a deep clean. Consistently mopping your laminate floor with the right technique not only keeps it spotless but also enhances its longevity. By spraying the cleaning solution in small sections and using a microfiber mop, you ensure a gentle yet effective cleaning process. This method keeps your laminate floor in top condition, maintaining its shine and durability.     5. Dry the Floor After you’ve finished mopping your laminate floor, it’s crucial to immediately dry the surface with a soft, dry cloth. This step is essential to prevent water spots and streaks, which can dull the floor’s appearance. Using a dry cloth allows you to quickly absorb any remaining moisture, ensuring that the laminate floor maintains a shiny, polished finish.

How to Clean Laminate Floor 7 Simple Steps for a Shiny Finish Read More »

Modern kitchen with gleaming light ceramic tiles and natural illumination.

How to Clean Ceramic Floors: 7 Easy Steps for a Sparkling Home

Keeping your ceramic floors spotless doesn’t have to be a daunting task. With a little know-how and some basic tools, you can have your floors looking as good as new. Here’s a simple guide on how to clean ceramic floors in seven easy steps. 1. Gather Your Cleaning Supplies Before you start, make sure you have all the necessary cleaning supplies to make the process smooth and efficient. To clean ceramic floors effectively, you will need a few essential items. First, grab a broom or a vacuum to remove loose dirt and debris from the surface of your ceramic floor. This step is crucial as it helps prevent scratches when you start mopping. Next, prepare a mop and a bucket, as these will be your primary tools for washing the floor. For the cleaning solution, choose a mild detergent or a cleaner specifically designed for ceramic floors. Harsh chemicals can damage the surface of your tiles and grout, so it’s best to avoid them. Fill your bucket with warm water and mix it with the cleaner according to the instructions on the product. You will also need a microfiber cloth or towel for drying the floor after mopping. Microfiber is excellent for this task because it absorbs water quickly and leaves no streaks behind. In case you encounter any tough stains, have a scrub brush on hand. This will help you tackle stubborn spots without damaging the floor’s finish. 2. Sweep or Vacuum the Floor To begin the cleaning process for your ceramic floor, it is essential to remove any loose dirt and debris. This initial step is crucial as it sets the foundation for a thorough and effective cleaning. Start by using a broom to sweep away dust, crumbs, and other particles that have accumulated on the surface. If you prefer, a vacuum cleaner can be used instead, which might be more efficient in capturing smaller particles and debris hidden in the grout lines. Sweeping or vacuuming is not just a preliminary step; it plays a vital role in protecting your ceramic floor. By removing loose dirt and debris, you prevent these particles from scratching the surface when you move on to mopping. Scratches can dull the appearance of your ceramic tiles and even lead to long-term damage. Therefore, taking the time to ensure your floor is free from these abrasive particles is an investment in the longevity and beauty of your ceramic floor. Additionally, regular sweeping or vacuuming of your ceramic floor helps maintain its cleanliness on a daily basis. This practice minimizes the buildup of dirt and makes your weekly or bi-weekly mopping sessions more manageable.     3. Prepare Your Cleaning Solution The next step in cleaning your ceramic floor is to prepare your cleaning solution. Start by filling a bucket with warm water. The warmth of the water helps to dissolve dirt and grime more effectively, ensuring a more thorough clean. Warm water is particularly effective at breaking down residues that might be stuck to the surface of your ceramic floor, making it easier to mop away. To this, add a few drops of mild detergent or a cleaner specifically formulated for ceramic floors. It’s important to choose a cleaner that is gentle yet effective, as harsh chemicals can damage the surface of your tiles and grout. Over time, these strong chemicals can cause discoloration and wear down the protective sealant on your ceramic floor, making it look dull and worn. Opting for a product designed for ceramic floors will help maintain the natural shine and longevity of your tiles. Once you’ve added the cleaner, mix the solution thoroughly until the detergent is well combined with the water. This ensures an even distribution of the cleaning agent throughout the water, allowing for a more consistent clean across your entire ceramic floor. A well-mixed solution will effectively lift away dirt and stains without leaving any residue behind. 4. Mop the Floor Once your cleaning solution is ready, it’s time to start mopping your ceramic floor. Begin by dipping your mop into the bucket, ensuring it soaks up enough of the solution to be effective. However, you’ll want to wring out any excess water to prevent the floor from becoming too wet, which can make the cleaning process less efficient and potentially lead to streaking or water spots. Start mopping your ceramic floor from one corner of the room and gradually work your way to the opposite corner. This systematic approach ensures that you cover the entire area without missing any spots. As you mop, use a figure-eight motion rather than a back-and-forth or circular motion. The figure-eight technique is particularly effective for ceramic floors because it helps to lift and trap dirt in the mop head rather than pushing it around. This motion also reduces the risk of spreading dirt and debris to clean areas, ensuring a more thorough clean. Pay extra attention to high-traffic areas where dirt and grime are more likely to accumulate. If your ceramic floor has grout lines, be sure to pass over them carefully, as dirt can easily get trapped in these crevices. Periodically rinse and wring out your mop to ensure you’re not reapplying dirty water to the floor.     5. Spot Clean Stubborn Stains Even with regular cleaning, sometimes stubborn stains and sticky spots can appear on your ceramic floor. For these tougher areas, you’ll need to take a more targeted approach. Start by applying a little extra cleaner directly onto the stain. Using a scrub brush, gently work the cleaner into the stain, using small, circular motions. This method allows the cleaner to penetrate the stain and lift it from the surface of your ceramic floor. It’s important to exercise caution while scrubbing. Applying too much pressure or using a brush with overly stiff bristles can damage the finish on your ceramic floor, potentially leading to scratches or a dull appearance. Instead, focus on being gentle but thorough, allowing the cleaning solution to do most of

How to Clean Ceramic Floors: 7 Easy Steps for a Sparkling Home Read More »

Modern furnished room with shiny vinyl flooring and cozy rug.

6 Easy Ways to Keep Your Vinyl Floors Looking New

Vinyl floors are a popular choice for many homeowners due to their durability, affordability, and stylish appearance. However, keeping them looking new can be a bit of a challenge if you don’t know the right techniques. Don’t worry, though! We’ve got you covered with these six easy ways to maintain the pristine look of your vinyl floors. 1. Regular Sweeping and Vacuuming One of the simplest ways to keep your vinyl floors looking new is to sweep or vacuum them regularly. Vinyl floors, known for their durability and low maintenance, can still suffer from the abrasive effects of dirt, dust, and debris. These particles can act like sandpaper, scratching and dulling the surface over time. By regularly sweeping or vacuuming, you can remove these particles before they cause any damage. Use a soft-bristle broom for sweeping to gently lift and remove dirt without scratching the surface. If you prefer vacuuming, choose a vacuum cleaner designed for hard floors. Such vacuums often come with attachments or settings specifically for hard surfaces, ensuring they pick up debris without harming the vinyl. Regularly maintaining your vinyl floors by removing dirt and dust not only preserves their appearance but also extends their lifespan, keeping them looking fresh and new for years. In addition to daily sweeping or vacuuming, consider using a dust mop for a more thorough clean. A dust mop can reach into corners and under furniture where a broom or vacuum might miss. This extra step ensures that even the smallest particles are removed, preventing them from accumulating and causing damage over time. If you have pets, it’s especially important to keep up with this routine, as pet hair and dander can quickly build up on vinyl floors. Frequent sweeping or vacuuming helps manage this issue and maintains a clean and healthy home environment. For those living in areas with heavy foot traffic or near construction sites, increasing the frequency of cleaning can further protect your vinyl floors from unwanted wear and tear.     2. Mop with the Right Cleaner When it comes to mopping your vinyl floors, using the right cleaner is essential for maintaining their appearance and durability. Vinyl floors have a protective layer that can be compromised by harsh chemicals or abrasive cleaners, leading to discoloration and damage. Therefore, it is crucial to select a cleaner specifically designed for vinyl surfaces. A safe and effective option for cleaning vinyl floors is a simple mixture of warm water and mild dish soap. This gentle solution effectively removes dirt and grime without harming the floor’s protective coating. When mopping, ensure that you wring out the mop thoroughly to avoid excess water. Standing water can seep into the seams of vinyl flooring, potentially damaging the adhesive and causing the floor to lift or warp. For an extra touch of care, consider using a microfiber mop. Microfiber mops are excellent at trapping dust and dirt while also being gentle on vinyl surfaces. They require less water and cleaning solution, reducing the risk of water damage. Additionally, they are easy to wash and reuse, making them a cost-effective and environmentally friendly choice. In cases where you encounter stubborn stains or spills, spot cleaning with a slightly stronger vinyl-safe cleaner may be necessary. Always test a small, inconspicuous area first to ensure that the cleaner does not cause any discoloration or damage. Gently scrub the stained area with a soft cloth or sponge, then rinse with clean water and dry thoroughly. Regular mopping with the right cleaner not only keeps your vinyl floors looking pristine but also extends their lifespan. By avoiding harsh chemicals and excessive water, you maintain the integrity of the vinyl and preserve its vibrant appearance. This careful approach to cleaning ensures that your vinyl floors continue to be a beautiful and durable part of your home. 3. Wipe Spills Immediately Spills are inevitable, especially in high-traffic areas like the kitchen, but addressing them promptly can make all the difference in maintaining your vinyl floors. The key to preventing stains and damage is to wipe up spills immediately, ensuring they do not have a chance to seep into the vinyl and cause long-term issues. When a spill occurs, start by using a damp cloth to clean the affected area. This method effectively lifts the liquid off the surface without spreading it further. Once you have wiped the spill, it’s crucial to dry the area thoroughly with a soft towel. This step is essential because any remaining moisture can penetrate the seams of the vinyl flooring, potentially damaging the adhesive and leading to warping or lifting. In addition to using a damp cloth and towel, it’s beneficial to have a mild vinyl floor cleaner on hand for more stubborn spills. This type of cleaner can address tougher stains without harming the vinyl’s protective layer. Apply a small amount of the cleaner to the spill, gently wipe it away, and then rinse with a damp cloth. Always finish by drying the area completely to avoid any moisture-related problems. Another important aspect of spill management is to be aware of the types of liquids that can cause more significant damage. For example, acidic substances like vinegar or tomato sauce can cause discoloration if left unattended. Similarly, oils and grease can leave behind residues that attract dirt and grime. By wiping up these spills immediately, you prevent them from becoming ingrained in the vinyl, maintaining the floor’s pristine appearance. Being vigilant about spills and responding quickly not only keeps your vinyl floors looking new but also extends their longevity. Regularly inspecting high-traffic areas for any unnoticed spills can help maintain their condition. This proactive approach ensures that your vinyl floors remain a beautiful and durable feature in your home. 4. Use Doormats and Rugs Incorporating doormats and rugs into your home’s design is a practical and stylish way to protect your vinyl floors. Placing doormats at all entrances and using rugs in high-traffic areas significantly reduces the amount of dirt and debris that gets

6 Easy Ways to Keep Your Vinyl Floors Looking New Read More »